Computers and Office

making our professional lives more efficient, productive, and interconnected.

Bridge Router: The Ultimate Guide to Enhancing Your Network

What is Bridge Mode?

Bridge router is a key router feature that savvy users need to know about. It acts as a connecting point between two routers, allowing them to work as one larger network. Think of bridge mode as a team-up for routers that boosts Wi-Fi reach and performance across larger areas.

Understanding the Function of Bridge Mode in Routers

When you activate bridge mode on a router, it stops doing certain jobs. Normally, a router gives out unique IP addresses to all connected devices, which is great for a single router setup. In bridge mode, this process stops to let another router handle it. This teamwork can solve tricky network issues and help your devices talk to each other better.

The Role of Bridge Mode in Extending Wi-Fi Coverage

Ever faced Wi-Fi dead spots at home or office? Bridge mode is the hero for these situations. It extends the Wi-Fi signals beyond the reach of just one router. This means you can enjoy a strong Wi-Fi connection even in the far corners of your space, making bridge mode ideal for larger homes or work environments.
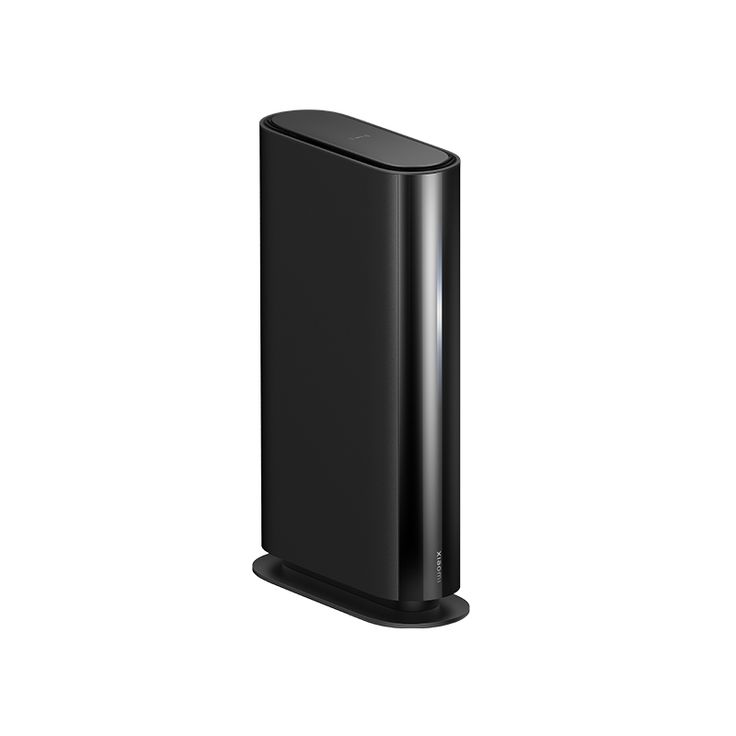
bridge router

Key Advantages of Bridge Mode

Smoother Device Communication and Increased Wi-Fi Range

Activating bridge mode on a router unleashes some crucial benefits, particularly for device communication and Wi-Fi range. In essence, bridge mode allows for a seamless connection between devices on your network by extending the Wi-Fi signal. This means fewer interruptions during video calls, streaming, or while performing online tasks. Also, areas in a home or office that once had weak or no signal can now enjoy better connectivity.

The extended reach is a lifesaver for larger spaces. Imagine a single network spread uniformly across your area, without the need for constant reconnection to different routers. Plus, the mesh network created by bridge mode offers a consistent Wi-Fi experience no matter where you are within the network’s radius.

Resolving IP Address Conflicts with Bridge Mode

IP address conflicts are a common nuisance in networks with multiple routers. They occur when two devices on the same network attempt to use the same IP address. Bridge mode effectively turns the tide on this issue by disabling one router’s Network Access Translation (NAT) feature. This ensures that all devices get unique IP addresses from a single router, thus eliminating conflicts.

With bridge mode, the ‘Double NAT’ issue — where two routers create separate networks and cause connection barriers — is also addressed. By allowing routers to operate as one network, bridge mode ensures devices can ‘see’ each other. Whether it’s sending a document to the printer or streaming to your TV, communication becomes hassle-free.

Incorporating bridge mode into your network setup offers a more harmonious and efficient environment for all your connected devices. It’s a strategy that not only enhances the user experience but also simplifies network management.

How to Set Up Bridge Mode

Setting up bridge mode can enhance your network’s reach and performance. This section will guide you through configuring your router to operate in bridge mode.

Step-by-Step Bridge Mode Configuration for Routers

To configure your router for bridge mode, please follow these steps:

  1. Log into your router’s admin panel, usually accessed through a web address like http://192.168.1.1.
  2. Navigate to the wireless settings or network settings menu.
  3. Look for the bridge mode or similar option and enable it.
  4. If prompted, enter the primary router’s network details — its SSID, security mode, and password.
  5. Save the settings and reboot the router if necessary.

After these steps, your router should operate in bridge mode, extending your network’s coverage.

Necessary Preparations Before Enabling Bridge Mode

Before enabling bridge mode, take these important steps:

  1. Write down the main router’s WiFi settings, including SSID, security type, and password.
  2. Ensure the secondary router is compatible with bridge mode.
  3. Backup your router’s current settings in case you need to revert.
  4. Check your router’s manual or online support for specific instructions.
  5. Connect to the router you wish to switch to bridge mode with an ethernet cable or via WiFi.

By preparing thoroughly, you prevent potential issues and ensure a smooth transition to bridge mode.
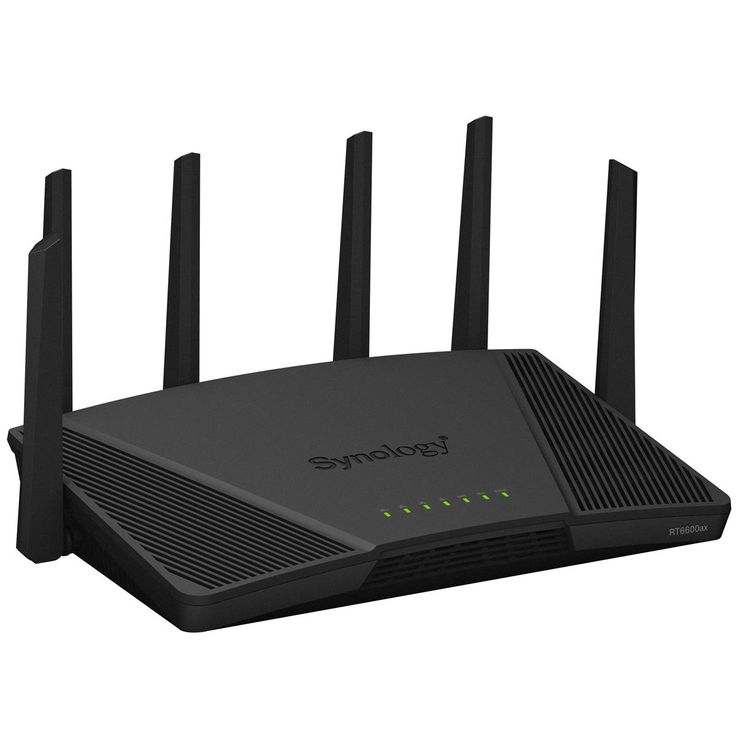
router

Why Use Bridge Mode in Your Network Configuration?

Enhancing Network Connectivity and Avoiding Double NAT

Using bridge mode can greatly improve your network’s connectivity. It allows two routers to merge into a more unified network. This eradicates the hurdles of ‘Double NAT.’ With Double NAT, two routers manage their own IP addresses, causing devices to struggle with communication. Bridge mode eliminates this issue, making for a smooth device-to-device connection.

One router takes the lead in handling IP addresses, while the other assists in extending the Wi-Fi coverage. This teamwork prevents frustrating connection problems and ensures a stable network-wide link. Bridge mode plays a crucial role in making sure that the network is easy to manage and more efficient.

Benefits for Large-Scale Offices and High Traffic Environments

Bridge mode shines in larger environments, like offices, where Wi-Fi demand is high. In places with many users, all needing stable connections, bridge mode is key. It extends the Wi-Fi signal to reach every corner, ensuring everyone stays connected.

For high traffic networks with multiple digital devices, bridge mode is a boon. It ensures seamless connectivity so that heavy usage does not overwhelm the network. Whether you’re video conferencing or transferring large files, bridge mode sustains an optimal network performance.

Large-scale offices benefit as bridge mode enables staff to connect from different areas without a hiccup. It aids in network reliability, giving a robust connection that modern businesses require. And, it avoids the common pitfalls of multiple routers, like overlapping networks or inconsistent coverage.

Addressing the Disadvantages

While bridge mode improves network reach and communication, it’s not without drawbacks.

Understanding Feature Limitations in Bridge Mode

Enabling bridge mode may limit certain router features, such as parental controls and MAC address filtering. This is because the secondary router, now in bridge mode, passes most management tasks to the primary router. As a result, some of the security and customization options may no longer be accessible.

Devices on your network rely on the primary router for these controls. It is essential to consider whether you can manage without these features before enabling bridge mode. For some users, the increased network coverage outweighs these limitations. Nonetheless, you should be aware of the trade-offs.

Alternatives to Using Bridge Mode for Router Functionality

If you’re hesitant to sacrifice router features, there are alternatives. You can consider upgrading to a single, more powerful router that covers your entire space. Mesh network systems also provide extended coverage without compromising router functionality. These systems contain multiple nodes that work together seamlessly, managing your network as a single, cohesive unit.

Another option is to use repeaters or range extenders. These devices amplify the Wi-Fi signal from your primary router, extending its reach without requiring bridge mode. While these solutions come with their own pros and cons, they might be better suited for those who wish to retain full router capabilities.
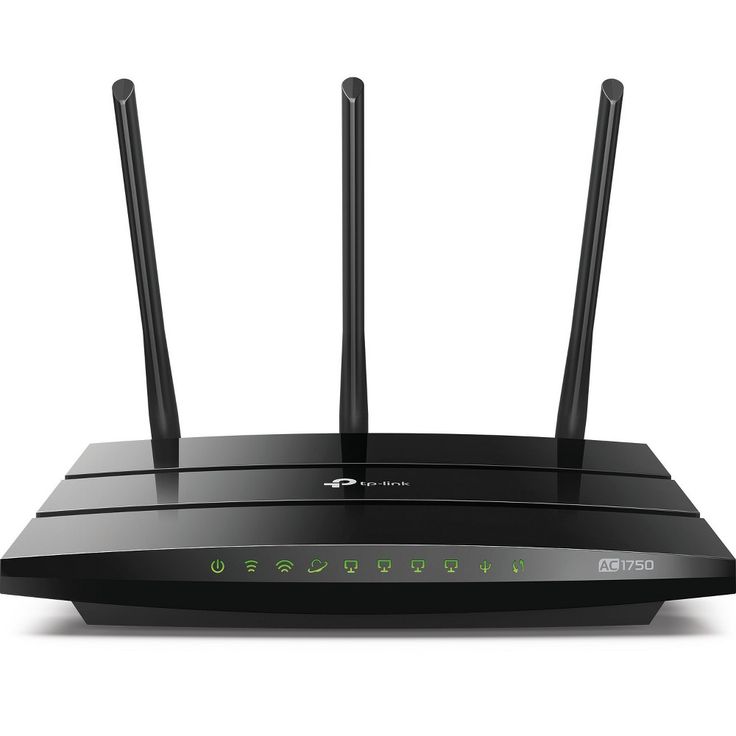
WiFi router

Scenarios for Implementing Bridge Mode

In some network setups, implementing bridge mode can dramatically enhance performance and connectivity. Here are scenarios where switching to bridge mode could be hugely beneficial.

Optimal Situations for Switching to Bridge Mode

Bridge mode is ideal when:

  • Expanding Wi-Fi to cover larger areas is needed, especially where walls or floors limit signal strength.
  • Multiple routers exist in a network, creating confusing overlaps or weak signal areas.
  • Device-to-device communication within a network requires improvement to avoid dropouts or delays.
  • You need to create a single, harmonious network from two separate routers to simplify the connection for users.

Before activating bridge mode, verify that it’s the best course for your network. Assess if you can manage without some router features, as bridge mode might disable them.

Considering Bridge Mode for Mesh Wi-Fi Systems

Bridge mode pairs well with mesh Wi-Fi systems. Mesh networks already work together to cover a wide area with a stable signal. By using bridge mode:

  • You eliminate redundant IPs and network clashes for smooth operation.
  • You ensure that all nodes in the mesh act as one, seamless network.
  • You can link distinct areas or floors within a business or home without losing signal power.

This scenario aids in keeping the network robust and user-friendly, regardless of where the user is located. It’s especially useful for tech-heavy environments with many Wi-Fi-dependent devices.

Mitigating the Risks Associated with Wireless Bridge Mode

When implementing bridge mode in your network, it’s critical to be aware of the potential security risks. Bridge mode can expose your network to vulnerabilities because it often disables many of the security features embedded in routers. Let’s dive into the common security issues you might face and how to address them effectively.

Recognizing Security Vulnerabilities in Bridge Mode

In bridge mode, router functions like firewall protection and address filtering may become inactive. These features often protect your network from outside threats. Without them, your risk of cyber attacks increases. Devices across your network could be open to unauthorized access. Additionally, the simplicity of a bridge network can make it easier for potential intruders to navigate.

Understanding these risks is the first step towards a secure bridge mode setup. Recognizing that bridge mode may leave your network without its usual defenses is key to creating a plan to protect your data and devices.

Best Practices for Securing Your Network in Bridge Mode

Here are best practices to enhance security when using bridge mode:

  1. Use strong encryption: Ensure that WPA2 or WPA3 encryption is active on your network to protect data transmissions.
  2. Enable a firewall: If available, activate a software firewall on all devices within the network to monitor incoming and outgoing traffic.
  3. Change default login credentials: Modify the default username and password for your routers to avoid unauthorized access.
  4. Regularly update firmware: Keep your router’s firmware up to date to protect against the latest vulnerabilities.
  5. Separate guest networks: Create a separate network for guests to prevent access to your main network’s devices and sensitive data.
  6. Use VPN services: A VPN can provide an extra layer of security by encrypting your internet traffic, further protecting your network from intruders.

Adopting these steps will help you maintain a secure network environment, even when utilizing the benefits of bridge mode. Remember to routinely monitor and adjust your settings to stay ahead of potential security issues.
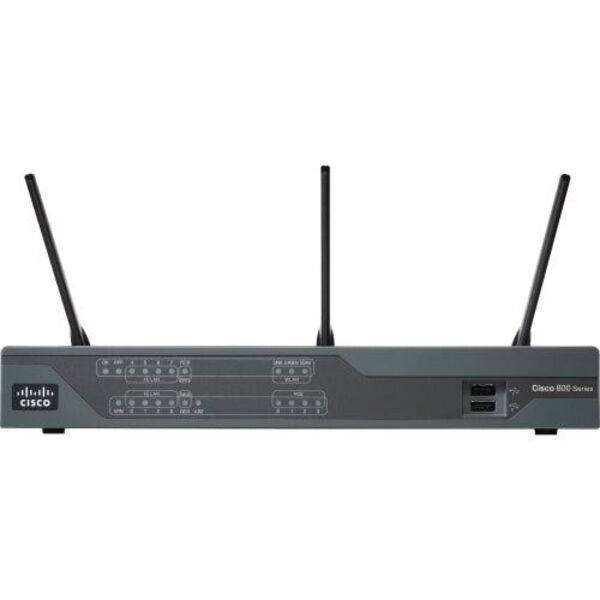
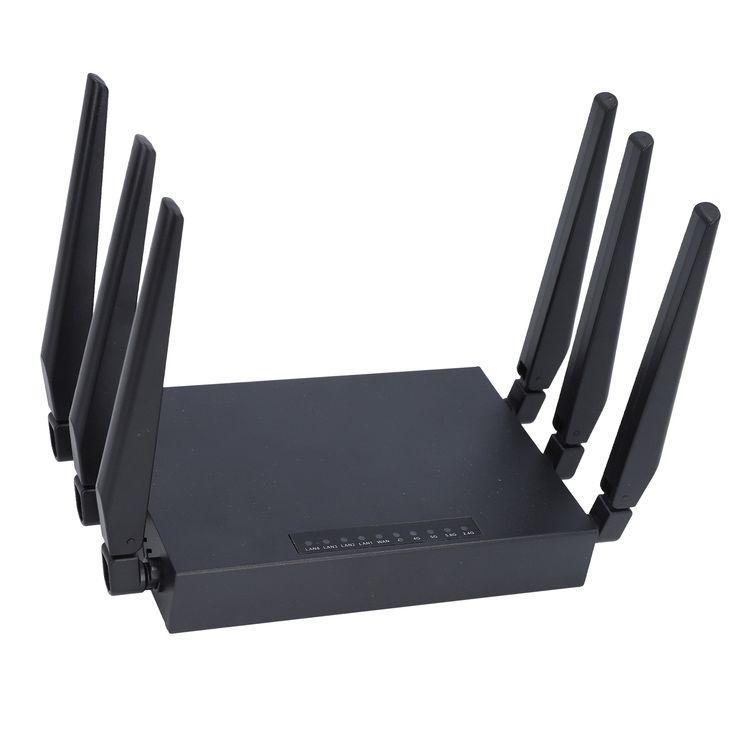
Cisco Router Setup: Quick Start Guide for New Users

Introduction to Cisco Router Configuration

Configuring a Cisco router can seem daunting at first. Yet, with the right approach, this process becomes manageable. When you start the Cisco router setup, you enter a world of extensive networking capabilities. Cisco routers are powerful tools in the networking realm, enabling efficient data transfer and secure connections.

Cisco router configuration involves a sequence of steps. These range from initializing the router to customizing its features for your network’s needs. Begin by connecting the router to your devices. Then, move on to basic configuration commands. These set up the router’s operational parameters. Special attention to security settings is a must to protect your network.

For those new to Cisco equipment, grasp the basics first. A resource like ‘Cisco Routers for the Desperate’ can be incredibly helpful. It simplifies essential information. With it, you could run through all the basic knowledge in a few hours.

Understanding each command is crucial, as every line can hugely impact your network. For example, a small change might disrupt the internet connection, especially if you work remotely. Hence, it’s valuable to use commands like ‘reload in 5’. This ensures your system can recover from changes that do not work as intended. In short, Cisco router setup is about patience and precise understanding of what each configuration does to your network’s connectivity and security.

cisco router setup

Essential Equipment for Cisco Router Setup

To begin your Cisco router setup, certain equipment is essential. First, you need a Cisco router. This is the central piece that directs traffic on your network. Ensure that you have the correct model for your specific needs. Next, reliable Ethernet cables are necessary to establish physical connections. A console cable may be required for initial setup without network connectivity. A computer with terminal emulation software is also a must for accessing the router’s command-line interface (CLI).

For efficient setup, have the latest router firmware available. This ensures compatibility and security. An uninterrupted power supply helps avoid setup disruptions. Lastly, Cisco documentation or a setup guide like ‘Cisco Routers for the Desperate’ can offer simple explanations during the process.

With these essentials in hand, you’re ready to focus on the configuration details. Remember that each step in Cisco router setup is crucial. A single error could affect your entire network’s functionality. Equip yourself well, and you pave the way for a solid, functional network.

Initial Cisco Router Setup and Configuration

Stepping into the world of Cisco router setup requires precision from the get-go. Begin with powering up your router. Next, connect your router to a PC using the console cable. This direct line lets you access the router’s console for initial configuration. Use terminal emulation software on your PC to start this process. This software communicates with the router, allowing you to enter commands.

Your first task is to enter the Global Configuration mode. This mode lets you modify the router’s settings. Enter the ‘enable’ command followed by ‘configure terminal’. This sequence takes you from the User EXEC mode to the Privileged EXEC mode and then into Global Configuration mode. Here, you can alter your router’s operational blueprint.

Set up a hostname for easy identification. Use the ‘hostname’ command followed by the name you choose. Next, secure your router by setting passwords. Start with the ‘enable secret’ command to secure privileged EXEC mode access. For console and VTY lines, use the ‘line console 0’ and ‘line vty 0 4’ commands. Then, add passwords with the ‘password’ command and enable login with the ‘login’ command.

After securing access, configure the interfaces. Assign IP addresses and enable them using the ‘interface’ command followed by ‘ip address’ and ‘no shutdown’ commands. Remember to do this for each interface that needs to be active.

Finally, save your configuration. Use the ‘copy running-config startup-config’ command. This ensures your setup persists after a reboot. Confirm your configuration with the ‘show running-config’ command. It displays all your current settings, allowing you to review them. If you’ve set up everything correctly, your Cisco router is now ready for operation.

router setup

Securing Cisco Routers: Best Practices

Securing your Cisco router is vital. It keeps your network safe from unauthorized access. Follow these best practices to tighten security.

First, always change the default passwords. Default credentials are easy targets for attackers. Use strong, unique passwords instead. Next, update the router’s firmware regularly. This fixes security flaws and enhances functionality.

Enable SSH (Secure Shell) and disable Telnet. SSH encrypts traffic, making it harder for intruders to intercept. Close unused ports and services as well. Every open port can be an entry point for threats. Implement access control lists (ACLs). They define who can access the network and what they can do.

Use the ‘service password-encryption’ command. It encrypts all plain text passwords in your configuration file. Activate logging and monitor router logs. This helps spot unusual activities early on. Enable the firewall feature and configure it properly. It prevents undesired traffic from entering your network. Finally, regularly back up your configuration files. This prepares you for a swift recovery in case of issues.

Stick to these practices and your Cisco router setup will be secure. Being proactive about router security is always better than reacting to breaches.

Configuring Cisco Routers for VPN Tunnels

Creating VPN tunnels on Cisco routers is a crucial step in secure networking. Knowing how to configure VPN tunnels is key for remote connectivity and protecting data. Here are the main steps for setting up VPN tunnels on your Cisco router.

  • First, determine the type of VPN you need. Cisco routers support various VPN protocols like IPsec and SSL.
  • Use the ‘crypto isakmp policy’ command to set up a security policy for data encryption.
  • Create an IPsec transform set with the ‘crypto ipsec transform-set’ command. This defines the encryption and authentication methods.
  • Define the traffic that will pass through the VPN tunnel with access control lists (ACLs).
  • With the ‘crypto map’ command, bind the security policy, transform set, and ACLs. Apply this to your router’s outbound interface.
  • Configure the peer routers with the corresponding settings to establish connectivity.

Each command is critical; a misstep can disrupt your network’s stability.

For a secure VPN, be diligent with every setting. Follow Cisco documentation for detailed instructions.

A VPN tunnel allows for secure, encrypted connections over the internet. Setting this up correctly ensures safe data transit between locations. A well-configured VPN can prevent data breaches and preserve confidentiality.

As with any aspect of Cisco router setup, take the time to understand the commands you’re using. Their purpose is to ensure the integrity and security of your network. If you’re using a Cisco router for an enterprise network, VPN configuration is usually a must-have.

cisco router

Troubleshooting Common Cisco Router Issues

When setting up and managing Cisco routers, you might encounter various issues. Troubleshooting is a critical skill to quickly resolve these problems. Below are some common complications and suggestions for how to deal with them.

  • Connection Problems: If devices can’t connect to the network, first check physical connections. Ensure cables are secure and the router is powered on. Verify that the correct interfaces are active.
  • Inability to Access Router CLI: If you can’t access the CLI, check the console cable and ensure your terminal emulation software is configured correctly.
  • Lost Passwords: In case of lost passwords, Cisco provides a password recovery process. Refer to the official Cisco documentation for detailed steps.
  • Firmware Issues: Outdated firmware can lead to security risks and instability. If your router behaves unusually, check if a firmware update is available.
  • Slow Performance: Slow network performance might be due to incorrect configurations or congested traffic. Review your configuration and consider implementing quality of service (QoS) settings.
  • VPN Connection Failures: For VPN issues, verify that all crypto commands are properly configured and that the ACLs are correctly defining the allowed traffic.

Each issue typically has a set of troubleshooting steps outlined in Cisco’s resources. Remember, understanding what each configuration command does is vital to pinpoint the root cause of problems. It’s also recommended to have a backup of the current working configuration. This allows you to revert changes if an update causes more issues than it solves. For deeper issues or when you’re in over your head, don’t hesitate to reach out to the Cisco community forums or consult with more experienced professionals.

Advantages of Efficient Cisco Router Configuration

Efficient Cisco router setup holds many benefits for individuals and businesses. Here are key advantages:

  • Optimized Network Performance: Properly configured Cisco routers enhance data flow, reducing lag and improving user experience. They manage network traffic smartly, preventing bottlenecks.
  • Enhanced Security: Secure setup shields the network from threats. It protects sensitive data with features like strong encryption, firewalls, and access control lists.
  • Reliable Connectivity: A well-set-up router provides steady connections. It ensures ongoing business operations and minimal downtime.
  • Scalability: As your network grows, a good configuration allows easy integration of new devices and services without major overhauls.
  • Cost Savings: Efficient routing reduces the need for extensive hardware. It saves on operational costs over time, offering a better return on investment.
  • Remote Access: Correct VPN configurations allow secure, remote connections. Employees can work from anywhere, expanding flexibility and productivity.

These benefits underscore the importance of taking the time to learn and perform a thorough Cisco router setup. It’s not just about getting the network up and running but ensuring it runs optimally, securely, and is prepared for future growth.

Learning Resources and Community Support for Cisco Routers

As you dive into Cisco router setup, having access to learning resources and support communities can be invaluable. Here’s how they can help:

  • Books and Manuals: Guides like ‘Cisco Routers for the Desperate’ offer a straightforward introduction to the basics. They save time and simplify complex ideas.
  • Online Forums and Social Media: Engage with Cisco communities on forums and social media. These platforms are great for asking questions and sharing insights. You can receive advice from experienced professionals.
  • Cisco Documentation: Cisco’s official documentation is a rich source of detailed information. It covers everything from initial setup to advanced configurations.
  • Training Courses: Consider enrolling in courses that provide structured learning. They can escalate your understanding from novice to expert level.
  • Troubleshooting Tips: Websites and forums often provide troubleshooting tips and best practices shared by users. These can be quite helpful when you’re facing specific issues.
  • YouTube Tutorials: Visual learners benefit from video tutorials available on YouTube, showing step-by-step configurations.
  • Ask the Community: Don’t hesitate to ask for help. Many are willing to share their experiences, like the individual who set up 64 routers with unique VPN tunnels.
  • Interactive Learning: Some websites offer interactive tools to practice router configurations. These can be great for hands-on learning.

Support communities and learning resources play a big part in successful Cisco router setup. They help enhance your skills and ensure you’re never alone in the process. Dive in, ask questions, and take advantage of the collective knowledge and experience out there.

BGW320 Router: Setup Guide for Faster Internet Connection

Unboxing and Setting Up Your BGW320 Router

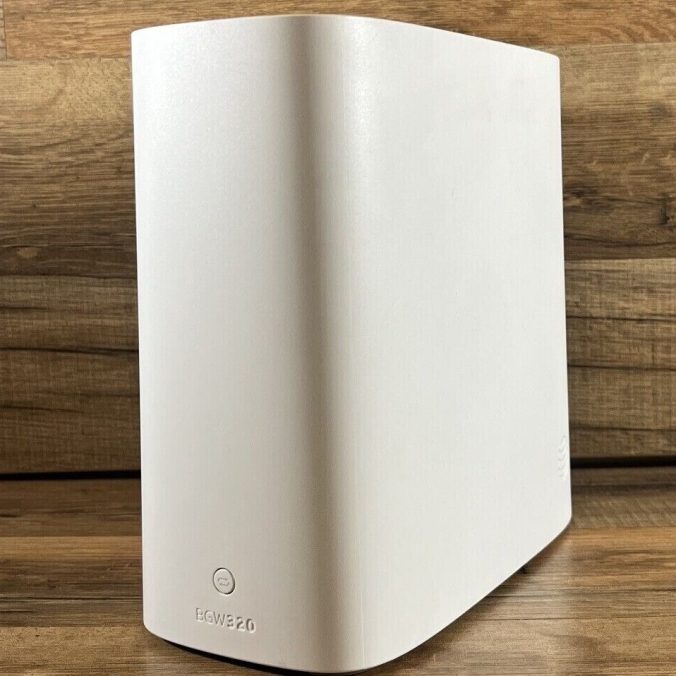
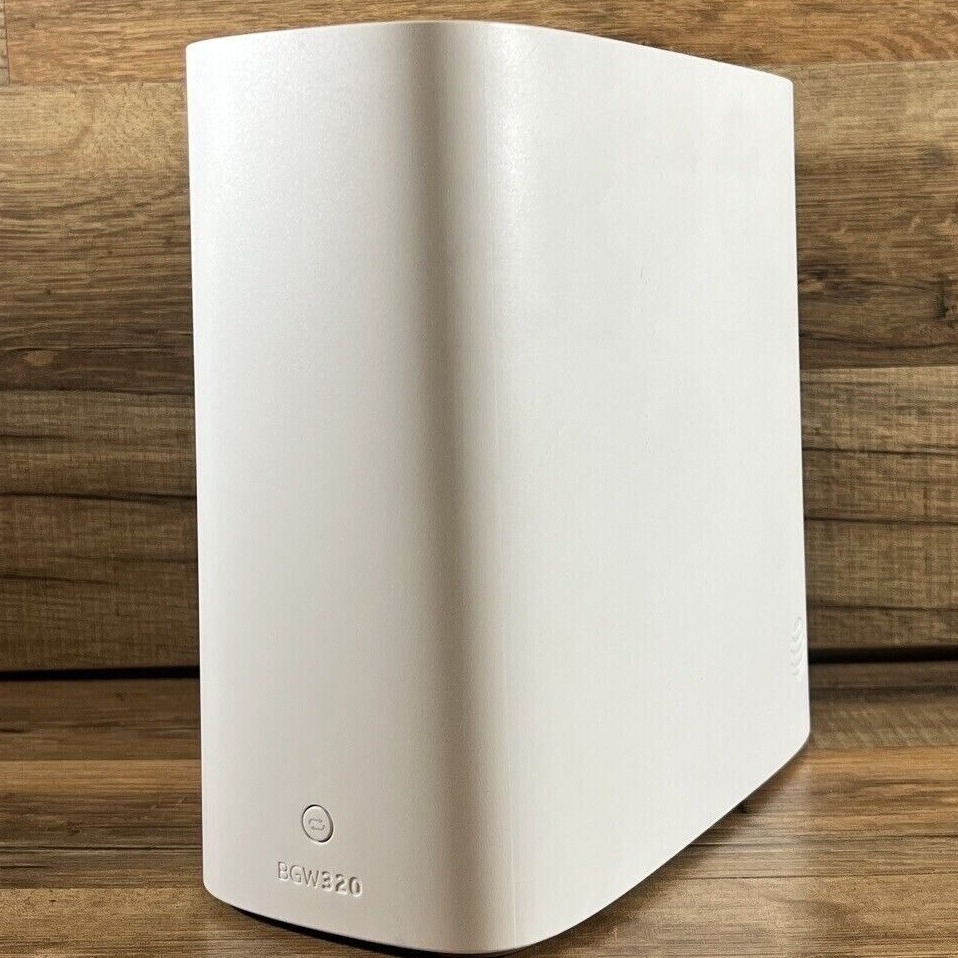
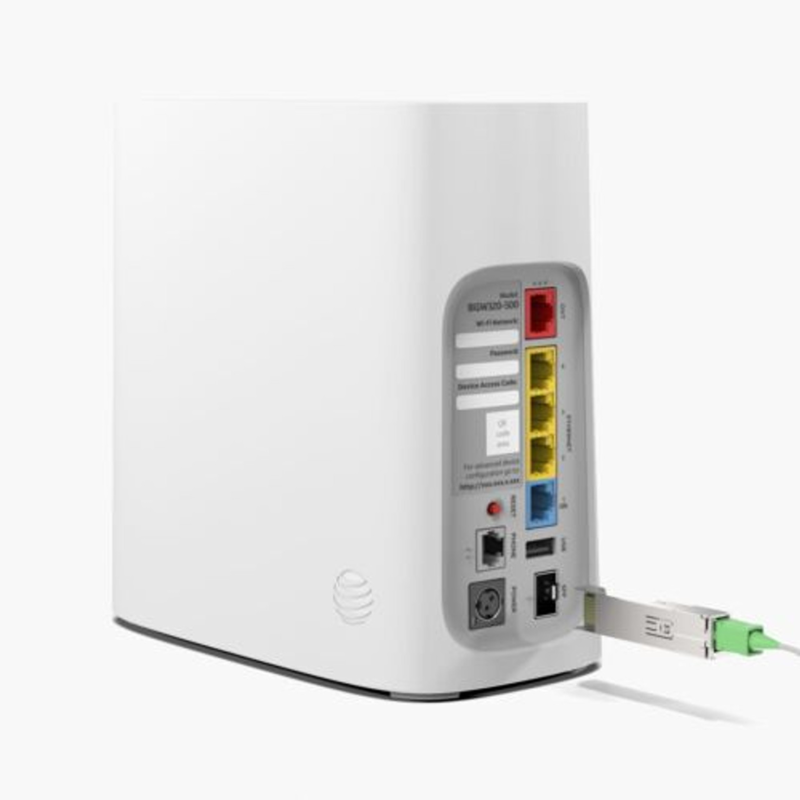
Opening the box of your new BGW320 router is the first step towards faster internet. Inside, find the router, a power adapter, an Ethernet cable, and setup instructions. Lay out each piece carefully. First, find a good spot for your router. It should be central, away from large metal objects and microwaves. This helps to avoid interference.

Connect the power adapter to the router and plug it into an outlet. Wait for the router to power up. You’ll see the lights turn on, indicating it’s ready. Next, use the Ethernet cable. Connect one end to the router’s WAN port and the other to your modem. Your router now has an internet connection.

Turn on your computer or mobile device. Look for the new router’s network name or SSID in your Wi-Fi settings. Select it and enter the default password usually found on the router or in the instructions. Once connected, open a web browser.

Type in the router’s IP address, given in the instructions, to access the router’s web interface. Use the default login information to enter the setup page. Follow the on-screen steps to customize your network settings. This includes setting a personal SSID and a strong password for security.

After these steps, your BGW320 router is set up. In no time, you’ll enjoy a faster and more reliable internet connection. Remember to save your custom settings and keep the default ones noted somewhere safe.

bgw320 router

Optimizing Wi-Fi Settings for Performance

To get the most out of your BGW320 router, optimizing the Wi-Fi settings is key. Tweaking a few settings can boost performance significantly. Let’s focus on how to do that effectively.

Choosing the Right Frequency Band

Your BGW320 router offers dual frequency bands: 2.4 GHz and 5 GHz. To optimize your Wi-Fi, select the right band. The 2.4 GHz band has greater coverage but is more prone to interference. It is ideal for devices further away from the router or with weaker Wi-Fi capabilities. On the other hand, the 5 GHz band is faster and less crowded. It is best for devices closer to the router that support this band. For the best experience, connect devices to the 5 GHz band when possible.

Adjusting Transmit Power

Adjusting the transmit power of your router can also enhance your Wi-Fi performance. By default, the BGW320 router might be set to a lower transmit power to save energy. Increasing the power can extend the Wi-Fi range, but it could also cause more interference with other devices. To find a balance, start with a medium setting. Then, test the Wi-Fi strength around your home. Adjust the power higher or lower based on the areas where the signal needs improvement.

Understanding and Modifying LAN Settings

To ensure your BGW320 router delivers the best possible internet experience, tweaking the LAN (Local Area Network) settings is important. LAN settings help manage how devices connect and communicate over your network. Here we’ll discuss two critical aspects: DHCP settings and static IP assignments.

Configuring the DHCP Settings

The Dynamic Host Configuration Protocol (DHCP) is a network management protocol used on IP networks. Your BGW320 router’s DHCP server assigns IP addresses automatically to devices on your network. This makes it easier to manage network connections.

To configure DHCP:

  • Access the router’s settings through the web interface.
  • Locate the DHCP settings page.
  • Ensure DHCP is enabled for automatic IP address assignment.
  • Set the range of addresses that your router can assign. Choose a range large enough to accommodate all devices.
  • You can also set the lease time, which is how long a device can use an IP address.
  • Save your changes after configuration.

With optimized DHCP settings, your network can manage devices efficiently, reducing connection issues.

Managing Static IP Assignments

Sometimes, you might need a device to have a consistent IP address, known as a static IP. For example, printers or gaming consoles often work better with a static IP.

To manage static IP assignments:

  • Find the device you want to assign a static IP on your network list.
  • Enter its MAC address and choose an IP address that is outside the DHCP range to avoid conflicts.
  • Save the settings to ensure that the device maintains the same IP address each time it connects.

These settings help your network remain organized and ensure your devices maintain consistent connectivity. By understanding and modifying these LAN settings, you can tailor your network to fit your needs, enabling smoother operation and a better internet experience with your BGW320 router.

router

Advancing Your Connection with Quality of Service (QoS)

To further enhance your internet experience, Quality of Service (QoS) is a feature to consider on your BGW320 router. QoS allows you to prioritize traffic. This means more important tasks get more bandwidth. Gaming, video conferencing, or streaming can run smoother with QoS.

Prioritizing Bandwidth for Applications

When you have multiple devices connected, network congestion can happen. Your video call might lag if someone else is downloading a large file. QoS can fix this. Here’s how to prioritize bandwidth:

  • Log into your BGW320 router settings.
  • Look for the QoS settings.
  • Prioritize applications or devices that need stable connectivity.
  • Adjust the settings to give these applications more bandwidth.
  • Test these changes and adjust if needed.

By setting up QoS on your BGW320 router, essential applications can perform better. This keeps your online gaming or video calls smooth even when the network is busy. It’s a useful tool for managing your home’s internet needs.

Firmware Updates: Enhancing Your Router’s Capabilities

Just like software on your computer, your BGW320 router’s performance can benefit from firmware updates. Firmware is the permanent software programmed into the router’s memory. Updates can bring new features, security enhancements, and performance improvements. Keeping your router’s firmware up to date is crucial for maintaining optimal functionality.

To check for firmware updates:

  • Access your router’s web interface using its IP address.
  • Navigate to the settings or administration section.
  • Look for an option labeled ‘firmware update’ or ‘router update’.
  • Follow the instructions to check if an update is available. If it is, proceed with the download and installation.
  • The router may restart after the update. Make sure not to interrupt the process.

Always ensure a stable power supply during the update to prevent any damage. Also, after updating, it’s good to check and tweak settings as some might reset to default. Regularly updating your firmware ensures that your BGW320 router runs with the latest improvements, keeps your network secure and can even resolve some connectivity issues. Stay informed, and set reminders to check for updates periodically.
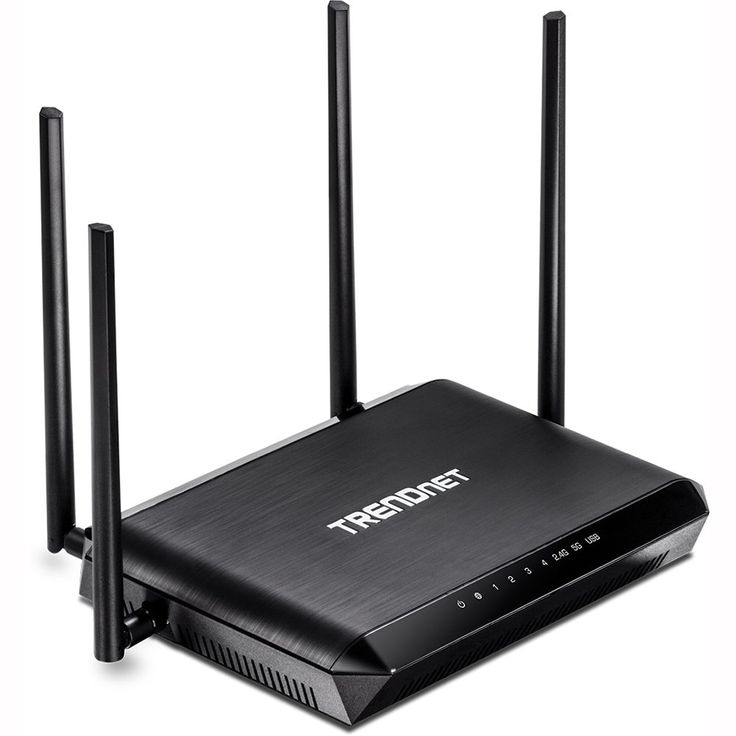
Wi-Fi router

Securing Your BGW320 Router to Maintain Optimal Performance

To keep your internet safe and efficient, securing your BGW320 router is vital. Simple steps can protect against unauthorized access and data breaches. Let’s review the essential security tweaks you should make.

Updating Passwords and SSID

Changing your router’s default SSID (network name) and password is necessary. Doing this keeps outsiders from guessing your login details. For a stronger security layer, choose a unique SSID and a complex password. Mix letters, numbers, and special characters. Update these credentials regularly, at least every few months, to outpace potential hackers.

Utilizing Firewall and Security Features

Your BGW320 router includes a firewall and other security enhancements. Turn on the firewall to filter incoming and outgoing traffic. It blocks suspicious activities and potential threats. Check for other security features like MAC address filtering, which allows only recognized devices to connect. Activate network encryption, like WPA2 or WPA3, to protect the data sent over your network. It’s crucial to explore these features and enable them to safeguard your online activities.

Troubleshooting Common Issues and Interferences

With any home network, you may find issues that affect your BGW320 router’s performance. Common problems include signal drops and slow speeds. Interference from other devices can also disrupt your connection. To keep your internet running smoothly, it helps to know how to tackle these issues.
Identifying and Resolving Wi-Fi Dead Zones

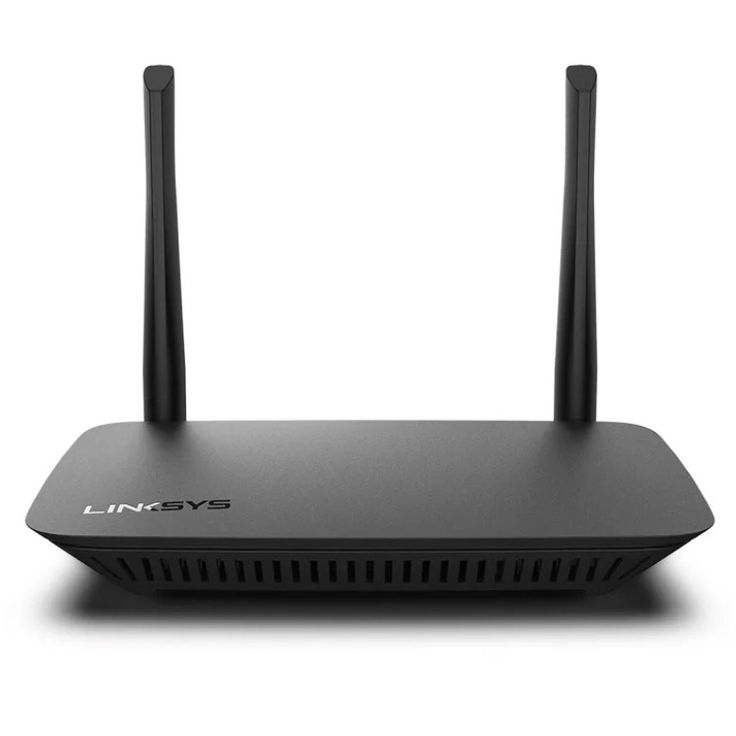
A ‘Wi-Fi dead zone’ is an area where your Wi-Fi signal is weak or non-existent. These can arise due to physical barriers like walls and floors, or distance from the router. To fix this:

  • Move the router to a more central location. It should be as open as possible.
  • Reduce the number of walls and large objects between your router and devices.
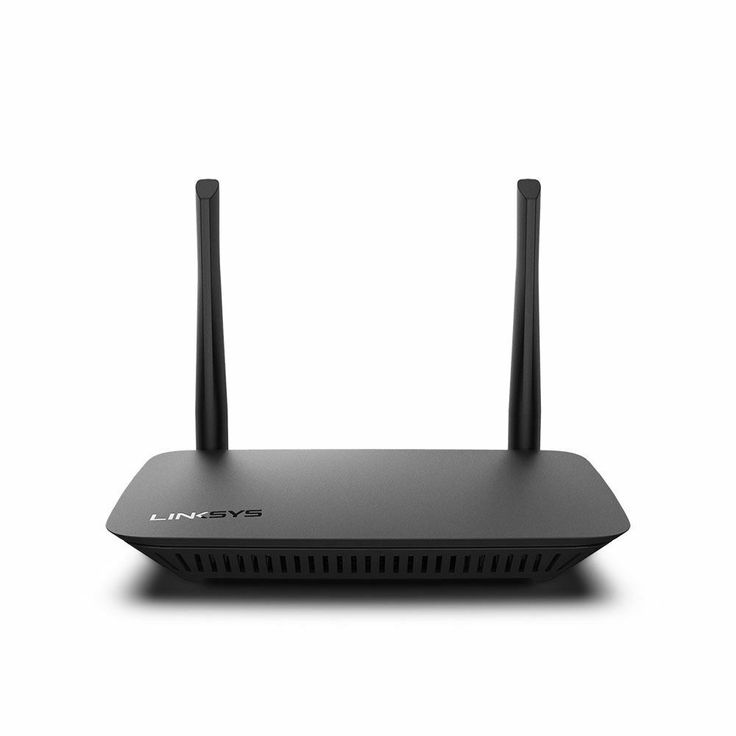
  • Try using a Wi-Fi extender to boost the signal and broaden your network’s reach.
  • Check for electronic devices that could cause interference, like microwaves or cordless phones. Place them away from your router if possible.
  • Update your router’s firmware, as new updates can improve signal strength.

By following these steps, you can identify and resolve Wi-Fi dead zones in your home. Enhance your BGW320 router’s performance and enjoy a seamless online experience.

Cascaded Router: A Comprehensive Guide to Efficient Networking

Introduction to Cascaded Routers

Cascaded router refers to the process of connecting two or more routers together in a single network. This setup enhances your home network by expanding coverage, segmenting the network, and managing traffic more efficiently. Typically, one router acts as the main or ‘primary’ router, while the others serve as secondary units. A cascaded router configuration can either extend the existing network or create separate subnetworks within a home or office.

router

When implemented correctly, a cascaded router setup can offer multiple advantages. It can amplify signal strength in distant areas, provide dedicated bandwidth for different activities, and introduce new layers of network management. Moreover, it lays the groundwork for advanced networking features like port forwarding and static routing between subnetworks. To fully leverage the power of cascaded routers, understanding the proper setup and configuration is essential. This will involve identifying the right equipment, configuring IP addresses correctly, and defining clear network pathways. We will dive deeper into these steps in the subsequent sections of this guide.

Benefits of Cascading Your Routers

Cascading routers can significantly enhance your home network. This setup brings various benefits that cater to those seeking improved performance and better control over their network environment. Here, we will explore some of the key advantages of this configuration.

  • Extended Wireless Coverage: Cascading allows you to increase the wireless coverage area. With more routers strategically placed, Wi-Fi dead zones in your home can disappear.
  • Improved Network Performance: Individual routers can manage traffic more efficiently. This can result in faster speeds for connected devices.
  • Increased Bandwidth Allocation: By segmenting your network, cascaded routers can provide dedicated bandwidth. This is useful for bandwidth-intensive tasks like gaming or video streaming.
  • Advanced Network Features: In a cascaded router setup, you can enjoy features such as port forwarding or static routing. These options are crucial for advanced users interested in network customization.
  • Enhanced Security: More routers mean more points of control. Each router can have its own security settings, allowing for granular security management.
  • Guest Network Configuration: Cascading makes it easier to set up separate networks for guests. This ensures that your main network remains secure and uninterrupted.
  • Cost Efficiency: Instead of purchasing expensive long-range routers, you can use existing routers to expand your network. This can be a more economical solution to boost your network’s reach and capacity.

By understanding these benefits, it’s clear that a cascaded router setup can be a great investment for anyone looking to upgrade their home network. It not only provides more network coverage but also enhances the overall user experience with improved performance and security. In the next sections, we will go over the essential equipment and step-by-step configuration to help you achieve a successful cascaded router system.

Equipment and Tools Needed for Cascading

To set up a cascaded router network, specific equipment and tools are necessary. These include:

  • Two or More Compatible Routers: Ensure that all routers have cascading capabilities.
  • Ethernet Cables: For connecting routers and devices directly.
  • Network Switch (Optional): If you need more ports than your routers provide.
  • Computer or Mobile Device: For accessing router settings.
  • Router Manuals: Useful for specific configuration details.
  • Internet Connection: To test the network once it’s set up.

Make sure that your primary router is capable of handling the role of the network hub. The secondary routers will need to support being configured either in bridging mode or as access points, depending on your cascading strategy.

Having the latest firmware for your routers can improve performance and compatibility. If necessary, update your router’s firmware before starting the cascading process.

Tools such as screwdrivers may be needed for mounting routers on walls. Labeling equipment with their IP addresses can help manage configurations more easily. With the right setup, cascading routers can transform your network’s reach and reliability.

cascaded router

Step-by-Step Configuration Process

Setting up a cascaded router network requires attention to detail to ensure everything functions correctly. Here is a straightforward guide to get you started:

Setting Up the Primary Router

The primary router is the central hub of your network. Follow these steps:

  1. Connect the Primary Router to the Internet: Use an Ethernet cable to link your primary router to the modem.
  2. Access the Router’s Web Interface: Open a web browser on your computer or mobile device and enter the router’s IP address.
  3. Configure Basic Settings: Set up the Wi-Fi name (SSID), password, and internet connection type.
  4. ** Update the Firmware**: Check for the latest firmware updates and install them.
  5. Note Down the IP Address Range: Document the DHCP IP address range for later reference.
  6. Disable DHCP (Optional): If you plan a LAN-to-LAN setup, you might need to disable DHCP on the secondary routers.

Configuring the Secondary Router

Integrating a secondary router involves these critical steps:

  1. Reset the Secondary Router: Ensure it’s on factory settings to start fresh.
  2. Connect to the Primary Router: Use an Ethernet cable to connect one of the primary router’s LAN ports to the secondary router’s LAN port for LAN-to-LAN configuration, or to its WAN port for LAN-to-WAN.
  3. Log In to the Secondary Router: Access its web interface using its default IP address.
  4. Assign a Static IP Address: Set a static IP within the primary’s subnet for LAN-to-LAN setup.
  5. Turn Off DHCP (LAN-to-LAN): Prevent IP conflicts by disabling DHCP on the secondary router.
  6. Match Wi-Fi Settings: For a seamless network, match the SSID and password to the primary router’s settings.

By following these configuration steps carefully and attentively, your cascaded router setup should provide the expanded coverage and enhanced performance that your home network needs.

Interconnecting Routers: LAN-to-LAN vs. LAN-to-WAN

When setting up cascaded routers, you need to choose between LAN-to-LAN and LAN-to-WAN configurations. Each approach serves a specific purpose and affects how your network operates. Let’s explore what each one entails and when to use them.

LAN-to-LAN Configuration

In a LAN-to-LAN setup, you connect the secondary router to a LAN port of the primary router. This method is ideal for expanding the coverage of your existing network without creating a separate network. Here are the key points:

  • This configuration keeps all devices on the same network.
  • It allows devices connected to different routers to communicate easily.
  • The secondary router should have DHCP disabled to avoid conflicts, as the primary router handles IP addresses.
  • It’s suited for larger homes or spaces needing wider Wi-Fi coverage.

LAN-to-WAN Configuration

In contrast, LAN-to-WAN links the secondary router’s WAN port to a LAN port of the primary router. This setup creates a distinct subnet, ideal for separating network traffic. Here’s what you need to know:

  • It segments the network, which can enhance security and performance.
  • Each router manages its own DHCP, resulting in separate IP address ranges.
  • It is useful for guest networks or separating work and personal devices.
  • This setup requires adjusting firewall and port forwarding settings for inter-router communication.

Your choice between LAN-to-LAN and LAN-to-WAN cascaded router configurations will depend on your specific network needs. If you simply want to extend your network’s reach, LAN-to-LAN is usually the way to go. However, for more advanced network segmentation, LAN-to-WAN might be the better option. Whichever you choose, ensure that you configure the settings correctly to make the most of your cascaded router setup.

Wi-Fi router

Addressing Potential Network Issues

A cascaded router network, while beneficial, can encounter issues that diminish its efficiency. Recognizing and addressing these problems early is vital for a stable and high-performing network. Here are some potential issues you might face and how to resolve them:

  • IP Address Conflicts: Make sure each router has a unique IP address to avoid conflicts.
  • Weak Signal Strength: Position routers to ensure strong signal coverage throughout. Use repeaters if necessary.
  • Uneven Bandwidth Distribution: Adjust quality of service (QoS) settings to prioritize important traffic.
  • Double NAT Issues: For LAN-to-WAN setups, configure the secondary router’s NAT settings to avoid networking complexities.
  • Firmware Incompatibility: Regularly update your routers’ firmware to the latest version for optimal performance.
  • Device Connectivity Problems: Sometimes devices may struggle to switch between routers smoothly. Set matching SSID and passwords to facilitate easier roaming.

By troubleshooting these common issues, you can enjoy the seamless operation of your cascaded router network. Always test your setup after making changes to ensure all devices connect and communicate effectively.

Securing Your Cascaded Router Network

After successfully setting up a cascaded router network, securing it is paramount. A secure network not only protects your sensitive information but also ensures that your network’s performance remains unimpeded by malicious entities. Here’s how to safeguard your cascaded router network:

  • Change Default Credentials: Replace all factory-set passwords with strong, unique passwords. Do this for both the primary and secondary routers.
  • Update Firmware Regularly: Vendors often release updates that address security vulnerabilities. Keep your routers’ firmware up to date to protect against threats.
  • Enable Network Encryption: Use WPA2 or WPA3 encryption to secure your Wi-Fi network. Encryption is a must to prevent unauthorized access.
  • Install Firewalls: Ensure both primary and secondary routers have firewalls activated. This will help block unwanted traffic from entering your network.
  • Limit Network Access: Minimize risks by restricting access to your network. Use MAC address filtering to control which devices can connect.
  • Guest Network Isolation: For guests, provide a separate Wi-Fi network. This prevents access to your main network’s resources and isolates traffic.
  • Periodic Security Audits: Regularly check your network for any unauthorized devices or access points. This helps spot potential breaches early.

By implementing these security measures, you can create a robust defense against most cybersecurity threats. Secure routers form a strong foundation for your home’s or office’s digital safety.

Troubleshooting Common Setup Problems

Even with careful setup, you might encounter issues while configuring a cascaded router network. Identifying these problems quickly and knowing how to resolve them can save you time and frustration. Here are some common setup problems and their solutions:

IP Configuration Errors

Incorrect IP settings can cause network disruptions. Ensure the following:

  • Each router has a unique IP address.
  • Subnets are correctly assigned for LAN-to-WAN setups.
  • Static IP addresses do not clash with DHCP ranges.

Connectivity Issues

Sometimes, devices may lose connection to the network. To fix this:

  • Check all physical connections between routers.
  • Restart the routers to refresh network settings.
  • Confirm Wi-Fi settings match across all routers, if intended.

Slow Internet Speeds

A cascaded network should not slow down your internet. If it does:

  • Test your internet speed directly from the modem.
  • Limit devices or applications using high bandwidth.
  • Use QoS settings to manage traffic better.

Difficulty Accessing Router Settings

Accessing router settings is crucial. If you’re having trouble:

  • Use a wired connection to ensure stability while configuring settings.
  • Verify you’re entering the correct IP address for each router.
  • Reset your router to factory settings as a last resort.

Wireless Signal Overlap

Overlapping Wi-Fi signals may reduce performance. Avoid this by:

  • Changing channels on each router to minimize interference.
  • Spacing routers apart to cover different areas effectively.

Firmware Issues

Outdated firmware may cause instability. Make sure to:

  • Update all routers to the latest firmware version available.
  • Check the manufacturer’s website for updates and instructions.

By addressing these common problems, your cascaded router network should run smoothly, enhancing your home’s or office’s connectivity. Remember to apply the cascaded router keyword appropriately, ensuring a smooth reading experience for your audience.

Build Your Own Router: A Step-by-Step Guide for Beginners

Assessing Your Home Network Needs

Before diving into build your own router, evaluate your specific network needs. Start by considering the number of devices connected to your network. These could include computers, smartphones, smart home devices, and gaming consoles. Next, think about the activities these devices perform. Are you streaming 4K videos, or just surfing the web? Do you work from home and require a stable, strong connection for video conferencing?

router

The speed of your current internet plan is crucial too. If you have a gigabit internet service, your router should handle these speeds, especially with security features active. Remember the frustration of the blogger who couldn’t get more than 118Mbps out of a 1Gbps service? You want to avoid that.

Consider also the layout of your home. Larger homes may need more powerful routers or additional access points to cover dead spots. If you’re keen on home automation, think about the security of your IoT devices. VLANs and separate networks for guests and IoT devices can add layers of protection.

Finally, assess your comfort with technology. Do you enjoy tackling tech challenges and learning new things, like the author who found joy in complexity? Or do you prefer something straightforward and easy to manage?

Identifying these factors will help you decide whether a custom router is right for your home, and what features it must have to meet your demands.

Comparing Pre-Built vs Custom Router Solutions

When considering whether to buy a pre-built router or build your own, compare the two options. Pre-built routers offer convenience and immediate use out of the box. They come with a set of standard features suitable for general needs. Yet, they may lack the versatility and deep customization options that tech enthusiasts crave. Budget-wise, they can be more cost-effective up front. Still, you might trade off performance and future-proofing.

Building a custom router presents a different set of benefits and challenges. The level of control over every aspect is the main advantage. You choose your hardware and software, tailoring the system to your precise needs. For learning and flexibility, this option wins. However, it requires a higher level of tech savvy and initial time investment. Cost-wise, it could be more once you factor in high-quality components.

Custom solutions also score high on security. They allow for complex configurations, like VLANs and stronger firewalls. This makes them a strong choice for smart homes. Speed-wise, your build can surpass most store-bought routers if assembled correctly. This ensures you’re getting the most from your internet service.

In conclusion, choose pre-built for ease and immediate use. Opt for a custom router if you value control, security, and performance. Your choice depends on your expertise, budget, and the specific demands of your home network.

Essential Components for Building a Custom Router

To create a custom router that meets all your needs, you must select the right components.

Selecting a SFF Computer

A Small Form Factor (SFF) computer is key for your custom router. Look for these features:

  1. Fanless design to reduce noise and enhance reliability.
  2. Multiple Network Interface Card (NIC) slots for versatility.
  3. Enough processing power to handle your network traffic without bottlenecks.
  4. Proximity in size to standard routers for easy placement.

Ensure the SFF computer has a solid-state drive (SSD) for quick data access. RAM should be sufficient for running the routing software smoothly. Also, consider power efficiency as it will be on 24/7.

Choosing the Right Network Interface Card (NIC)

NICs are crucial as they connect your router to the network. Consider the following when choosing a NIC:

  1. Compatibility with your chosen SFF and software.
  2. Quality from reliable brands like Intel to ensure stable connections.
  3. The number of ports depending on the size of your network.
  4. Support for high speeds if you have gigabit internet.

Remember, a high-quality NIC can help achieve the desired speeds and reliable connectivity for your home network.

build your own router

Selecting Router Software: Open Source vs Proprietary

When building your own router, the choice of software is crucial. You’ll find two main types: open source and proprietary. Open source software, like pfSense, OPNsense, and OpenWRT, is free and customizable. Proprietary software, on the other hand, often comes at a cost but can offer dedicated support and unique features. The decision hinges on whether you prioritize customization or convenience.

Getting Started with pfSense

Getting started with pfSense, a popular open source router software, requires some prep. First, verify your hardware meets pfSense requirements. Download the software from the pfSense website. Burn the installation image to a USB stick or CD. Follow the installation guide to set up pfSense on your SFF computer. After installation, access the web interface to configure the network settings.

Exploring Other Software Options like OPNsense and OpenWRT

Besides pfSense, other open source options exist. OPNsense is a fork of pfSense that offers a user-friendly web interface and focuses on security. Meanwhile, OpenWRT is ideal if you need more control over your router’s features. It is highly versatile and runs well on various devices. Choose based on which interface you prefer and the specific features you need.

Step-by-Step Guide to Assembling Your Custom Router

Building your own router can be both rewarding and challenging. To start, gather all the components described in previous sections. Then, use this guide to assemble and configure your custom router.

Installation of the Router Operating System

For the installation, you’ll need your SFF computer and installation media (USB stick with software image).

  1. Insert the USB stick with the pfSense software image into the SFF computer.
  2. Boot the computer from the USB stick. This process might require altering the boot sequence in the BIOS settings.
  3. Follow the on-screen prompts to install the router software. Choose the right disk to install the software and proceed.
  4. Remove the installation media after the process completes and reboot your system.

The operating system should now be installed. You’ll configure it through its web interface next.

Configuring Basic Settings and Network Management

Now that the software is installed, it’s time to set up your network.

  1. Connect a device to your SFF computer via the LAN port to access the router’s web interface.
  2. Open a web browser and enter the default IP address for pfSense or the software you installed.
  3. The initial setup wizard will launch. Set your time zone, WAN connection type, and LAN IP address.
  4. Create passwords for admin access to prevent unauthorized changes.
  5. Set up your DHCP server to assign IP addresses to devices on your network.
  6. If required, configure VLANs to segment and secure your network further.

Follow these steps carefully to ensure a stable and secure network. Now, you’ve built your own router.

build router

Advantages of a DIY Router: Performance and Customization

Building your own router comes with clear benefits, particularly regarding performance and customization. Let’s explore these advantages to understand why a DIY approach can be superior to off-the-shelf options.

Enhanced Performance

Custom-built routers shine when it comes to performance. Since you select the components, you can ensure they are powerful enough to handle high-speed internet and heavy network traffic. A bespoke router can reliably manage gigabit speeds with ease, avoiding the bottlenecking issues that plague some commercial routers.

Incorporating a robust SFF computer and a high-quality NIC positions your router to deliver consistent, high-performance networking. This means smoother streaming, better gaming, and efficient home office setups.

Tailored Customization

Customization is another huge perk. With open-source software like pfSense, you’re not locked into the features and limitations of a pre-built router. You can fine-tune settings and add functionalities to match your needs exactly.

From advanced security settings to intricate network management, you can create a system that adheres to your specific preferences. Whether that entails setting up multiple VLANs for enhanced security or installing a VPN for remote access, you’re in control.

Moreover, as new needs arise or technology evolves, you can adapt your router without waiting for manufacturer updates. This flexibility ensures your router remains current and effective.

In conclusion, if you prioritize performance and want to tailor your home network to your exact requirements, building your own router is a pursuit worth considering.

Future-Proofing Your Network with Expandability Options

Building your own router comes with a significant perk: expandability. Unlike most off-the-shelf routers, a DIY router can evolve with your network’s growing demands. This means, as your internet needs change or new technologies emerge, you won’t be stuck with outdated equipment.

  • Easy Upgrades: With a custom router, upgrading the hardware is straightforward. You can swap out old components for newer ones as better technology becomes available.
  • Modular Design: Opt for a modular SFF computer that allows for easy component additions. You may start with what you need today, knowing you can add RAM, storage, or NICs tomorrow.
  • Software Scalability: Open-source software like pfSense is frequently updated. You can add new features or update existing ones without waiting for a manufacturer.
  • Additional Network Services: If you want to add services like a VPN, network monitoring, or advanced QoS, you can do so. Your custom router’s software should support these additions without the need for new hardware.
  • Performance Tuning: As your network grows, you can fine-tune performance settings. This helps maintain optimal speeds and reliability.

Building your own router ensures that your home network stays ahead of the curve. It adapts as necessary, providing a future-proof solution to home networking. This approach saves you from frequent replacements and offers a long-term, cost-effective strategy. Go for a DIY router if you want a setup that grows with your tech life.

M913 Gaming Mouse: The Ultimate Weapon for Esports

In the highly competitive world of esports, having the right gear can make all the difference. Among the various peripherals, the mouse stands out as a crucial element that can impact a player’s performance. Enter the M913 Gaming Mouse, a device designed specifically for gamers who demand precision, speed, and reliability. This article will delve into the various features and benefits of the M913 Gaming Mouse, recounting why it is considered the ultimate weapon for esports enthusiasts.

M913 gaming mouse

Unmatched Precision with the M913 Gaming Mouse

Precision is key in gaming, and the M913 gaming mouse excels in this area. With a high DPI (Dots Per Inch) sensor, it offers an adjustable range that can be customized according to the player’s preference. This level of customization ensures that gamers can switch between sensitivity settings seamlessly, allowing for greater precision in strategic moments. Whether you’re sniping enemies from a distance or engaging in fast-paced action, the M913 gaming mouse provides the accuracy needed to gain the upper hand.

  • The adjustable DPI settings range from 800 to 16,000, catering to both low-sensitivity and high-sensitivity gamers.
  • Utilizing top-tier optical sensors, the M913 Gaming Mouse minimizes lag and enhances responsiveness.
  • Gamers benefit from the mouse’s color-coded DPI indicators, making it easy to know the current sensitivity setting at a glance.

Ergonomic Design Tailored for Comfort

  1. Comfort-Driven Ergonomics: The M913 Gaming Mouse is expertly designed to provide ultimate comfort for users, particularly during those lengthy gaming sessions. Its ergonomic shape contours to the hand, significantly reducing strain and fatigue, allowing for extended gaming without discomfort.
  2. Enhanced Focus and Performance: By alleviating the physical stress on hands, the mouse helps maintain gamers’ peak performance levels. This design consideration plays a crucial role in enhancing focus, ensuring that players can stay immersed in their games for longer periods.
  3. Non-Slip Grip: The mouse features a specially designed non-slip grip, securing its position firmly within the player’s hand. This stability is essential for precision, enabling quick and accurate movements during intense gaming scenarios.
  4. Balanced Weight: Designed with a balanced weight, the M913 allows for swift movements without causing fatigue, promoting agility and responsiveness during gameplay.
  5. Customizable Weights: Players can further tailor their experience by utilizing customizable weights included with the mouse. This feature empowers users to adjust the feel and handling of the mouse to their individual preferences, maximizing comfort and control.

gaming mouse

Multi-Functionality of the M913 Gaming Mouse

The M913 Gaming Mouse stands out with its impressive multi-functionality, tailored specifically for gamers seeking an edge in competitive play. Here are some key features:

  1. Customizable Buttons: With up to 12 programmable buttons, players can assign their favorite actions and macros, allowing for quick access to essential commands during intense gaming sessions.
  2. Enhanced Gameplay: This capability helps gamers strategize more effectively, enabling them to execute complex commands and maneuvers with ease, thus giving them an advantage over their opponents.
  3. Onboard Memory: The inclusion of onboard memory allows users to save multiple profiles and settings, making it hassle-free to switch configurations for different games.
  4. User-Friendly Interface: The software accompanying the M913 is designed to be intuitive, so even novice gamers can customize their setup easily.

Together, these features make the M913 a powerful tool for any serious gamer.

Advanced Software for Personalization

To enhance the user experience, the M913 Gaming Mouse comes equipped with cutting-edge software designed to maximize its performance. Here are some key features:

  1. Personalization Options: The software enables gamers to tailor their gaming experience by customizing various aspects, including lighting effects, DPI settings, and button assignments. This level of customization ensures that the mouse aligns perfectly with individual preferences and play styles.
  2. RGB Lighting Feature: The dynamic RGB lighting not only adds a visually stunning aesthetic but also contributes to creating an immersive gaming atmosphere, enhancing the overall experience during gameplay.

  3. Performance Monitoring: Through the software, gamers can easily monitor performance metrics, allowing for real-time adjustments. This capability provides immediate feedback, enabling players to fine-tune their settings on-the-fly.

  4. Competitive Edge: The in-depth customization options cater to the needs of competitive gamers, making the M913 Gaming Mouse an ideal choice for those looking to maximize their performance and gain an advantage during intense gaming sessions.

mouse

Enhanced Durability for Long-Lasting Use

  1. Built for Intensity: Esports can be incredibly demanding, requiring equipment that can keep up with the high pace of competitive play. The M913 Gaming Mouse is specifically engineered with durability in mind, ensuring it can withstand the rigors of intense sessions without faltering.
  2. High-Quality Components: Featuring premium switches, the mouse is rated for over 20 million clicks. This impressive lifespan guarantees that it remains a trusted gaming ally throughout countless matches, significantly reducing the need for replacements.
  3. Reinforced Cable Design: The M913’s cable is not only reinforced but also braided, enhancing overall durability. This design minimizes wear and tear while preventing tangling, which is crucial during critical gaming moments where every second counts.
  4. Rugged Construction: With its robust build, the M913 Gaming Mouse stands strong against the pressures of competition. Gamers can depend on this mouse to deliver consistent performance, making it an essential tool for achieving gaming victories time and time again.

Compatibility Across Multiple Platforms

One significant challenge many gamers encounter is compatibility with different devices. However, the M913 Gaming Mouse has been meticulously designed to work seamlessly across a variety of platforms. Here are the key features that ensure an excellent gaming experience:

  • Versatile Platform Support: Whether you’re using a gaming PC, a laptop, or a console, the M913 Gaming Mouse delivers exceptional performance, guaranteeing a consistent and enjoyable experience no matter the device.
  • Plug-and-Play Functionality: Setting up the mouse is a breeze, thanks to its plug-and-play capability. You can start using basic features immediately, with no need for additional software installations.
  • Dual-Mode Compatibility: For models that support it, the mouse allows players to switch effortlessly between wired and wireless modes, providing greater flexibility based on your gaming environment.
  • Portability: The adaptability of the M913 makes it easy for gamers to take their setup on the go, freeing you from worries about compatibility issues during travel.

With these features, the M913 Gaming Mouse is a reliable choice for gamers seeking versatility and performance across platforms.

Wireless Mouse

Competitive Edge in Esports

In the world of esports, achieving a competitive edge can make all the difference for players aiming for victory. The M913 Gaming Mouse stands out as a vital tool for enhancing performance. Here are key points about its capabilities:

  1. Precision and Accuracy: The M913 is designed to provide exceptional accuracy, allowing players to hit targets with pinpoint precision. This enhances their ability to execute complex moves and strategies effectively.
  2. Ultimate Comfort: Ergonomically designed, the mouse ensures prolonged gaming sessions remain comfortable. This prevents fatigue and allows players to maintain focus during crucial moments.
  3. Customizable Features: With programmable buttons, players can quickly access essential functions. This feature enables swift reactions, which can turn the tide of an intense match.
  4. Technological Advantage: By leveraging advanced technology, the M913 gives gamers a competitive advantage. Players equipped with high-performance gear can outperform those who rely on standard equipment, setting them apart in the competitive landscape.

User Feedback and Community Support

The gaming community is an expansive network that thrives on interaction and shared experiences. When a product like the M913 Gaming Mouse gains traction, user feedback becomes essential for several reasons:

  1. Shared Experiences: Players routinely share their personal experiences with the M913, discussing its performance in various gaming scenarios, which helps new users understand what to expect.
  2. Online Forums: Dedicated online forums and community spaces thrive with discussions focused on the M913, allowing gamers to highlight its various benefits and unique features.
  3. Customization Tips: Players exchange valuable tips on customizing the mouse settings for different game genres, whether it’s first-person shooters, strategy games, or MMORPGs. This enhances usability and personalizes the gaming experience.
  4. Expert Insights: Feedback from expert gamers is instrumental in shaping the future of gaming gear. Their input encourages manufacturers to continuously improve their products and adhere to high-quality standards.
  5. Building a Community: The collaboration fosters a sense of community among gamers, as they unite to help one another enhance their gaming experiences with tools like the M913.

Wired mouse

Conclusion: The Power of the M913 Gaming Mouse

In conclusion, the M913 Gaming Mouse is undeniably an ultimate weapon for esports enthusiasts. With its incredible precision, ergonomic design, customizable features, and durability, it meets the varying needs of gamers. Whether you’re a casual player or a professional esports competitor, investing in the M913 Gaming Mouse is sure to elevate your gaming experience.

  • By ensuring comfort during long sessions, it reduces fatigue and allows gamers to focus on their strategies.
  • The multi-functional buttons and advanced software provide an unparalleled level of customization and control.
  • Ultimately, the M913 Gaming Mouse stands as a testament to what gamers can achieve when equipped with the right tools, propelling them towards victory.

With the above insights, prospective buyers can be confident that the M913 Gaming Mouse delivers performance that matches its reputation in the esports sphere. Whether you’re aiming for precision play or an ergonomic design, this gaming mouse is your best choice. Upgrade your gear today and experience what it means to compete at the highest level.

Best Place for WiFi Router: Boost Your Internet Signal

In today’s digital age, a reliable Wi-Fi connection is essential for both work and leisure. One of the most crucial aspects of achieving superior Wi-Fi performance is proper router placement. This article will guide you through the best practices and considerations for determining the best place for wifi router. By optimizing your router’s location, you can dramatically improve your network’s reach and speed, ensuring smooth connectivity for all your devices.

wifi router

Optimal Router Locations for Strong Connectivity

To achieve strong connectivity, the correct positioning of your Wi-Fi router is essential. Placing your router strategically can greatly enhance the Wi-Fi signal throughout your home or office.

Centralizing Your Router for Wide Coverage

Put your router in the heart of your space to maximize reach. A central spot allows the Wi-Fi to distribute more evenly. It ensures uniform coverage and can help prevent dead zones in farther areas. If your home is a shape other than a square or rectangle, find the center of the main area where you use Wi-Fi most.

Elevating the Router to Improve Signal Range

Lift your router off the floor. Your router’s waves carry better when above ground level. A higher placement can also help signals avoid some floor clutter. Consider putting it on a shelf or mounting it on the wall. This can help the signal travel over some obstacles without hindrance.

Avoiding Obstructions and Interferences

Keep your router away from things that block or disrupt signals. Avoid thick walls, large furniture, and heavy appliances that might interfere with your Wi-Fi. Also, keep your router at a distance from devices like microwaves and cordless phones, as these can cause interference too. The goal is to minimize barriers between your router and your devices to maintain a strong, consistent connection.

Understanding Wi-Fi Signal Propagation

To better place your router, it helps to know how Wi-Fi signals move. Wi-Fi uses electromagnetic waves that spread out from the router’s antennas. This spread can be blocked or weakened by obstacles like walls and floors.

How Wi-Fi Signals Emanate from Antennas

Your Wi-Fi router’s antennas send out signals in all directions. These signals form a sort of invisible ‘bubble’. It is strongest near the router and fades with distance. The antenna’s design shapes how far and wide this bubble extends.

Effects of Walls and Floors on Signal Strength

Walls and floors made from materials like brick and concrete can weaken Wi-Fi signals. Some materials may even block signals completely. Wood and plaster are less of an issue but can still reduce signal strength. To ensure the best signal, place your router where there are fewer walls and floors between it and your devices.

best place for wifi router

Tips for Minimizing Interference

To maintain a strong and reliable Wi-Fi signal, addressing interference is crucial. Interference can come from various sources, and managing it effectively can enhance your internet experience and improve connection stability.

Distance from Electronics and Large Metal Objects

One of the primary factors affecting Wi-Fi signal strength is the presence of large metal objects and electronic devices. These items can significantly disrupt Wi-Fi signals by causing interference. To optimize your Wi-Fi performance, it’s advisable to place your router in an open space, away from any large metal fixtures, such as filing cabinets or appliances. Additionally, try to keep it distanced from other electronics, like microwaves and cordless phones, as these can create electronic noise that hampers connectivity. The goal is to establish a clear, clutter-free area where the router can broadcast signals unimpeded.

Strategic Antenna Adjustments

If your router is equipped with external antennas, take advantage of them by positioning them strategically. Adjusting the antennas can greatly enhance your Wi-Fi coverage. Experiment with pointing the antennas in different directions—some facing horizontally and others vertically—to effectively cover various areas in your home. This approach not only expands the signal range, but also helps eliminate blind spots where the Wi-Fi signal may be weak. Regularly rotating and adjusting the angles of the antennas can help ensure consistent and optimal performance throughout your space. By following these tips, you can minimize interference and enjoy a more reliable Wi-Fi connection.

Dealing with Wi-Fi Dead Zones

Wi-Fi dead zones can be frustrating, reducing your online experience to a crawl or cutting it off entirely. Fortunately, there are ways to address these problematic areas to ensure more consistent Wi-Fi coverage throughout your home or office. By understanding Wi-Fi signal propagation and interference, you can better strategize solutions for eliminating these dead spots. Below we explore two effective strategies: using Ethernet cables and implementing Wi-Fi extenders.

Using Ethernet as a Reliable Backup

Sometimes, Wi-Fi simply can’t reach every corner of your home. In these cases, Ethernet cables are a trusty solution. Direct connections bypass Wi-Fi issues altogether, providing a stable and fast internet connection. Run Ethernet cables from your router to devices that need a reliable link. It’s perfect for stationary gadgets like desktop computers or gaming consoles. It may not be as convenient as wireless, but it’s a fail-safe for essential areas.

Implementing Wi-Fi Extenders Correctly

Wi-Fi extenders can broaden your network’s reach and can be very effective when placed properly. To maximize their performance, place extenders where your Wi-Fi starts to falter. This location is typically halfway between your router and the dead zone. Avoid putting extenders too close to the router or too far into the dead zone, as they won’t work as well. Extenders rebroadcast the existing signal, so proper positioning is critical for a boost in coverage without sacrificing speed.

router

Accelerating Wi-Fi Performance

Enhancing your Wi-Fi performance largely depends on the strategic positioning of your router. Proper placement can significantly influence your internet speed and overall connectivity experience. By taking a thoughtful approach to where you locate your router, you can achieve a more reliable and faster internet connection throughout your home.

Prioritizing High-Use Areas

To ensure you have a strong connection where it’s needed most, place your router near the areas you frequent for internet usage, such as your living room or home office. This proximity will enhance the Wi-Fi signal in those crucial spaces. For households with multiple users and devices, consider centralizing the router in a location that maximizes coverage for everyone. Balancing the signal range is essential for an even distribution of internet access across your work and living areas, allowing everyone to enjoy a seamless online experience.

Tactical Placements for Mesh Networks

If you are using a mesh network, it’s vital to position the nodes strategically throughout your home. Each node should be placed to ensure optimal signal relay and coverage, creating a cohesive network. Distributing the nodes evenly can help avoid interference from materials that dampen the signal, such as walls and furniture. Mesh network setups are particularly effective because they create a seamless web of connectivity that eliminates dead zones. For multi-story homes, consider placing a node on each floor to guarantee continuous Wi-Fi coverage in every corner of your living space.

Additional Considerations for Router Placement

Certain factors can affect where you place your router for best performance.

Router Placement in Multi-Story Homes

For homes with more than one floor, router placement gets trickier. You want strong Wi-Fi on all levels. Placing the router centrally on the first floor, up high near the ceiling, is a good start. Another option is near the floor on the second level. Either way, aim for minimal barriers between floors. Often, stairways offer the best unblocked path from one floor to the next.

Considering the Impact of Household Appliances and Furnishings

The stuff in your home can block or weaken Wi-Fi signals. Large appliances like fridges and washing machines should be far from your router. Metal objects and mirrors can mess with signals too. Try to keep a clear path between your router and where you use Wi-Fi most. Simple rearrangements of furniture and devices can sometimes solve signal issues without moving your router.

Best Place for Router: Maximizing Your Wi-Fi Signal Strength

Ideal Router Locations

Choosing the right spot for your router can significantly enhance your Wi-Fi coverage, ensuring a strong and consistent internet connection throughout your home. Here are some key points to consider when placing your router:

Wi-Fi router

Central Placement for Optimal Coverage:

    • The best location for your router is in a central area of your home. This placement ensures that the Wi-Fi signal is evenly distributed, providing optimal coverage to all areas.
    • For most homes, a centrally located router will provide the best overall signal strength and reach, minimizing dead zones and weak spots.

Elevated Router Positioning:

    • Place your router at an elevated position, such as on a shelf or table, rather than on the floor. A higher placement allows the Wi-Fi signal to travel further and more effectively.
    • By elevating the router, you can avoid physical obstructions like furniture and other objects that can block or weaken the signal. This helps in maintaining a stronger and more reliable connection.

Avoiding Obstructions and Electronics:

    • Keep your router away from walls and metal objects. Walls, especially those made of concrete or brick, can significantly reduce the range and strength of the Wi-Fi signal.
    • Avoid placing the router near other electronic devices such as microwaves, cordless phones, and baby monitors. These devices operate on similar frequencies and can cause interference, leading to a weaker and less stable Wi-Fi connection.
    • Additionally, keep the router away from large appliances and other electronics that might emit electromagnetic interference, which can disrupt the Wi-Fi signal.

Minimizing Interference from Other Networks:

    • If you live in a densely populated area, there may be multiple Wi-Fi networks operating on the same frequency, causing congestion and interference. To minimize this, use a Wi-Fi analyzer tool to find the least congested channel and set your router to that channel.
    • Consider using a dual-band or tri-band router, which operates on both 2.4 GHz and 5 GHz frequencies. The 5 GHz band is generally less congested and offers faster speeds, but it has a shorter range compared to the 2.4 GHz band.

By following these guidelines, you can ensure that your router is placed in the most effective location, providing the best possible Wi-Fi coverage and performance for your home.

best place for router

Understanding Wi-Fi Signal Mechanics

Understanding how Wi-Fi signals move is key to optimal router placement. By grasping the basics of signal propagation, you can ensure that your devices receive the strongest and most reliable connection possible.

How Wi-Fi Signals Propagate

Wi-Fi signals spread out in every direction from the router, much like ripples in a pond. When the router is centrally located, these ripples reach further, providing more even coverage throughout your home or office. However, it’s important to be mindful of obstacles that can interfere with the signal. Thick walls, for example, can absorb or block Wi-Fi waves, reducing their strength. Similarly, metal objects can deflect or scatter the signals, leading to dead zones where the connection is weak or non-existent. Placing the router in a central, elevated position and away from such obstructions can significantly improve the overall signal quality.

Role of Router Antennas in Signal Distribution

Router antennas play a crucial role in broadcasting your Wi-Fi signal. They should be positioned carefully to maximize coverage and minimize interference. Antennas pointing in different directions can cover a larger area, ensuring that the signal reaches all corners of your space. For instance, if one antenna is vertical and another is horizontal, they can work together to provide a more robust and consistent signal. Additionally, some routers come with adjustable antennas, allowing you to fine-tune their orientation based on your specific layout. This strategic positioning helps connect your devices better to the Wi-Fi network, ensuring a seamless and reliable internet experience.

Strategies for Enhancing Router Performance

Efficient router performance is crucial for a stable and fast Wi-Fi network. A well-optimized router ensures that all your devices can connect smoothly, without interruptions or slow speeds.

Adjusting Router Antennas

One simple yet effective strategy is to adjust your router’s antennas. By positioning the antennas in different directions, you can enhance the signal distribution throughout your home. For example, if one antenna points vertically and the other horizontally, this can help cover a broader area. Additionally, angling the antennas slightly can improve the connection quality for specific devices, especially those in corners or on different floors.

Utilizing Wi-Fi Extenders and Mesh Networks

Another way to boost your Wi-Fi signal is by using Wi-Fi extenders. These devices can significantly increase the reach of your network, ensuring that even the farthest corners of your home have a strong signal. For larger spaces or multi-story homes, mesh networks are an excellent solution. They provide a seamless experience by creating a single, unified network. This means you won’t need to manually switch between different signals as you move around, ensuring a consistent and reliable connection.

router

Practical Placement Tips

Finding the best place for your router involves considering several factors that impact Wi-Fi performance. Here are practical tips to help improve your Wi-Fi coverage.

Addressing Dead Zones

Dead zones are areas in your home where Wi-Fi signals are weak or nonexistent. To tackle this:

  1. Move your router to a central position, closer to these dead zones, if possible.
  2. Use Wi-Fi analyzers or apps to pinpoint exact locations of weak signals.
  3. Install Wi-Fi extenders to boost coverage in specific areas.
  4. Rearrange home layout and furniture placement to minimize signal blockage.

By taking these steps, you can reduce or eliminate dead zones, providing consistent Wi-Fi coverage throughout your home.

Using Ethernet for Stability in Key Areas

For areas that require a stable connection:

  1. Utilize Ethernet cables to directly connect devices to your router.
  2. Position your router near high-usage devices that work best with a wired connection.
  3. Run Ethernet cables through walls or under floors to maintain a tidy appearance.
  4. Consider powerline adapters as an alternative, which use existing electrical wiring for network connectivity.

Ethernet connections can guarantee stability for critical tasks like streaming and gaming, ensuring your activities remain uninterrupted.

Special Considerations

When optimizing Wi-Fi, specific scenarios in your home may need extra attention. These special considerations can enhance your wireless connectivity when addressed properly.

Router Placement in Multi-Story Homes

In homes with multiple floors, router placement becomes more complex. You aim for a central location on the vertical plane. For homes with two stories, placing the router near the ceiling on the first floor or near the floor on the second can help. Direct the signal upwards or downwards to ensure it spreads evenly between floors. Avoid putting your router in the basement as this can limit the signal strength on upper floors.

For buildings with more than two stories, you might need additional strategies. Consider setting up a mesh network or using Wi-Fi extenders on different levels. Make sure to position these devices where they can bridge the signal effectively.

Dealing with Household Appliances and Building Materials

Your home’s materials and appliances can impact Wi-Fi performance. Thick walls made of brick or concrete can block signals. So can large metal appliances like refrigerators and microwaves. Try to position your router away from these materials and devices.

Keep routers clear of water tanks and mirrors as they can disrupt the signal. Place your router in an open space to avoid interference from household items. By considering these factors, you can find the best place for your router and boost your Wi-Fi coverage.

Advanced Solutions and Devices

Deciding on the right Wi-Fi equipment for your home is crucial for optimal internet performance. Here’s a breakdown of the potential devices you might consider for better Wi-Fi coverage.

Choosing Between Different Types of Routers

There are several router types to consider, depending on your specific needs:

  1. Stand-alone Routers – These are common and suitable for small homes with fewer obstacles.
  2. Modem/Routers – Combines a modem and router, ideal for those needing a simple setup.
  3. Long-range Routers – Great for larger homes; they cover wider areas effectively.
  4. Wi-Fi Extenders – Useful for extending the signal to hard-to-reach areas.

Matching the right type of router to your home’s layout and Wi-Fi needs is vital.

Benefits of Mesh Systems for Larger Homes

For homes with multiple floors or complex layouts, mesh systems are highly recommended:

  • Seamless Connectivity: Mesh networks use multiple devices to create a single, continuous network.
  • Expandable Coverage: You can add more units to improve coverage in specific areas.
  • Uniform Network: These systems don’t require separate network names, simplifying connectivity.

Mesh systems ensure efficient Wi-Fi distribution and can significantly enhance internet performance across large homes.

Best Location for Wifi Router: Strategic Placement Tips

Importance of Router Placement

Choosing the best location for wifi router is crucial for ensuring optimal performance. The position of your router greatly influences the reliability and reach of your Wi-Fi network. When placed wisely, a router can provide strong connectivity throughout your living space, making it easier for all devices to access the internet efficiently.

A good spot ensures strong performance across the home. This can help avoid common issues such as weak signals or frequent dropped connections, which can be frustrating for users. In this discussion, we will delve into how router placement affects your overall Wi-Fi experience and explore effective strategies to sidestep dead zones, ensuring seamless internet access in every corner of your home.

best location for wifi router

How Router Location Affects Wi-Fi Signal

The router’s location can make or break your Wi-Fi experience. A central spot can cover more area, giving better service. High places increase the router’s range, while spots away from electronics reduce signal interference. Avoiding obstructions, like thick walls, can prevent signal loss. Detailed positioning takes these factors into account for the best results.

Avoiding Wi-Fi Dead Zones

Dead zones are areas where Wi-Fi doesn’t reach well. To avoid them, consider placing your router centrally. Keep it elevated to dodge blockage from furniture. Stay clear of metal appliances and mirrors that might deflect signals. Sometimes, signal extenders or mesh networks can solve dead zone issues in large or complex homes.

Key Considerations for Placement

Finding the optimal location for your Wi-Fi router is crucial for ensuring a strong and consistent signal throughout your home. Here are some key factors to keep in mind when deciding where to place your router.

Analyzing Home Layout and Signal Obstacles

Understanding your home’s layout is the first step in effective router placement. Take note of the following:

  • Walls and Barriers: Thick walls, especially those made of concrete or brick, can significantly impede Wi-Fi signals. Ideally, place the router in an area where fewer walls obstruct the path to your devices.
  • Large Furniture: Items such as bookshelves, cabinets, and entertainment centers can absorb or block signals. Keep the router clear of these obstructions to maximize its coverage.
  • Metal Objects: Metal can reflect and absorb signals, so avoid placing the router near large metal appliances like refrigerators or file cabinets.

Selecting the Best Room for Your Router

Choosing the right room for your router is essential for optimal performance.

  • Central Location: A centrally located room allows for the best distribution of your Wi-Fi signal throughout your home. Rooms such as living rooms or home offices are often ideal.
  • Avoid Corners and Closets: Placing the router in a corner or a closet can confine its signal to a restricted area, making it hard for devices situated farther away to maintain a good connection. Open spaces yield better results.

Router Placement in Multi-Storey Homes

For homes spanning multiple floors, special considerations are necessary to ensure strong coverage on all levels.

  • High Placement: Place your router high on the first floor or low on the second floor. This positioning aids in distributing the signal vertically throughout the home.
  • Avoiding the Basement: Do not place the router in the basement. Signals radiate downward and may struggle to reach upper floors, leading to weak connectivity where it’s needed most.

By considering these factors, you can significantly enhance your Wi-Fi performance, ensuring a reliable connection for all your devices across your home.

wifi router

Tips for Optimizing Router Location

Optimizing your router’s location boosts Wi-Fi performance. Let’s explore how.

Elevating Your Router for Improved Coverage

Place your router higher to extend its range. Use shelves or wall mounts for elevation. This approach avoids large furniture that could block signals.

Minimizing Interference from Household Appliances

Keep routers away from microwaves and TVs. These can disrupt your Wi-Fi signal. Choose spots distant from such electronics for the best location for wifi router.

Strategic Placement to Avoid Physical Obstructions

Find clear paths for your Wi-Fi signal. Position the router where walls and big objects don’t block its path. A spot with minimal obstructions ensures stronger connections.

Additional Tools for Enhanced Performance

Enhanced Wi-Fi performance may require more than optimal router placement. Tools like Wi-Fi extenders, mesh networks, and Ethernet connections can bolster your Wi-Fi coverage and quality, especially in challenging home layouts.

Utilizing Wi-Fi Extenders

Wi-Fi extenders, also known as repeaters, boost the reach of your Wi-Fi signal. They pick up the signal from your router and rebroadcast it. This increases the signal’s reach to distant corners of your home. Ideal for larger areas, extenders can help eliminate dead zones without rearranging your entire setup. Remember, placement is crucial. Set extenders where your Wi-Fi begins to weaken but before it entirely fades.

The Role of Mesh Networks in Larger Homes

For extensive or multi-storey homes, a mesh network is highly effective. This system involves multiple router-like devices spread around your home. These devices work together to cover a wide area under a single network. Unlike extenders, mesh networks use the same network name and password. This seamless connection ensures no manual switching is needed as you move throughout your home.

Using Ethernet Connections in Dead Zones

Sometimes, certain areas in a home can’t sustain a stable Wi-Fi connection due to thick walls or other big obstructions. In these cases, using Ethernet cables is a reliable alternative. Direct connections with Ethernet ensure the utmost stability and speed, essential for activities like gaming or HD streaming. Position your router in a central location and then run Ethernet cables to the dead zones. This method bypasses physical barriers effectively.

Place wifi router

Frequently Asked Questions

How to Relocate Your Router for Better Performance

Moving your router can boost your Wi-Fi. First, find a central spot free from obstructions. Elevate it on a shelf to extend the signal range. Keep it clear of electronics like microwaves that cause interference. If on multiple floors, place it near the ceiling or floor to cover both levels. Connect extra devices with Ethernet cables to enhance coverage.

Choosing Between Different Router Types

Decide on a router based on your home’s size. A stand-alone router suits small spaces best. Larger homes may need mesh networks for widespread coverage. Use extenders to reach spots your router can’t cover. Check router specs for range and features that fit your internet needs.

Adjustments for Different Types of Homes

For multi-storey homes, central placement helps spread the Wi-Fi. In homes with thicker walls, mesh networks or Ethernet cables work well. For long homes, consider placing extenders strategically. Check for obstructions and interference sources when deciding on router position.

Final Thoughts

As we wrap up, let’s recap the key points for optimal router placement. Implementing these strategies will help enhance your Wi-Fi network’s reach and stability.

Summarizing Best Practices for Router Placement

To achieve the best Wi-Fi performance, remember these tips:

  1. Place your router in a central location for even coverage.
  2. Keep the router elevated off the floor to improve its range.
  3. Avoid physical obstructions like walls and large furniture.
  4. Steer clear of electronics that can interfere with the signal.
  5. Use Wi-Fi extenders, mesh networks, or Ethernet cables as needed.

Following these guidelines ensures a strong, reliable Wi-Fi connection in every room.

Long-Term Benefits of Optimal Router Positioning

When you choose the best location for wifi router, you invest in your network’s future. Here are the lasting advantages:

  1. Consistent and quick internet access in your entire home.
  2. Fewer dead zones, meaning seamless online experiences.
  3. Reduced interference, leading to stable connectivity.
  4. The potential for lower stress, with less troubleshooting needed.

By considering home layout, signal obstacles, and supplementing with the right tools, you can enjoy robust Wi-Fi performance for years to come.

« Older posts