making our professional lives more efficient, productive, and interconnected.

Month: May 2024 (Page 1 of 3)

Complete Guide to Routers: Setting Up Your Router

What is a Router?

The Basics of a Router

A router is a fundamental device that connects multiple devices to the internet and each other within a network. It acts as a traffic director, guiding data packets efficiently between devices and the internet. The role of a router might seem simple, but it is crucial for any home or office network. Without a router, devices would have difficulty communicating and accessing the internet consistently. Most routers include both wired and wireless capabilities, providing versatility in how devices connect.

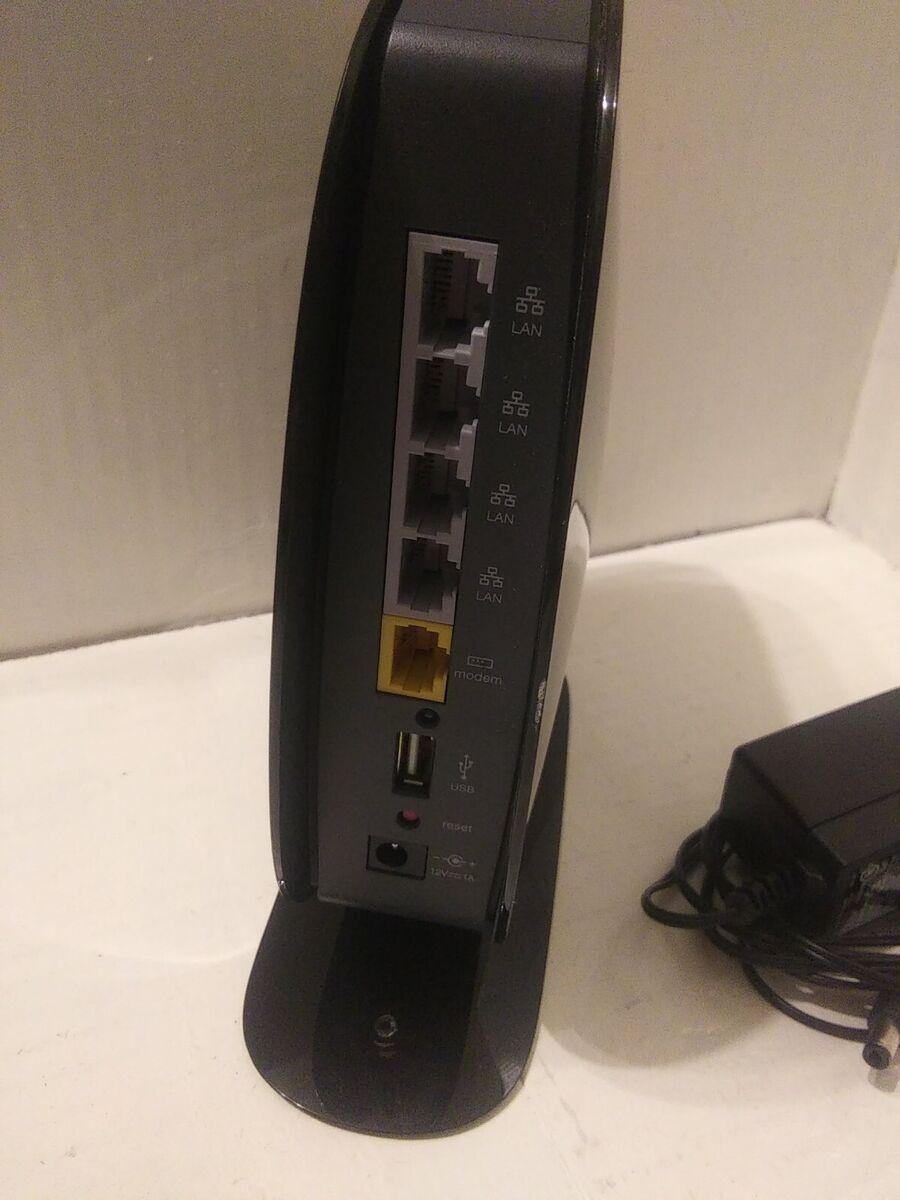
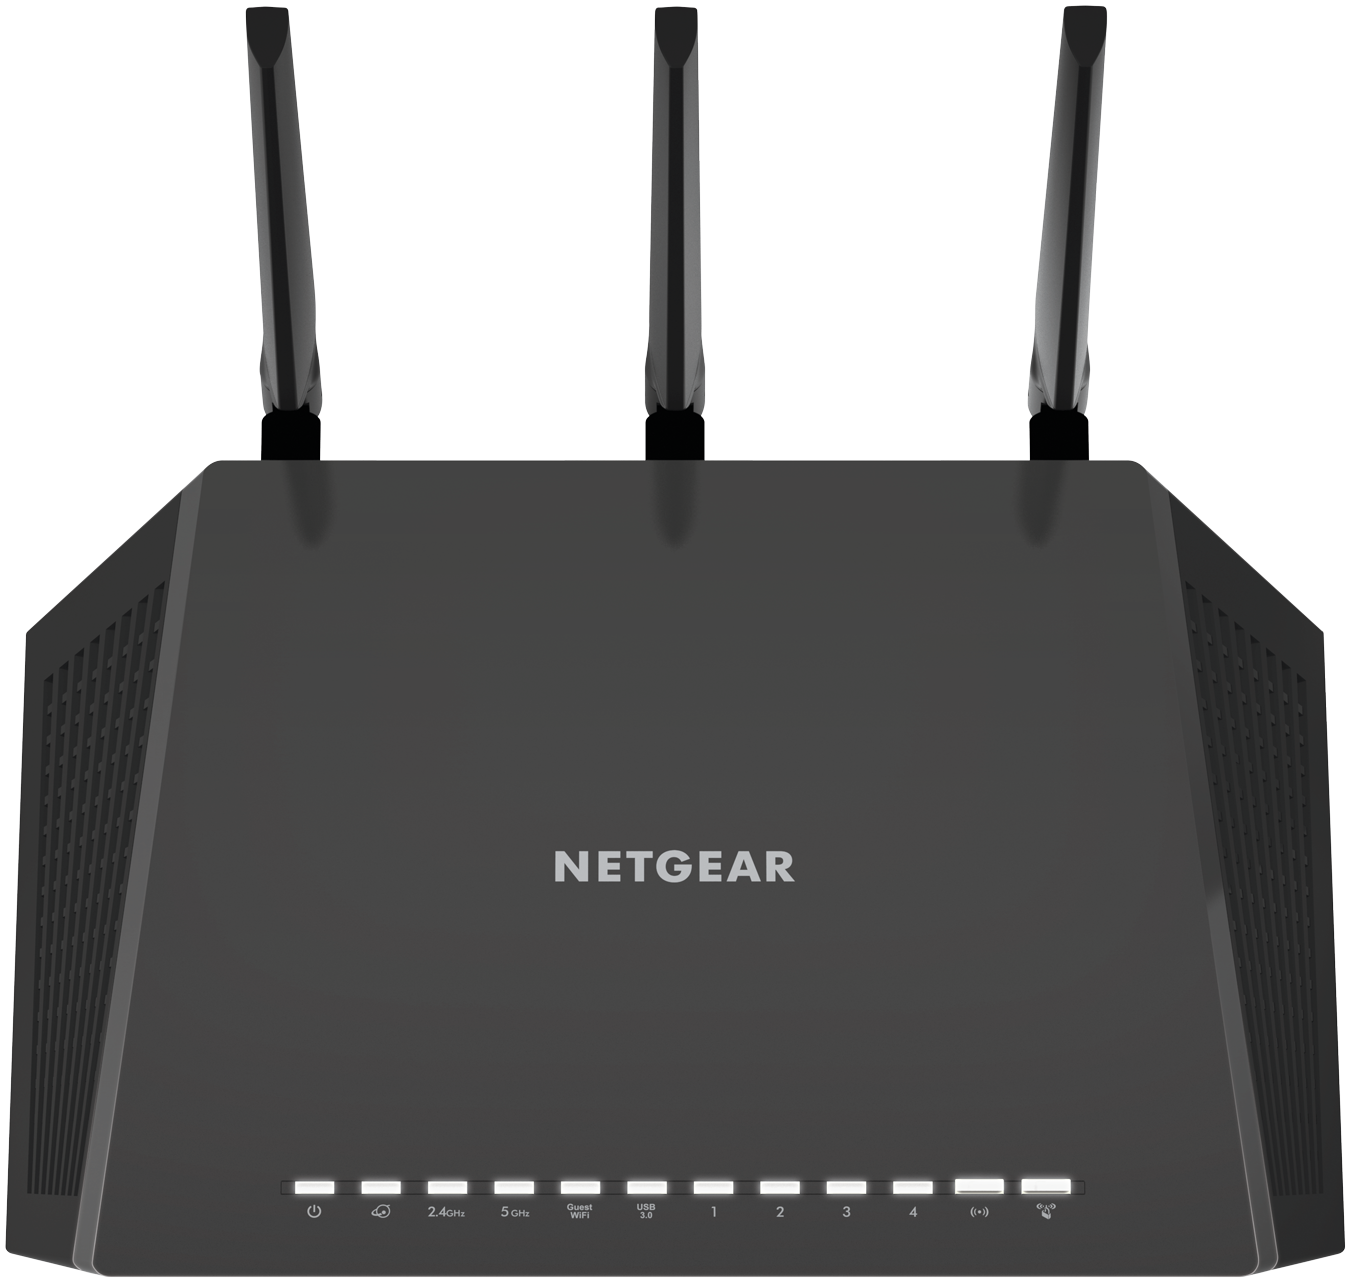
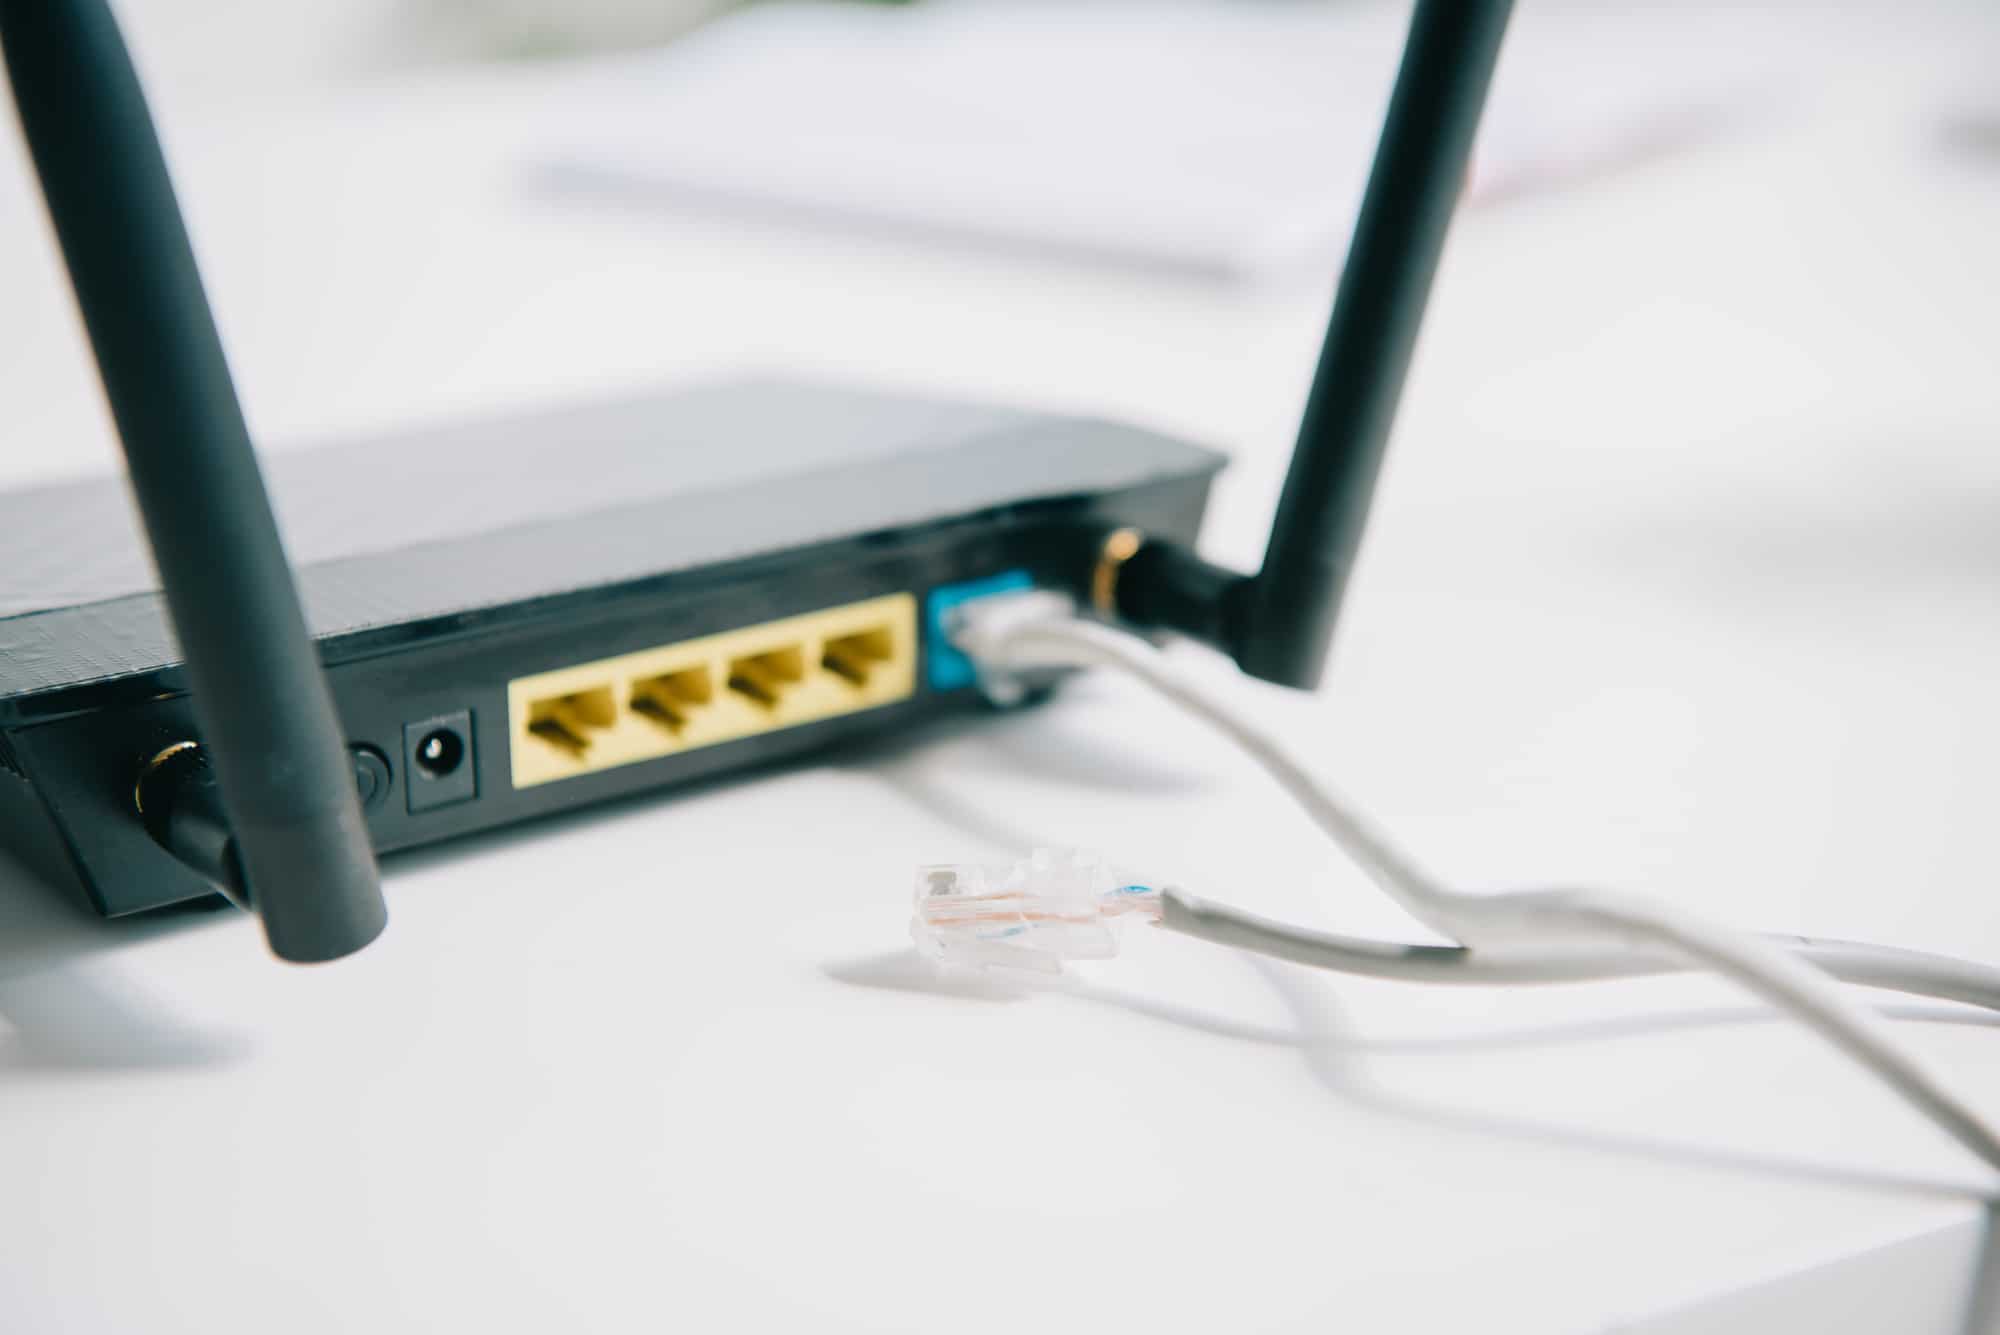
Modern routers come with several features that enhance network performance and security. They typically include multiple Ethernet ports, allowing wired connections for faster, more stable connections. They also support Wi-Fi, which enables wireless connectivity for smartphones, laptops, and other devices. Routers use different frequency bands, such as 2.4 GHz and 5 GHz, to manage wireless connections. These bands help devices achieve optimal performance depending on their requirements and distance from the router.

Understanding the basics of a router helps appreciate its importance in a network setup. It is the cornerstone of connectivity, ensuring that devices can operate smoothly and efficiently. Knowing its key components and functions allows for better decision-making when selecting a router for specific needs.

How Routers Work

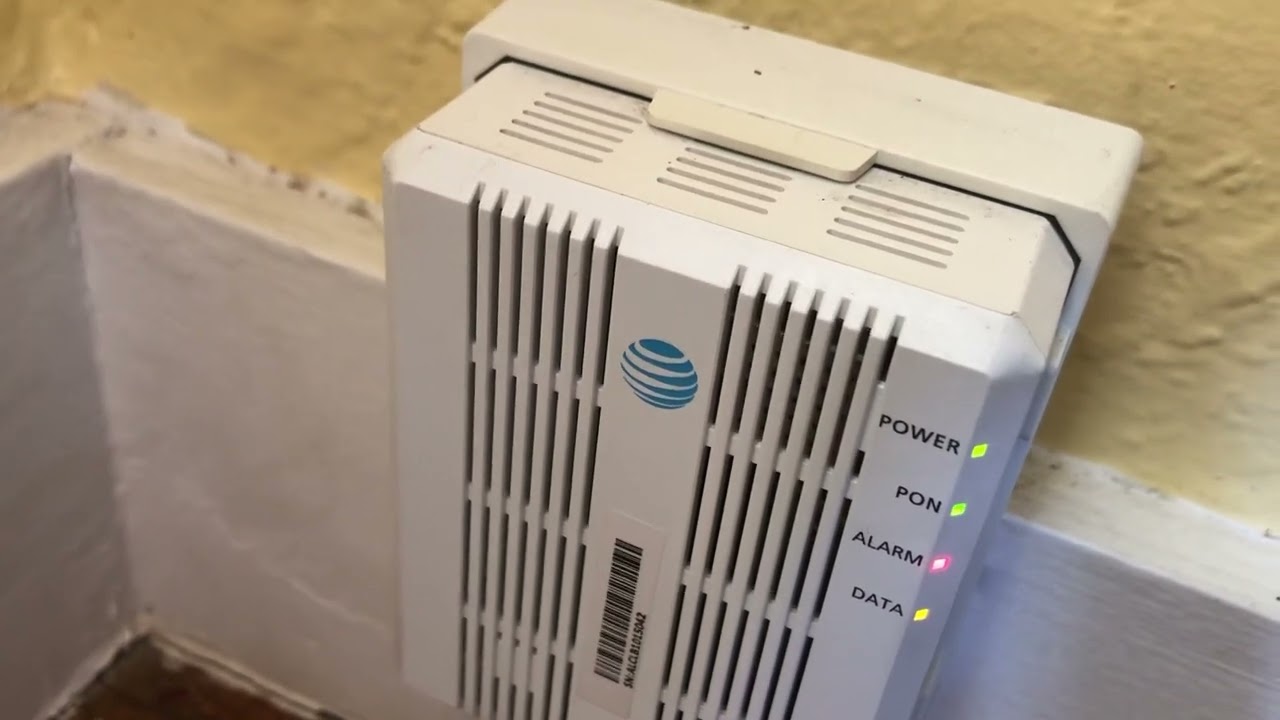
Routers play a crucial role in making your network functional and efficient. When you connect to the internet, your modem brings in the data from your Internet Service Provider (ISP). The router takes this data and distributes it to the devices on your network, ensuring that each device receives the information it requests. Routers use IP addresses to identify devices and direct data packets correctly. Every device on your network gets a unique IP address, enabling smooth communication with the router and the internet.

Routers also ensure network security by acting as a barrier between your devices and potential external threats. Most routers come with built-in firewalls and other security features that protect your network from unauthorized access and cyber-attacks. Additionally, routers can prioritize certain types of traffic, known as Quality of Service (QoS). This feature ensures that high-priority activities, like video conferencing or gaming, receive the necessary bandwidth for optimal performance.

Understanding how routers work gives insight into their importance in network management. They are not just conduits for internet access but also serve roles in security and performance optimization. Knowing these functionalities can help in choosing the right router and configuring it effectively.router guide

Choosing the Right Router

Key Features to Consider

When choosing a router, it’s essential to consider several key features to ensure it meets your needs. One of the primary factors is the router’s speed and coverage. Look for routers that support the latest Wi-Fi standards, such as Wi-Fi 5 (802.11ac) or Wi-Fi 6 (802.11ax), which offer faster speeds and better coverage. These standards provide improved performance, especially in homes with multiple devices and high bandwidth requirements.

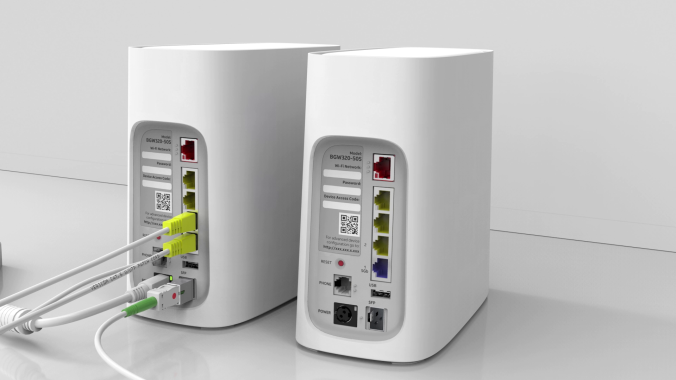
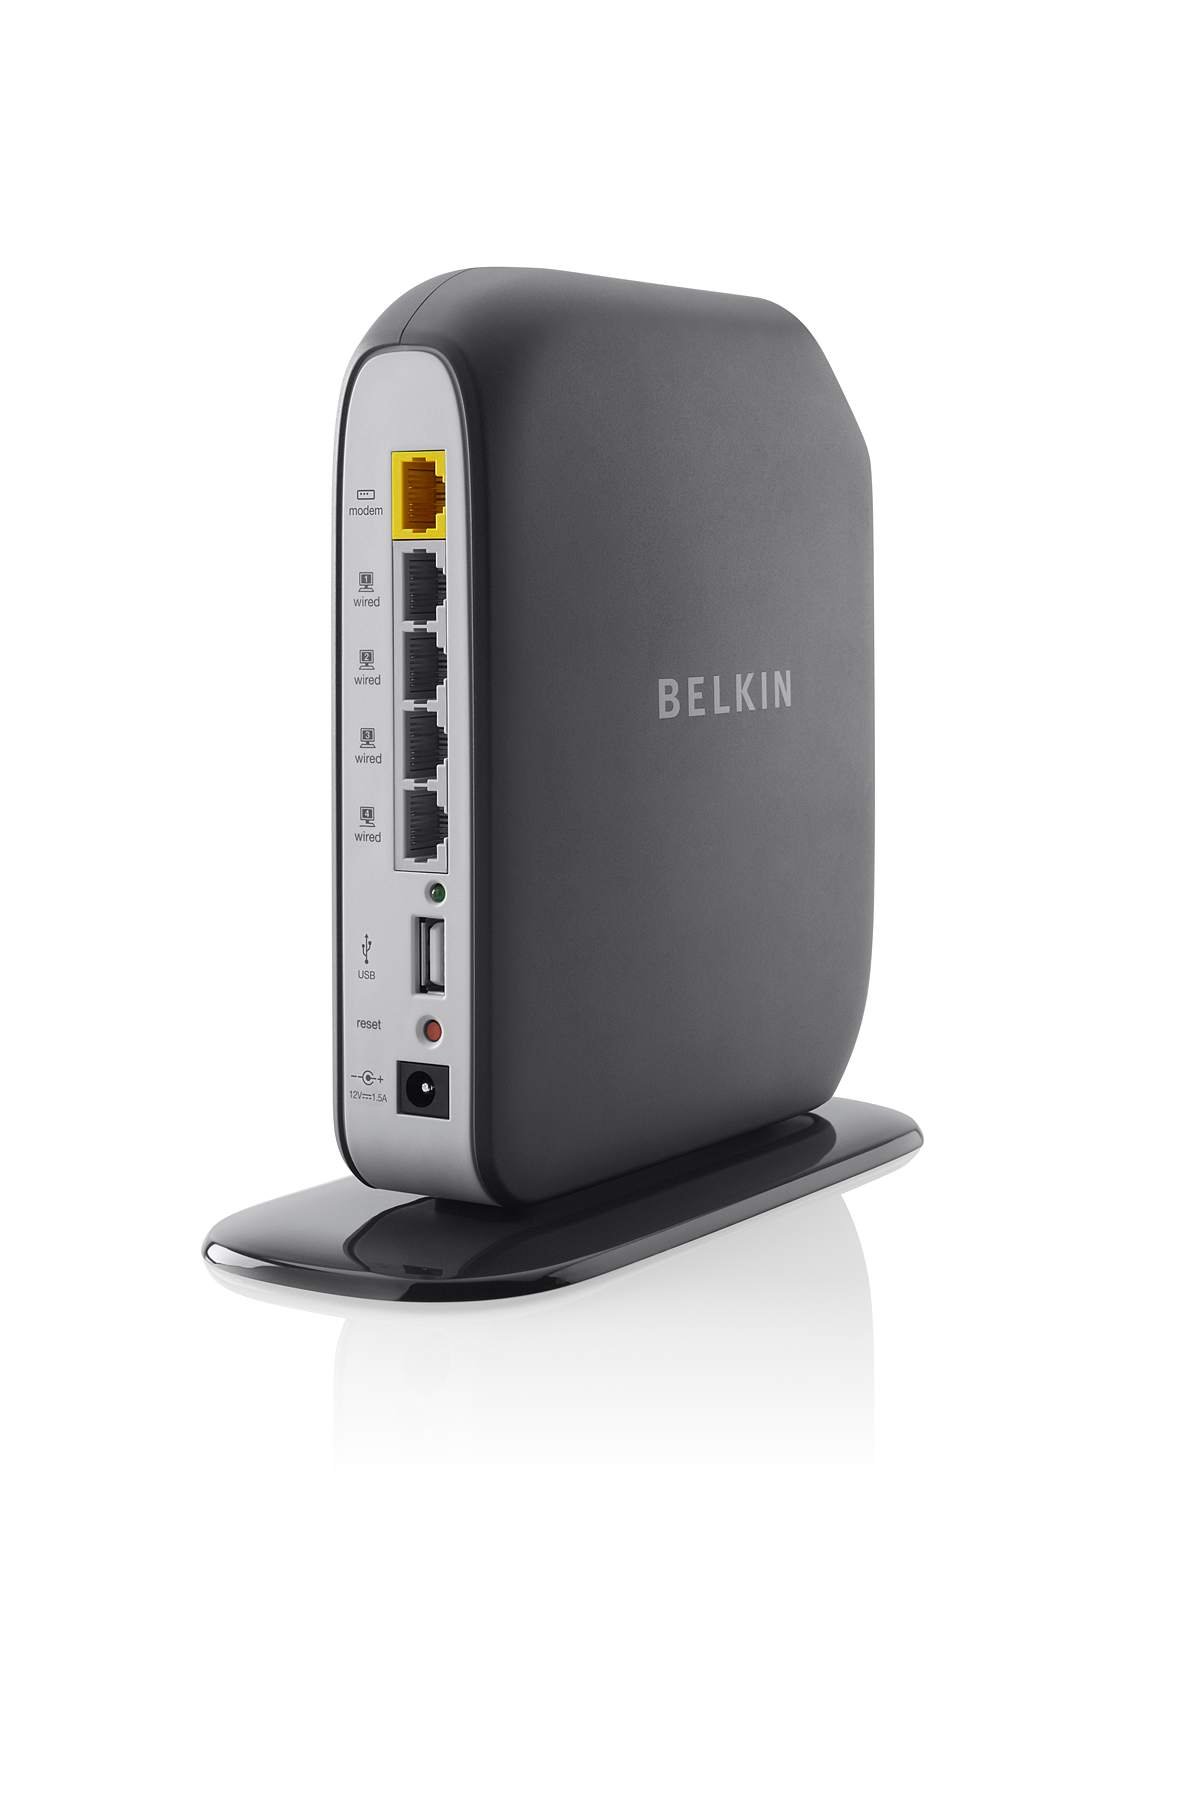
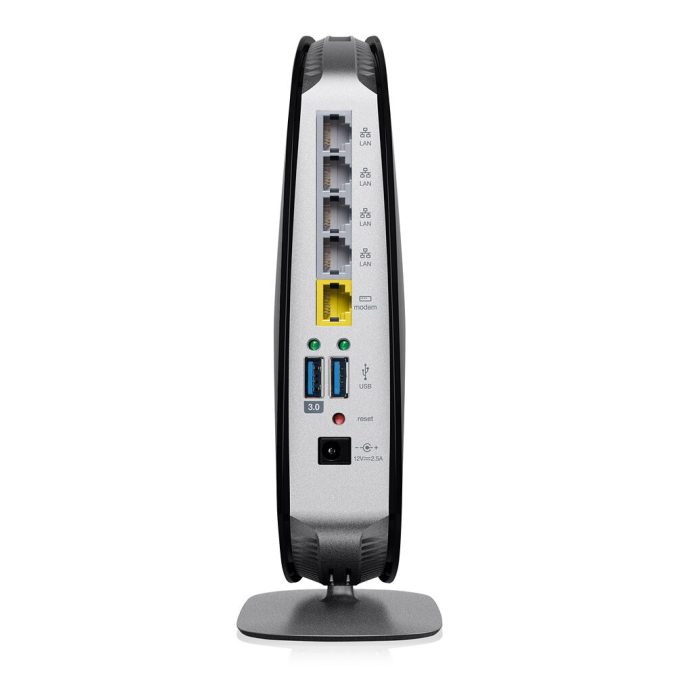
Another crucial feature is the number of Ethernet ports. If you have devices that require wired connections like desktop computers or gaming consoles, ensure the router has enough ports. For a more reliable wireless connection, consider a dual-band or tri-band router. Dual-band routers operate on both 2.4 GHz and 5 GHz frequency bands, offering flexibility and reducing interference. Tri-band routers add an additional 5 GHz band, which is beneficial for households with many devices.

Security features are also vital. Look for routers that offer WPA3 encryption, guest network capabilities, and built-in firewalls. These features protect your network from potential threats and unauthorized access. Additionally, some routers come with parental control options, allowing you to manage and restrict internet access for specific devices.

Considering these key features ensures you choose a router that meets your specific needs. Whether it’s for streaming, gaming, or general internet use, selecting the right router enhances your network’s performance and security.router guide

Understanding Router Specifications

Router specifications can be overwhelming, but understanding them is crucial for making an informed decision. The Wi-Fi standard is one of the essential specifications to consider. Wi-Fi 6 (802.11ax) is the latest standard, offering faster speeds, better performance, and improved efficiency compared to previous standards. If you have multiple devices or a large household, opting for a Wi-Fi 6 router can significantly enhance your network’s performance.

Another critical specification is the router’s speed, typically measured in megabits per second (Mbps). The speed rating represents the maximum data transfer rate the router can handle. However, real-world speeds are usually lower due to various factors like interference and distance. Look for routers with higher speed ratings, especially if you have high-bandwidth activities like streaming 4K videos or online gaming.

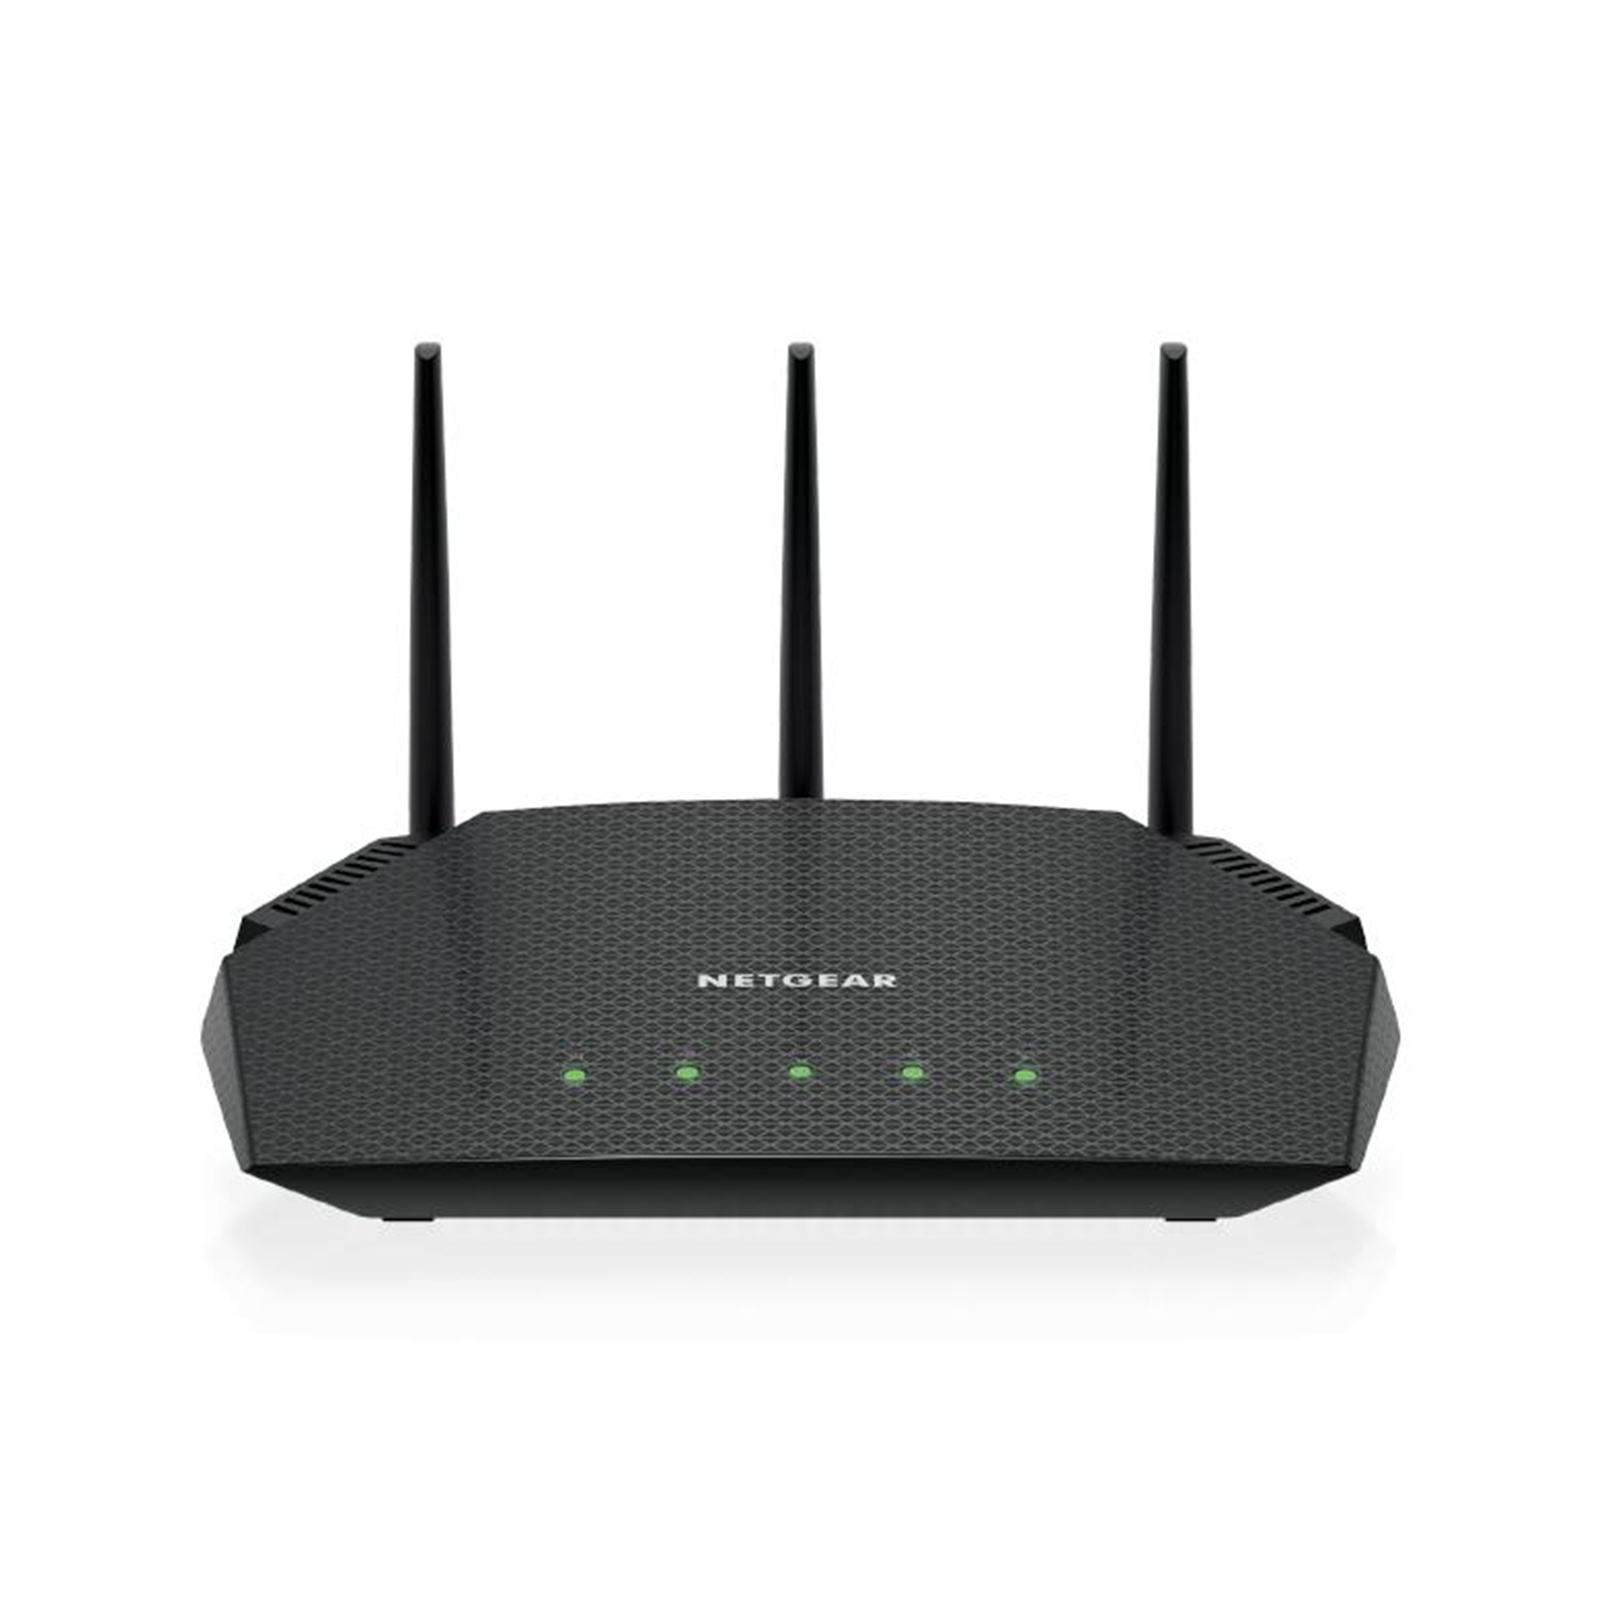
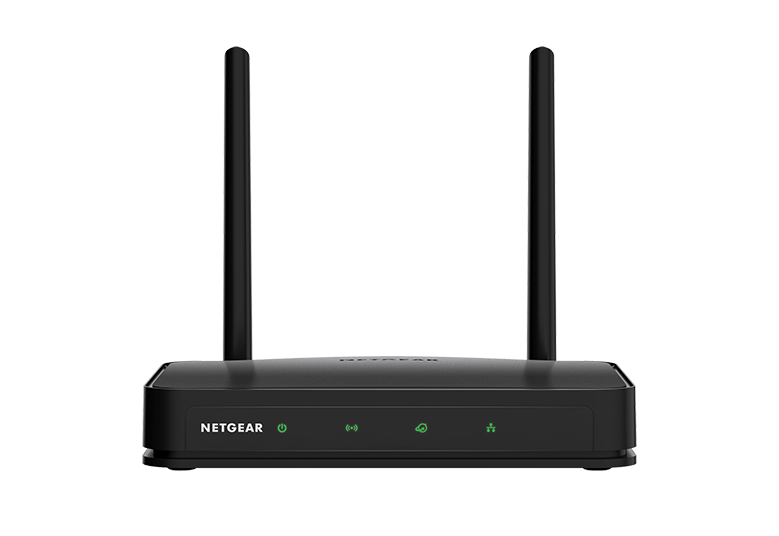
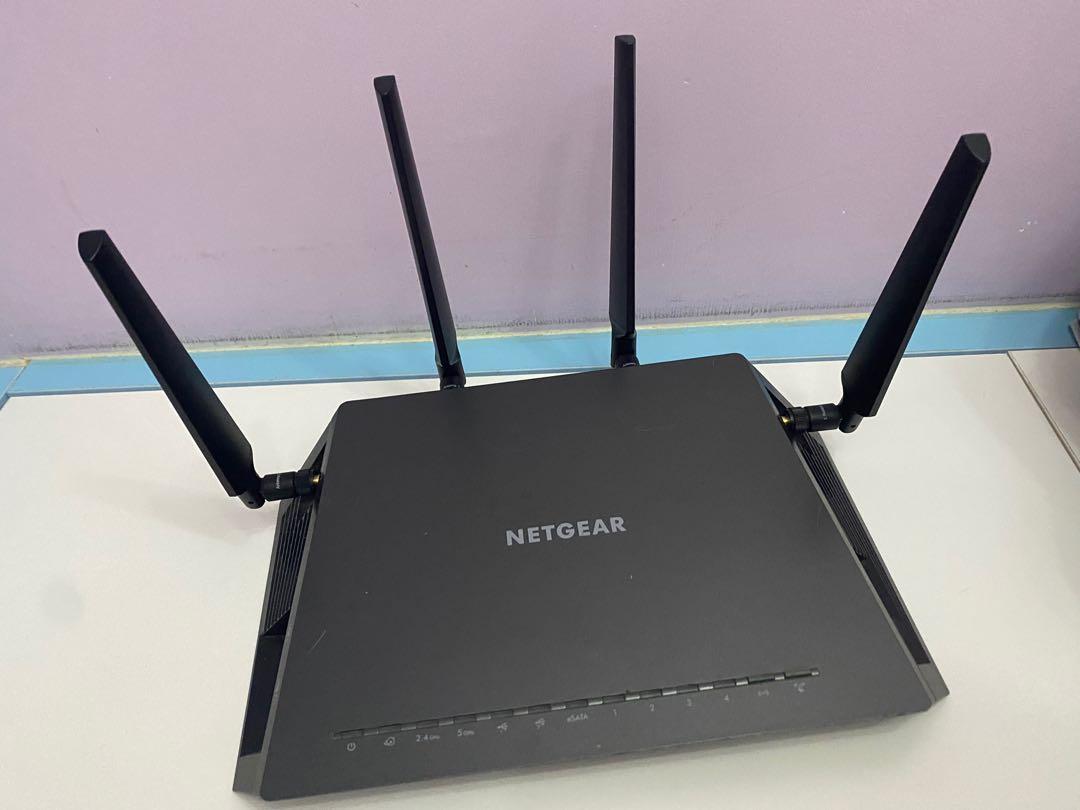
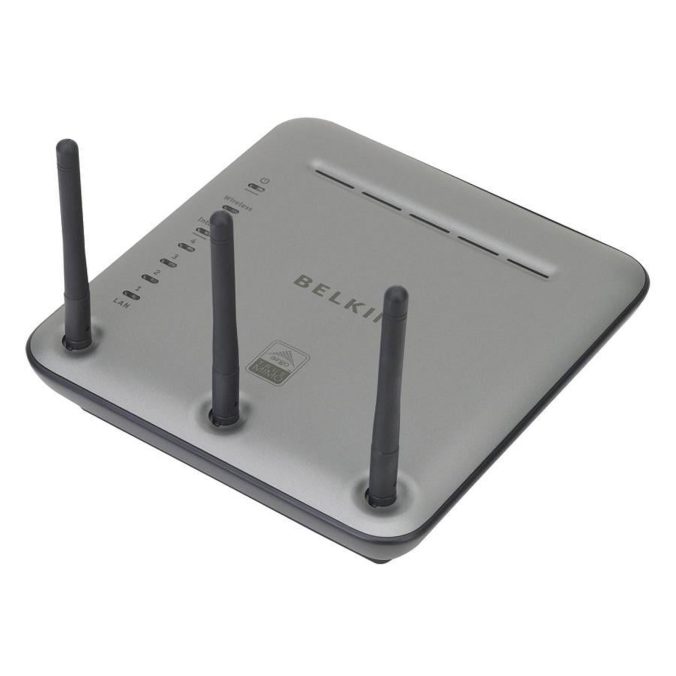
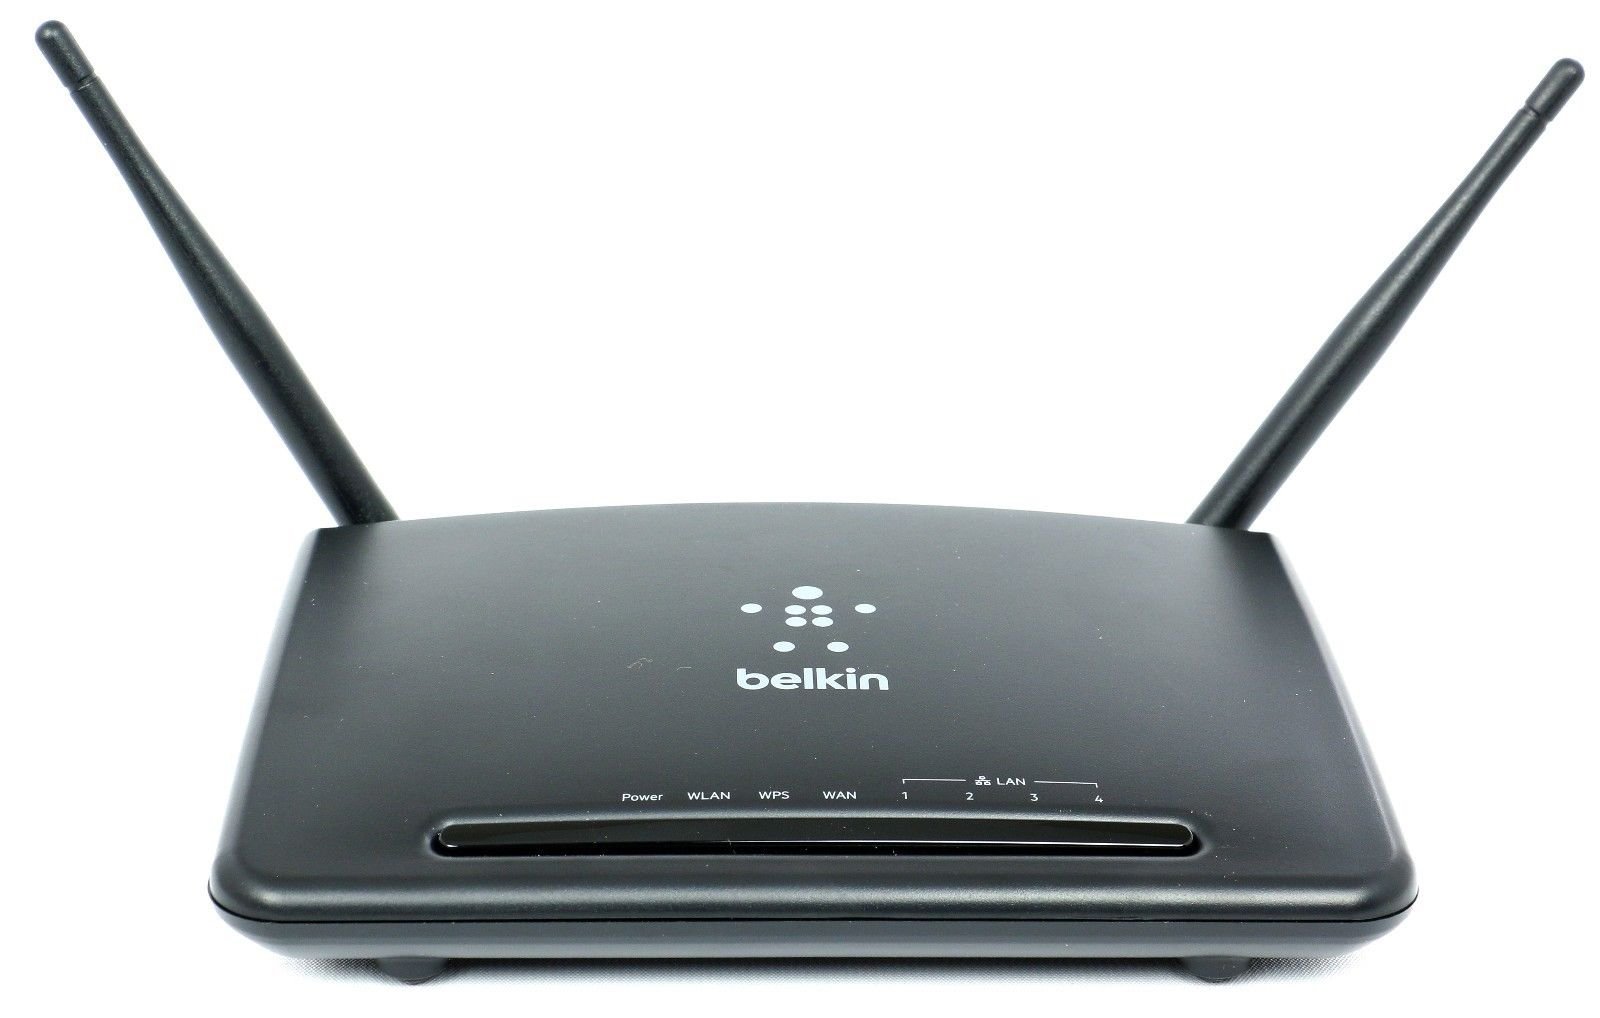
The number of antennas also impacts the router’s performance and coverage. Routers with multiple antennas provide better signal strength and coverage, ensuring devices throughout your home receive a stable connection. Some advanced routers come with beamforming technology, which directs the Wi-Fi signal towards specific devices, enhancing performance and range.

Understanding these specifications helps in choosing a router that aligns with your requirements. By considering the Wi-Fi standard, speed rating, and antenna configuration, you can select a router that provides optimal performance and coverage for your home network.

Setting Up Your Router

Initial Configuration Steps

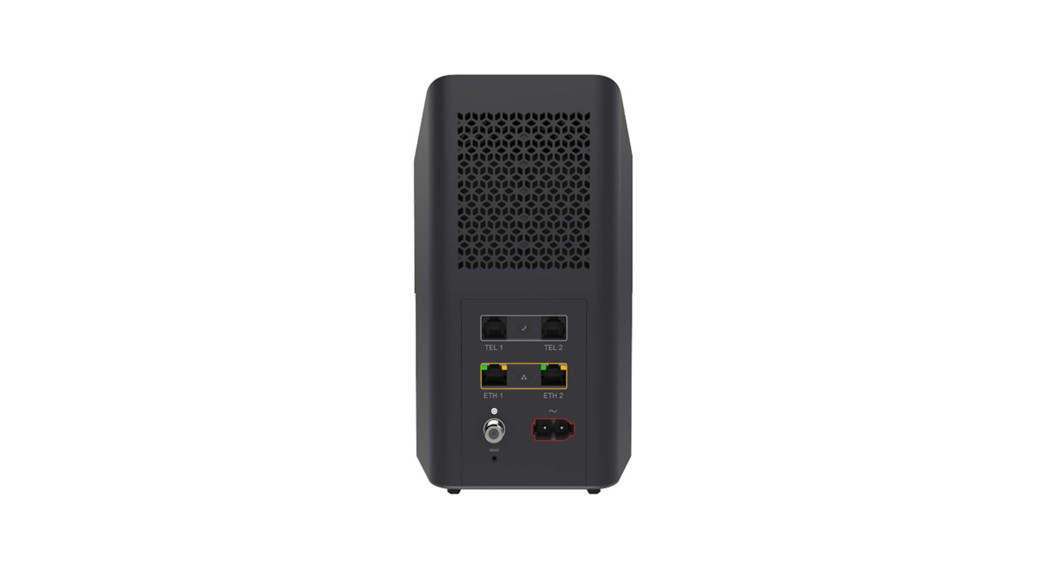
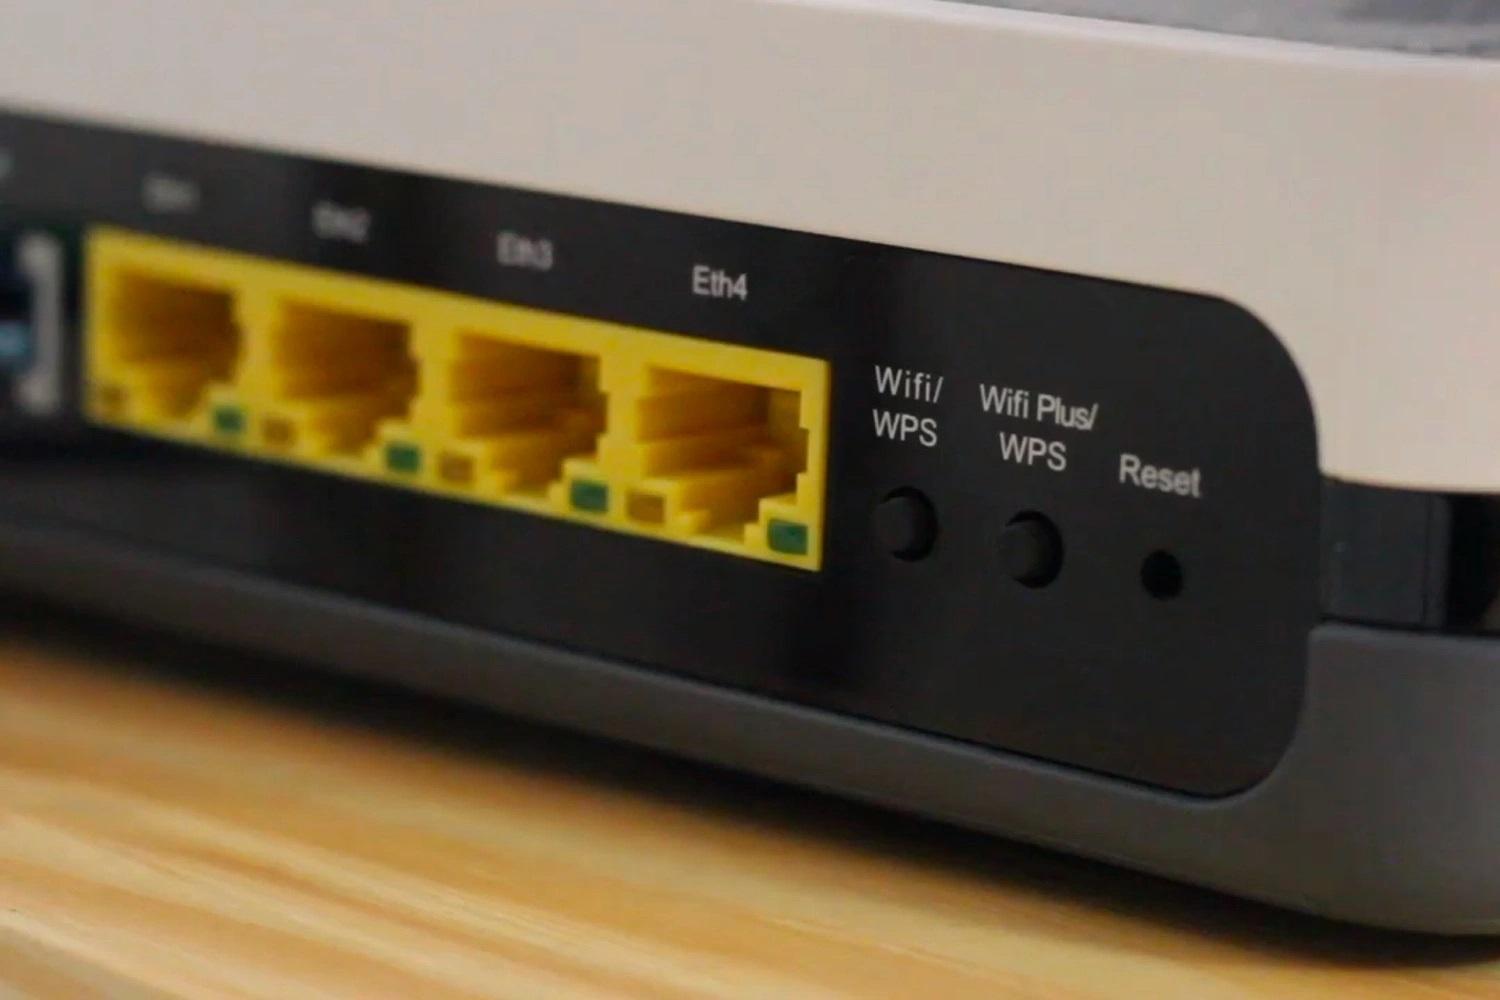
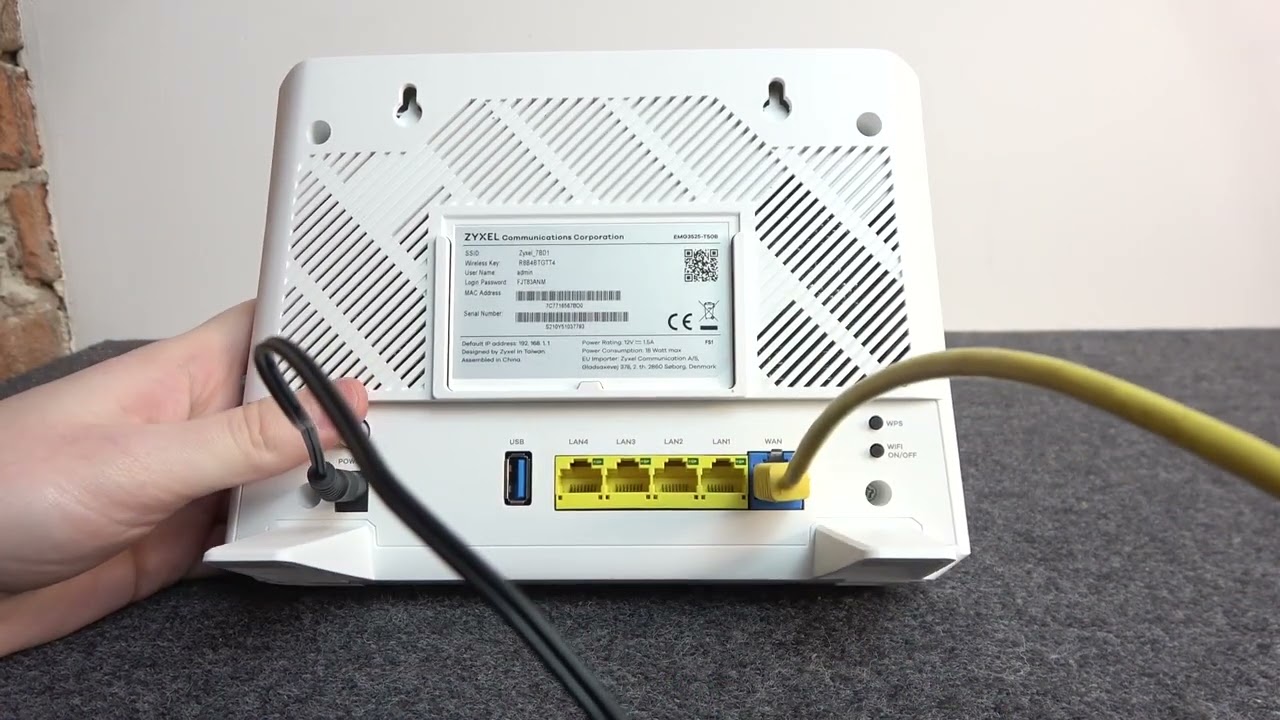
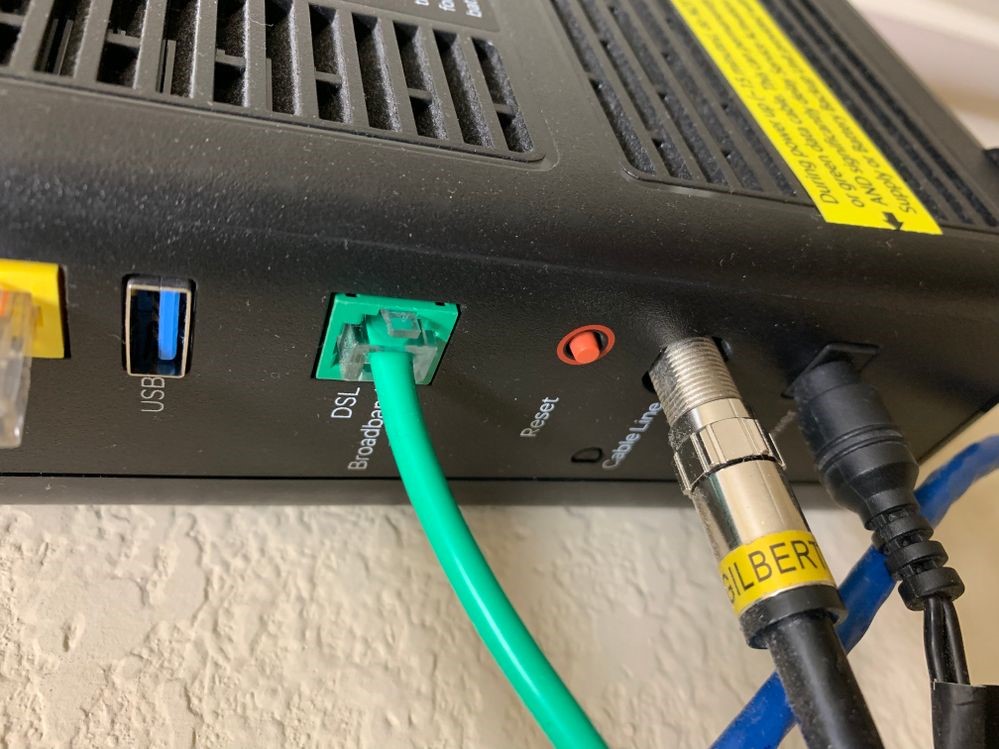
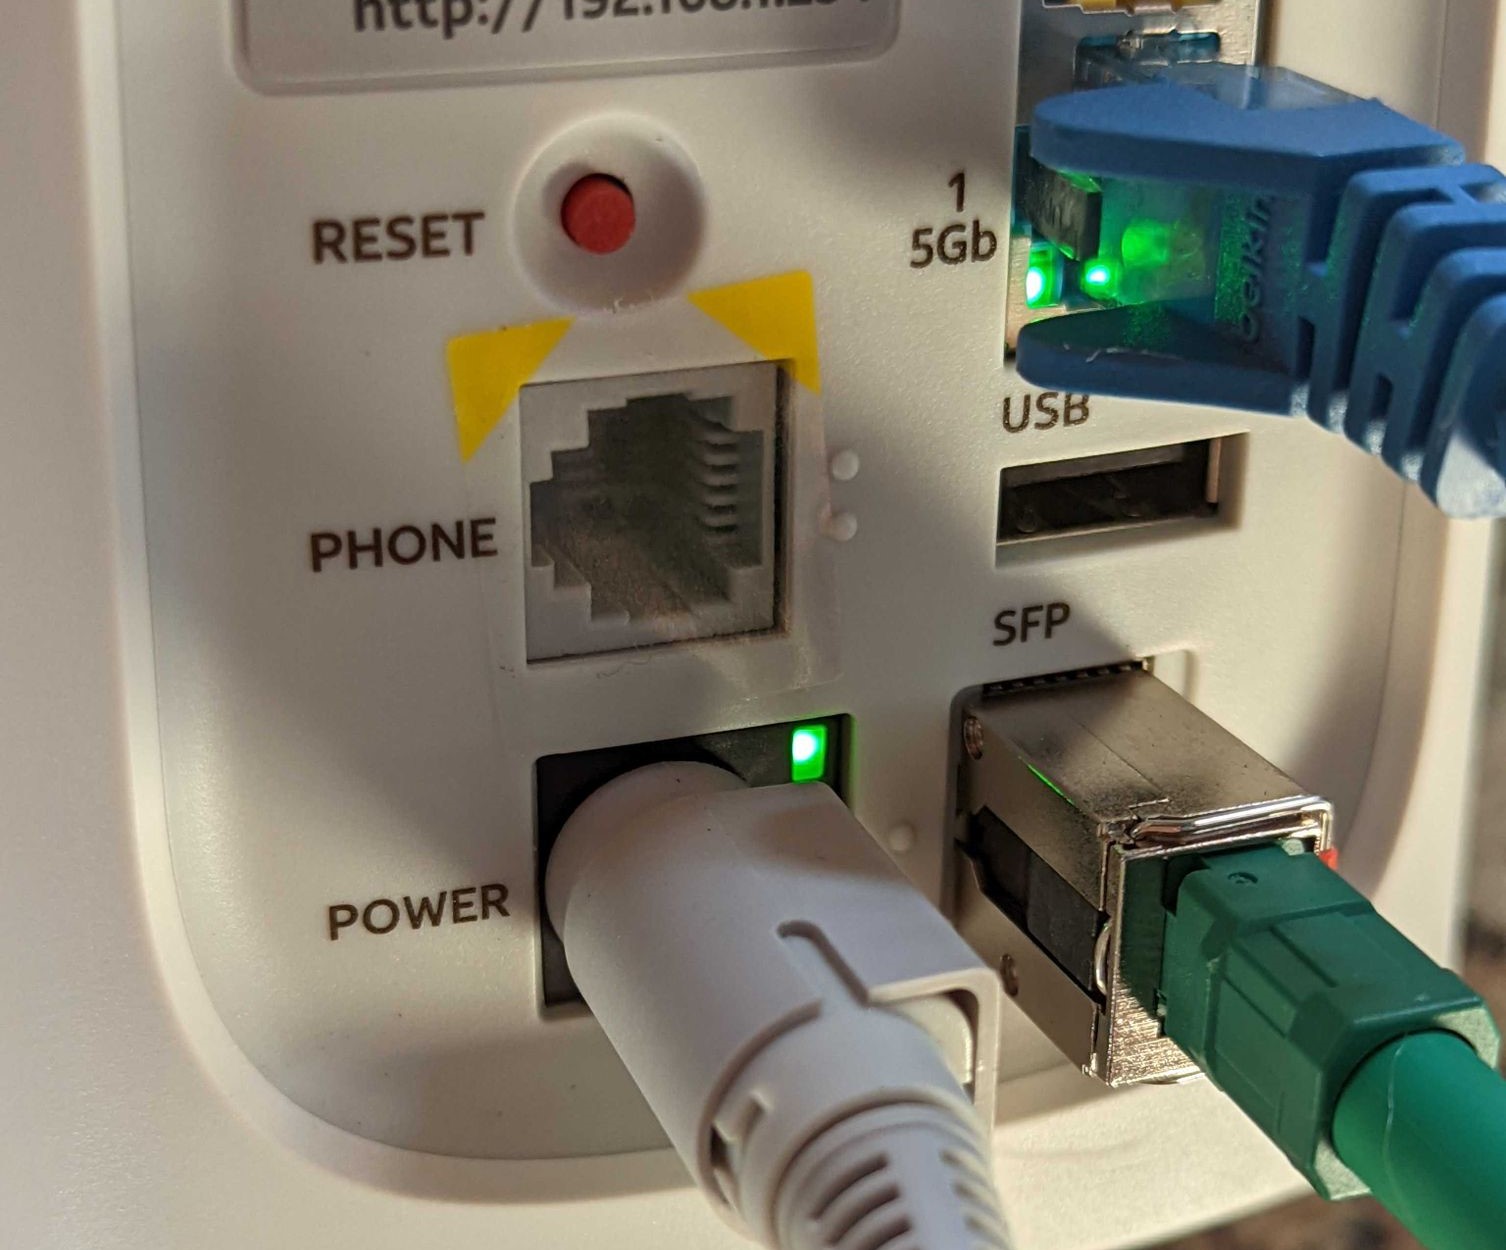
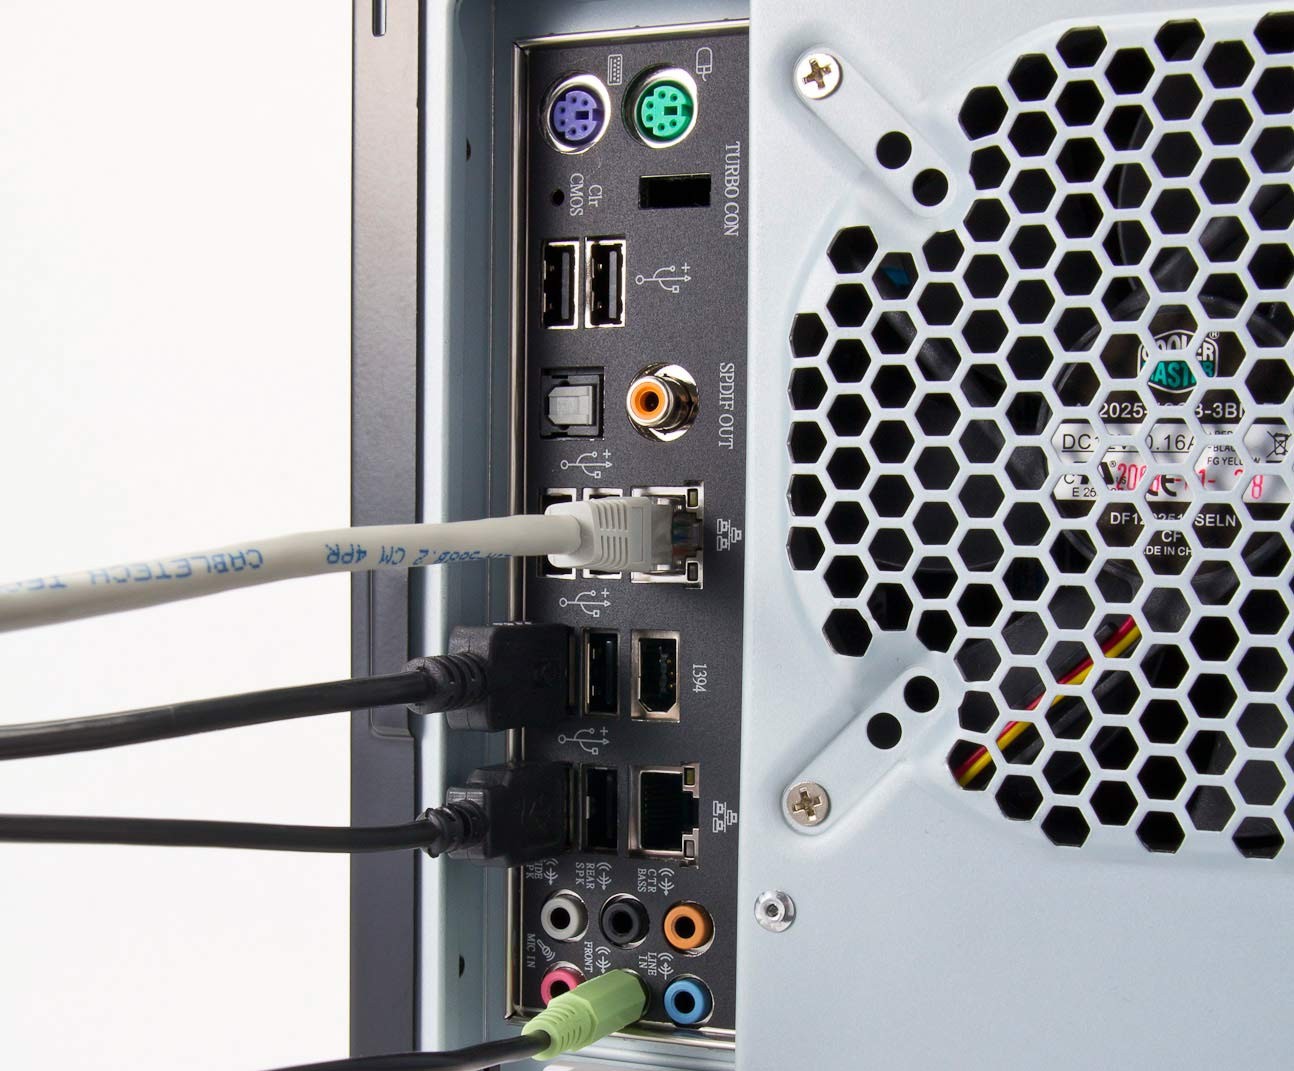
Setting up your router involves several initial configuration steps to ensure it functions correctly. First, connect the router to your modem using an Ethernet cable. Plug one end of the cable into the modem and the other into the router’s WAN (Wide Area Network) port. This connection allows the router to receive internet data from the modem.

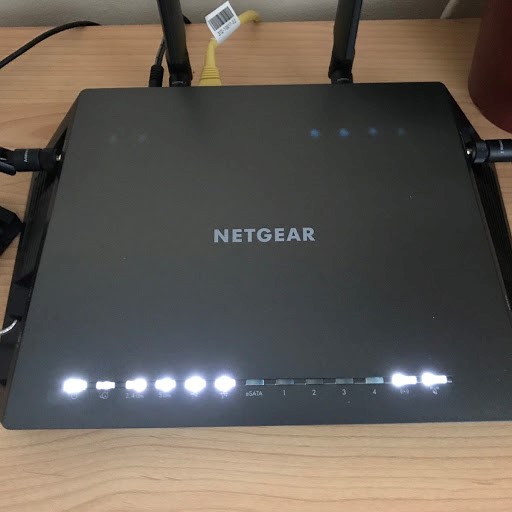
Next, power on the router by plugging it into a power outlet. Wait for the router’s indicator lights to stabilize, indicating it is ready for configuration. You can then connect a computer to the router using another Ethernet cable or through Wi-Fi.

Access the router’s web interface by typing its default IP address into a web browser. Common IP addresses for routers are 192.168.1.1 or 192.168.0.1. Log in using the default username and password, usually found in the router’s manual or on a sticker on the device. Once logged in, follow the setup wizard to configure your router’s settings, such as Wi-Fi network name (SSID) and password.

During the setup process, ensure you update the router’s firmware to the latest version. Firmware updates often include performance improvements, new features, and important security patches. Navigate to the firmware update section in the router’s web interface and follow the instructions to download and install any available updates.

Following these initial configuration steps ensures your router is set up correctly and ready to provide a reliable internet connection for your devices.router guide

Advanced Configuration Tips

After completing the initial setup, you can explore advanced configuration options to optimize your router’s performance and security. One useful feature is Quality of Service (QoS), which prioritizes certain types of traffic, such as video streaming or online gaming. Enabling QoS ensures these activities receive the necessary bandwidth, reducing lag and buffering.

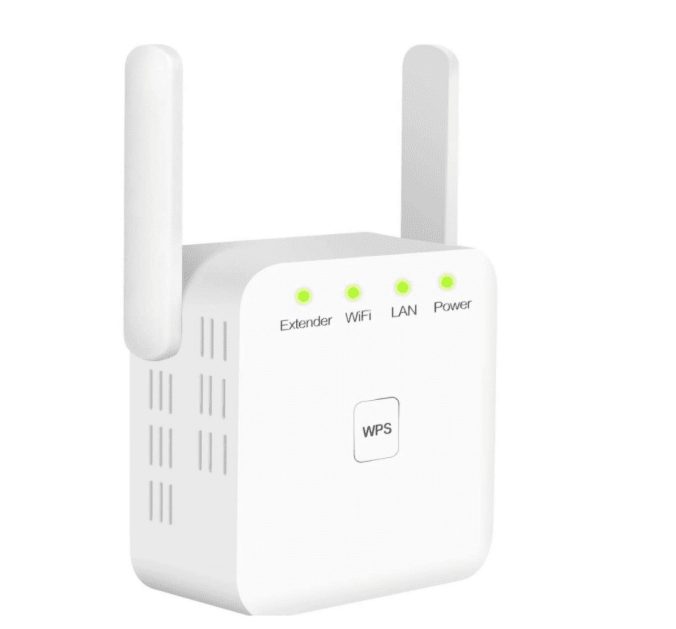
Another advanced feature is the creation of a guest network. A guest network allows visitors to connect to the internet without accessing your main network. This adds an extra layer of security by isolating guest devices from your personal devices and data.

Consider enabling parental controls if you have children. Parental controls allow you to restrict access to specific websites and manage internet usage for individual devices. This feature ensures a safe online environment for your family.

Regularly updating your router’s firmware is essential for maintaining performance and security. Set up automatic updates if your router supports this feature, ensuring you receive the latest improvements and patches.

Lastly, periodically review connected devices and monitor network usage. Most routers provide a list of connected devices in the web interface, allowing you to identify any unauthorized connections. Disconnect unfamiliar devices and change your Wi-Fi password if you suspect unauthorized access.

Implementing these advanced configuration tips enhances your router’s functionality, security, and overall performance. By regularly managing and optimizing your router settings, you can ensure a smooth and secure internet experience for all connected devices.

Conclusion: Maximizing Your Router’s Potential

Routers are fundamental devices for home and office networks, providing internet connectivity and ensuring device communication. Understanding the basics of routers, recognizing key features, and knowing how to set them up are crucial steps in maintaining a high-performance network.

Choosing the right router involves assessing your needs, considering essential features like Wi-Fi standards, speed, and security options. Understanding router specifications helps in making an informed decision that aligns with your specific requirements.

Setting up your router involves initial configuration steps to ensure proper functionality. Exploring advanced configuration options like QoS, guest networks, and parental controls further optimizes your network performance and security.

By following this comprehensive guide, you can maximize your router’s potential, ensuring a reliable and secure internet connection for all your devices. Whether for work, entertainment, or daily communication, a well-configured router enhances your overall digital experience.

Troubleshooting a Non-Functional Netgear Router

Introduction to Netgear Routers

Importance of Reliable Internet

In today’s digitally connected world, reliable internet access is crucial for both personal and professional activities. With a stable internet connection, individuals can work remotely, stream entertainment, engage in online learning, and connect with friends and family. As such, any disruption to your internet connection, such as a malfunctioning router, can be a significant inconvenience. Netgear routers are widely praised for their reliability, speed, and user-friendly features. However, as with any technology, they are not immune to issues. Understanding how to troubleshoot common problems with Netgear routers can save time, reduce frustration, and restore internet connectivity promptly.

A functioning router is the heart of a home network, distributing data packets between devices and the internet. When a Netgear router fails to work, the entire network can be compromised, leading to connectivity issues for all connected devices. Common signs of a malfunctioning router include no internet access, unreliable connections, slow speeds, and unresponsive router settings. Ignoring these issues can exacerbate problems and result in extended periods of downtime.

Knowing how to identify and resolve these issues ensures that users can maintain a stable and high-speed internet connection. For anyone depending on reliable internet access for work, entertainment, or communication, understanding basic troubleshooting steps for their Netgear router is highly beneficial. Moreover, a proactive approach to router maintenance can mitigate potential issues before they become severe.

In this article, we will explore common reasons why a Netgear router may not be working and provide detailed steps to troubleshoot and resolve these issues. By following these guidelines, you can effectively diagnose problems and take appropriate actions to restore your internet connection.

Common Issues with Netgear Routers

Power and Connectivity Problems

One of the most common issues with Netgear routers involves power and connectivity problems. A router that is not receiving power or has faulty connections cannot distribute internet signals effectively. Understanding how to identify and troubleshoot these issues is the first step in resolving router malfunctions.

Firstly, check the power supply to ensure that the router is receiving adequate power. Inspect the power cable for any damage, such as frays or exposed wires. If the power cable appears intact, make sure it is securely plugged into both the router and the power outlet. Additionally, verify that the power outlet is functioning correctly by testing it with another device. Sometimes, a simple power cycle—turning the router off and on—can resolve minor power issues. To do this, unplug the router from the power source, wait 10-15 seconds, and then plug it back in. Allow the router a few minutes to reboot and establish connections.

Connectivity problems can also arise from faulty or loose cables. Ensure that all cables, including Ethernet and coaxial cables, are securely connected to their respective ports. Check for any visible damage or wear to these cables, and replace them if necessary. Sometimes, internal cable damage can disrupt the flow of internet signals, leading to connectivity issues.

Power and connectivity problems are common yet fixable issues with Netgear routers. By thoroughly inspecting and addressing these basic elements, users can often restore router functionality and regain internet access.Non-Functional Netgear Router

Firmware and Software Issues

Another frequent cause of malfunction in Netgear routers is related to firmware and software issues. Firmware is the software embedded in the router, responsible for its operation and functionality. Outdated or corrupted firmware can lead to several problems, including loss of connectivity, slow speeds, and erratic performance. Understanding how to address firmware and software issues is crucial for maintaining a functional router.

First, check for firmware updates. Manufacturers like Netgear regularly release firmware updates to improve performance, fix bugs, and enhance security. Access your router’s settings by entering its IP address (usually 192.168.1.1 or 192.168.0.1) into a web browser. Log in using your administrator credentials and navigate to the firmware update section, often found under “Advanced” or “Administration” settings. If an update is available, follow the on-screen instructions to download and install it. Do not interrupt the update process, as this can lead to further issues.

Software conflicts on connected devices can also affect router performance. Ensure that your computer, smartphone, or other devices have the latest drivers and software updates. Outdated network adapters or operating systems can cause compatibility issues, leading to connectivity problems. Regularly updating your devices ensures seamless communication with the router.

Additionally, settings misconfigurations can lead to software-related issues. Restoring the router to its factory settings can resolve these problems. Most Netgear routers have a reset button, usually located on the back. Press and hold this button for about 10 seconds until the router reboots. However, note that this action will erase all custom settings, so reconfigure your network settings after the reset.

Addressing firmware and software issues involves updating your router’s firmware, ensuring connected devices are up-to-date, and resolving settings misconfigurations. These steps can significantly improve the router’s performance and reliability.Non-Functional Netgear Router

Interference and Range Issues

Interference and range issues are common challenges that can affect the performance of Netgear routers. Understanding how to identify and mitigate these issues can help enhance your internet connectivity and network stability.

Electronic devices, such as microwaves, cordless phones, and even neighboring Wi-Fi networks, can cause interference. These devices emit signals that can disrupt your router’s wireless frequency, leading to dropped connections or slow speeds. To reduce interference, position your router in a central location, away from potential sources of electronic noise. Additionally, use the 5 GHz frequency band, if available. The 5 GHz band is less crowded and offers higher speeds compared to the 2.4 GHz band, although its range is shorter.

Walls, floors, and other physical obstructions can also limit the range of your router’s signal. Ensure that your router is elevated and placed in an open area. Avoid positioning the router inside cabinets or behind large objects, as these can block the signal. If your home is large or has multiple floors, consider using Wi-Fi extenders or mesh systems to improve coverage. Wi-Fi extenders amplify the existing signal and extend its reach, while mesh systems create a unified network with multiple access points, ensuring consistent coverage throughout the house.

Changing the router’s wireless channel can also help mitigate interference. Log in to your router’s settings and navigate to the wireless settings section. Experiment with different channels to find one that experiences less interference. Tools like Wi-Fi analyzers can help identify the best channel for your network.

Interference and range issues can significantly impact the performance of Netgear routers. By positioning the router correctly, reducing interference, and using range extenders, you can improve your network’s reliability and coverage.

Advanced Troubleshooting Tips

Checking ISP Issues

Sometimes, the problem with your Netgear router may not stem from the router itself but rather from issues with your Internet Service Provider (ISP). Understanding how to identify and address ISP-related problems can save time and effort. First, check the status lights on your modem and router. If the modem shows no internet connection, this indicates a potential issue with your ISP. Contact your ISP’s customer support to inquire about any service outages or ongoing maintenance work in your area. ISPs often provide real-time updates on their websites or through customer service channels.

Run a speed test using a wired connection to verify your internet speed and performance. If the speed is significantly lower than your subscribed plan, it suggests an issue with the ISP. Make sure to explain the situation to the customer support representative, including the results of the speed test.

Resetting your modem can also resolve temporary issues. Unplug the modem’s power cable, wait for about 30 seconds, and plug it back in. Allow a few minutes for the modem to reboot and re-establish the connection. Once the modem is online, reconnect your router and check if the issue is resolved.

Checking for ISP-related problems is crucial in the troubleshooting process. Identifying whether the issue is with your ISP can help narrow down the root cause and facilitate a quicker resolution.Non-Functional Netgear Router

Factory Reset and Reconfiguration

If other troubleshooting steps fail, performing a factory reset and reconfiguration of your Netgear router can often resolve persistent issues. A factory reset restores the router to its original settings, erasing any custom configurations that may be causing problems. Understanding how to safely perform this reset and reconfigure the router can help restore functionality.

To perform a factory reset, locate the reset button on your router, usually found on the back panel. Use a paperclip or a similar tool to press and hold the reset button for about 10 seconds. Release the button when the router’s lights start to blink, indicating that it is resetting. Allow a few minutes for the router to reboot and restore its default settings.

After the reset, you will need to reconfigure your network settings. Connect a computer to the router using an Ethernet cable and launch a web browser. Enter the router’s default IP address (typically 192.168.1.1 or 192.168.0.1) to access the login page. Use the default login credentials provided in the router’s manual or on a sticker on the device. Follow the setup wizard to reconfigure your network settings, including Wi-Fi name (SSID), password, and security settings.

Keep in mind that a factory reset will erase all custom settings, including port forwarding rules, parental controls, and guest networks. To prevent data loss, note down important settings before performing the reset.

Performing a factory reset and reconfiguration can resolve persistent issues and restore the router to a functional state. By carefully following the steps and reconfiguring the settings, you can ensure a smooth and effective resolution.

Contacting Netgear Support

If all troubleshooting efforts fail to resolve the issue, contacting Netgear’s customer support may be the best course of action. Understanding how to effectively communicate with customer support can expedite the resolution process. Before contacting support, gather all relevant information, including your router’s model number, firmware version, and a detailed description of the issue. This information will help the support representative diagnose the problem more efficiently.

Netgear offers various support channels, including live chat, phone support, and community forums. Visit Netgear’s official website to access these resources. When speaking with a support representative, be clear and concise in describing the issue and the steps you have already taken to troubleshoot it. This will help the representative understand the problem and provide targeted solutions.

Netgear’s online community forums are another valuable resource. Here, you can find troubleshooting guides, FAQs, and discussions with other Netgear users who may have experienced similar issues. Engaging with the community can provide additional insights and potential solutions.

In some cases, the problem may be hardware-related, requiring a replacement or repair. If your router is still under warranty, Netgear’s support team can guide you through the process of returning the device for a replacement.

Contacting Netgear support can provide expert assistance in resolving complex issues. Understanding how to prepare and communicate effectively with support representatives ensures a smoother and quicker resolution process.

Conclusion: Restoring Internet Connectivity

Dealing with a non-functional Netgear router can be frustrating, but understanding common issues and troubleshooting steps can help restore internet connectivity promptly. By addressing power and connectivity problems, updating firmware, minimizing interference, and exploring ISP issues, users can resolve most router malfunctions.

Advanced troubleshooting steps, such as performing a factory reset and reconfiguration, can further help restore the router to a functional state. If all else fails, contacting Netgear’s customer support provides access to expert assistance and potential hardware solutions.

Through proactive maintenance and a thorough understanding of troubleshooting techniques, individuals can ensure that their Netgear router continues to provide reliable internet access. Restoring functionality to the router not only enhances internet connectivity but also supports uninterrupted daily activities, making it a critical component of a well-connected home or office.

By following these guidelines, users can effectively diagnose and resolve router issues, ensuring a stable and fast internet connection. This comprehensive approach to troubleshooting empowers individuals to maintain their network’s performance and reliability, enhancing their overall internet experience.

Understanding Your Netgear Router’s Indicator Lights

In the ever-evolving world of home and office networking, Netgear routers have become a ubiquitous choice for many users. These reliable devices not only provide seamless internet connectivity but also offer a wealth of features and functionalities to enhance the user experience. However, one aspect of Netgear routers that often goes overlooked is the array of indicator lights adorning their exteriors. These lights, while seemingly simple, can actually provide valuable insights into the status and performance of your router, empowering you to troubleshoot issues and optimize your network effectively.

Mastering the Netgear Router Indicator Lights

The Netgear router’s indicator lights are designed to serve as visual cues, informing users about the various aspects of the device’s operation. From power status to internet connectivity, these lights offer a quick and intuitive way to assess the health and functionality of your router.

Identifying the Different Indicator Lights

Netgear routers typically feature a range of indicator lights, each serving a specific purpose. These may include, but are not limited to, lights for power, internet connectivity, Ethernet port activity, wireless connectivity, and even USB device status.

netgear router lights

Power Indicator Light

The power indicator light is usually the most prominent, providing a clear indication of whether the router is powered on and functioning properly. This light should be steadily illuminated, signaling that the device is receiving the necessary power to operate.

Internet Connectivity Indicator Light

The internet connectivity indicator light is a crucial one, as it reflects the status of your router’s connection to the internet. A solid, unblinking light typically indicates a successful internet connection, while a blinking or flashing light may suggest an issue with the connection.

Ethernet Port Indicator Lights

Many Netgear routers feature individual indicator lights for each Ethernet port, providing visual feedback on the activity and status of wired devices connected to the router. These lights may blink or remain steady, depending on the data transfer and link status.

Wireless Connectivity Indicator Lights

For wireless networks, Netgear routers often include indicator lights that reflect the status of the various wireless bands (2.4GHz and 5GHz). These lights can help you identify any potential issues with your wireless connections.

USB Device Indicator Light

If your Netgear router supports USB devices, such as external hard drives or printers, it may include a dedicated indicator light to signify the presence and activity of a connected USB device.

Understanding the purpose and behavior of these various indicator lights is crucial for effectively monitoring and troubleshooting your Netgear router’s performance.

Interpreting the Indicator Light Patterns

Each indicator light on a Netgear router can exhibit different patterns, such as steady illumination, blinking, or flashing. These patterns can provide valuable insights into the current state of your router and the overall network.

Steady Illumination

A steadily illuminated indicator light typically suggests that the corresponding feature or function is operating as expected. For example, a solid power light indicates that the router is receiving power, while a steady internet connectivity light signifies a successful internet connection.

Blinking or Flashing Lights

Blinking or flashing indicator lights often signify an active process or an issue that requires attention. For instance, a blinking internet connectivity light may indicate an unstable or intermittent internet connection, prompting you to investigate the underlying cause.

Alternating Flashing Lights

In some cases, Netgear routers may display alternating flashing lights, which can indicate a specific configuration or troubleshooting mode, such as the WPS (Wi-Fi Protected Setup) process or the router’s reset mode.netgear router lights

By familiarizing yourself with the various indicator light patterns and their corresponding meanings, you can gain a deeper understanding of your Netgear router’s performance and quickly identify and address any potential issues that may arise.

Leveraging Indicator Lights for Troubleshooting and Optimization

The Netgear router’s indicator lights are not only informative but can also serve as valuable tools for troubleshooting and optimizing your network. By closely monitoring these lights and interpreting their patterns, you can quickly diagnose problems and take the necessary steps to resolve them.

Identifying and Resolving Network Issues

The indicator lights on your Netgear router can be invaluable in identifying and addressing network-related problems. For instance, a blinking or off internet connectivity light may suggest an issue with your internet service provider (ISP) or a problem with the router’s connection to the modem. Similarly, erratic or disconnected wireless indicator lights could indicate interference or weak signal strength, prompting you to adjust the router’s placement or explore other optimization strategies.

Verifying Connectivity and Device Status

The Netgear router’s indicator lights can also help you verify the connectivity and status of the devices connected to your network. By observing the Ethernet port and wireless connectivity lights, you can quickly determine whether your wired and wireless devices are properly connected and communicating with the router.

Monitoring Network Performance and Activity

In addition to troubleshooting, the Netgear router’s indicator lights can provide valuable insights into your network’s overall performance and activity. For instance, observing the patterns of the Ethernet port and wireless connectivity lights can give you a sense of the data traffic and load on your network, enabling you to identify potential bottlenecks or areas for optimization.netgear router lights

Guiding Firmware Updates and Resets

In some cases, the Netgear router’s indicator lights may blink or flash in specific patterns to indicate the need for firmware updates or to guide you through the router reset process. By understanding these light patterns, you can ensure that you are properly updating your router’s software or resetting the device to its factory settings, if necessary.

Conclusion: Harnessing the Power of Netgear Router Indicator Lights

The indicator lights on Netgear routers are far more than just ornamental features; they are powerful tools that can help you gain a deeper understanding of your network’s performance, troubleshoot issues, and optimize your home or office connectivity. By mastering the interpretation of these lights and leveraging them effectively, you can unlock a wealth of information and empowerment, ensuring that your Netgear router operates at its full potential.

As you navigate the ever-evolving world of home and office networking, remember to keep a vigilant eye on your Netgear router’s indicator lights. These unassuming yet informative features can serve as your gateway to a more reliable, efficient, and hassle-free network experience. Embrace the power of these lights, and let them guide you towards a seamless and optimized connectivity solution that meets your needs and exceeds your expectations.

WPS on Router: Enhancing Your Router’s Security

In the ever-evolving world of technology, the security and connectivity of our home and office networks have become increasingly critical. One feature that has gained significant attention in recent years is the Wi-Fi Protected Setup (WPS) protocol, a convenient method for establishing a secure wireless connection. However, the implementation and utilization of WPS on routers have been the subject of much debate and discussion.

Understanding the Basics of WPS

WPS is a feature designed to simplify the process of connecting devices to a wireless network. Traditionally, setting up a secure Wi-Fi network involved complex configurations, including the manual entry of lengthy passwords or passphrases. WPS aims to streamline this process by allowing users to connect new devices to the network with the push of a button or the entry of a PIN code.

wps on router

The WPS Connection Process

The WPS connection process typically involves two steps. First, the user initiates the WPS connection on the router, either by pressing a physical button or accessing the router’s web-based interface. Next, the user selects the WPS option on the device they wish to connect, and the two devices establish a secure wireless connection without the need for manually entering a password.

This convenience factor has made WPS a popular choice for many users, particularly those who frequently add new devices to their network or have limited technical expertise. By simplifying the connection process, WPS can help ensure that all devices in a household or office are seamlessly integrated into the network.

The Security Concerns Surrounding WPS

While the convenience of WPS is undeniable, it has also sparked concerns about the potential security vulnerabilities associated with its implementation. Over the years, researchers have uncovered weaknesses in the WPS protocol that can be exploited by malicious actors, compromising the overall security of the network.

The Brute-Force Attack Vulnerability

One of the primary security concerns with WPS is its susceptibility to brute-force attacks. The WPS PIN, a unique 8-digit code that serves as an alternative to the network password, has been found to be vulnerable to such attacks. Attackers can use automated tools to systematically guess the PIN, eventually gaining access to the network.

Fortunately, many router manufacturers have addressed this vulnerability by implementing measures to limit the number of attempts or by disabling the WPS PIN feature entirely. However, it is essential for users to ensure that their router’s WPS settings are configured correctly and that the latest firmware updates are installed to mitigate these security risks.

The Risks of Leaving WPS Enabled

Another security concern with WPS is the potential risk of leaving the feature enabled, even if it is not actively being used. If an attacker gains physical access to the router or is able to remotely access the device, they could exploit the WPS vulnerability to gain unauthorized entry to the network.

To address this issue, it is recommended that users carefully consider the potential risks and benefits of keeping WPS enabled on their routers. In some cases, disabling WPS entirely may be the most prudent course of action, especially if the network is not frequently used to connect new devices.wps on router

Optimizing Router Security with WPS

While the security concerns surrounding WPS are valid, it is important to recognize that the feature can still be leveraged effectively when implemented and configured correctly. By understanding the potential risks and taking appropriate measures, users can harness the convenience of WPS while maintaining a secure network environment.

Striking a Balance Between Convenience and Security

When it comes to WPS, striking a balance between convenience and security is crucial. Users should carefully evaluate their specific needs and the level of risk they are willing to accept. For some, the added convenience of WPS may outweigh the potential security risks, while others may opt to prioritize security by disabling the feature altogether.

Implementing Robust Security Measures

To mitigate the security risks associated with WPS, users should consider implementing additional security measures on their routers. This may include regularly updating the router’s firmware, changing the administrative password, and enabling features like MAC address filtering or client isolation.

Furthermore, users should be vigilant in monitoring their network activity and promptly addressing any suspicious behavior or unauthorized access attempts. By taking a proactive approach to router security, users can leverage the benefits of WPS while minimizing the potential for compromise.

Educating Yourself and Others

Ultimately, the effective utilization of WPS on routers requires a combination of technical knowledge and a deeper understanding of the associated security implications. By educating themselves and others on the best practices for WPS implementation and network security, users can empower themselves to make informed decisions and maintain a secure and reliable wireless environment.

Conclusion: Embracing WPS with Caution and Vigilance

In the ever-evolving landscape of home and office networking, the Wi-Fi Protected Setup (WPS) feature presents both opportunities and challenges. While WPS can simplify the process of connecting new devices to a wireless network, it is essential to be aware of the potential security vulnerabilities associated with its implementation.wps on router

By understanding the basics of WPS, the security concerns surrounding its use, and the strategies for optimizing router security, users can make informed decisions about the appropriate implementation and configuration of this feature. By striking a balance between convenience and security, and by staying vigilant in monitoring their network environment, users can harness the power of WPS while maintaining a robust and secure wireless infrastructure.

Although WPS provides convenience, it also brings some security risks. Attackers can exploit the vulnerability in the WPS PIN code to conduct brute force attacks and gain network access. To minimize these risks, users should carefully evaluate their needs and take appropriate security measures, such as regularly updating firmware, changing administrative passwords, and enabling MAC address filtering. It’s equally important to educate yourself and others about WPS implementation and cybersecurity best practices. Only by using WPS in a prudent and vigilant manner can users achieve a balance between convenience and security, ensuring the reliability and security of wireless infrastructure.

As technology continues to evolve, it is crucial for users to remain informed and proactive in their approach to network security. By embracing the convenience of WPS with caution and vigilance, users can ensure that their wireless connections remain secure, reliable, and tailored to their specific needs.

How to reset att router? A Comprehensive Guide

How to reset att router?  In the ever-evolving world of home networking, the need to reset your AT&T router may arise for a variety of reasons, from troubleshooting connectivity issues to restoring the device to its factory settings. Whether you’re tackling a persistent problem or simply seeking to start fresh with your AT&T router, understanding the reset process is a crucial skill that can help you regain control of your home’s internet connectivity.

In this comprehensive guide, we will walk you through the step-by-step process of resetting your AT&T router, explore the different reset methods available, and provide practical strategies for troubleshooting common issues that may necessitate a router reset. By the end of this article, you’ll have the knowledge and confidence to effectively reset your AT&T router and optimize your home network’s performance.

Prepare to master the art of resetting your AT&T router and take control of your home’s internet experience.

How to reset att router? Understanding the Reasons Behind Resetting an AT&T Router

Before delving into the reset process, it’s essential to understand the various scenarios and reasons that may prompt the need to reset your AT&T router.

Troubleshooting Connectivity Issues

One of the primary reasons to reset an AT&T router is to address persistent connectivity problems, such as slow internet speeds, intermittent connections, or the inability to connect devices to the network.

Resolving Network Glitches

A router reset can help clear any software or firmware-related issues that may be causing disruptions to your home network.

Regaining Access to the Router’s Settings

If you’ve forgotten the login credentials or encountered other access-related problems, resetting the router can help you regain control of the device’s administrative settings.

Restoring Factory Default Settings

Resetting your AT&T router to its factory default settings can be beneficial in a variety of situations, from setting up a new router to troubleshooting more complex network issues.

Removing Customized Settings

Resetting the router erases any custom configurations, network settings, or passwords you’ve previously set, reverting the device to its original state.

Preparing for Router Replacement or Relocation

If you’re replacing your AT&T router or moving it to a new location, a factory reset can help ensure a clean slate for the setup process.

Addressing Security Concerns

In some cases, resetting your AT&T router may be necessary to address security vulnerabilities or concerns related to unauthorized access to your home network.

Mitigating Security Threats

Resetting the router can help you regain control of your network and eliminate any potential security breaches or malicious activity.

Enhancing Network Privacy and Safety

A router reset can be a proactive measure to enhance the overall security and privacy of your home network, especially if you suspect any compromised devices or settings.

How to reset att router? Identifying the Different Reset Methods for AT&T Routers

When it comes to resetting your AT&T router, there are two primary methods you can employ: a hardware reset and a software reset. Understanding the differences between these approaches can help you determine the most appropriate reset method for your specific situation.

Hardware Reset

The hardware reset method involves physically interacting with the router’s reset button, typically located on the back or bottom of the device.

Locating the Reset Button

Carefully identify the dedicated reset button on your AT&T router, which is usually recessed and may require the use of a small pin or paperclip to access.

Performing the Hardware Reset

Press and hold the reset button for the recommended duration, typically 10-30 seconds, to initiate the hardware reset process.

Software Reset

The software reset method allows you to reset your AT&T router’s settings through the router’s web-based administrative interface.

Accessing the Router’s Web Interface

Log in to your AT&T router’s web-based management console using your current login credentials.

Navigating to the Reset Option

Locate the “Reset” or “Factory Reset” option within the router’s settings and follow the on-screen instructions to complete the software-based reset.

Choosing the Appropriate Reset Method

The choice between a hardware or software reset depends on the specific circumstances and the level of access you have to your AT&T router’s settings.Resetting an AT&T Router

Hardware Reset for Troubleshooting

If you’re unable to access the router’s web interface or have forgotten the login credentials, a hardware reset may be the best course of action.

Software Reset for Customized Settings

If you’re looking to reset your router’s settings without completely erasing all of your custom configurations, a software reset may be the preferred option.

How to reset att router? Step-by-Step Guide to Resetting Your AT&T Router

Whether you opt for a hardware or software reset, the process of resetting your AT&T router follows a similar sequence of steps. This section will provide a detailed walkthrough to ensure a successful reset.

Performing a Hardware Reset

Follow these steps to execute a hardware reset on your AT&T router:

Locate the Reset Button

Identify the dedicated reset button on the back or bottom of your AT&T router.

Press and Hold the Reset Button

Using a small pin or paperclip, press and hold the reset button for the recommended duration, typically 10-30 seconds.

Wait for the Router to Reboot

After releasing the reset button, allow your AT&T router to complete the reset process and restart.

Conducting a Software Reset

To perform a software reset on your AT&T router, follow these steps:

Access the Router’s Web Interface

Log in to your AT&T router’s web-based administrative console using your current login credentials.

Navigate to the Reset Option

Locate the “Reset” or “Factory Reset” option within the router’s settings menu.

Confirm the Reset Process

Follow the on-screen instructions to initiate and confirm the software-based reset of your AT&T router.Resetting an AT&T Router

Verifying the Reset Completion

After either a hardware or software reset, ensure the reset process has been successfully completed by checking for the following indicators:

Observe the Router’s LED Lights

Monitor the router’s LED lights for any changes, such as a solid or blinking pattern, indicating the reset is complete.

Reconnect and Reconfigure the Router

Reconnect your devices to the router and verify that you can access the internet and the router’s web interface using the default login credentials.

How to reset att router? Troubleshooting Common Post-Reset Issues

While resetting your AT&T router can resolve a wide range of connectivity and configuration problems, you may occasionally encounter some post-reset challenges that require additional troubleshooting steps.

Inability to Access the Router’s Web Interface

If you’re unable to log in to your AT&T router’s web-based management console after the reset, consider these troubleshooting steps:

Verify the Default Login Credentials

Ensure you’re using the correct default username and password for your AT&T router model.

Check the Router’s IP Address

Confirm the router’s default IP address and ensure your device is connected to the correct network.

Connectivity and Internet Access Issues

After resetting your AT&T router, you may experience problems with device connectivity or internet access. Try these troubleshooting techniques:

Reestablish Network Connections

Reconnect your devices to the router’s network and ensure they are properly authenticating.

Verify Internet Service Provider Settings

Ensure your AT&T router is configured correctly for your internet service provider’s connection type and settings.

Persistent Performance Problems

If you’re still experiencing issues with your home network’s performance after resetting the AT&T router, consider these additional troubleshooting steps:

Update the Router’s Firmware

Check for and install any available firmware updates for your AT&T router model.

Contact AT&T Customer Support

If you’ve exhausted all troubleshooting options, reach out to AT&T’s customer support team for further assistance.Resetting an AT&T Router

Conclusion: Empowering Your Home Network with a Reset

Resetting your AT&T router is a powerful tool that can help you regain control of your home network, address persistent connectivity issues, and prepare your device for various scenarios, from setup to security enhancements. By understanding the reasons behind a router reset, the different reset methods available, and the step-by-step process, you now have the knowledge and confidence to effectively reset your AT&T router and optimize your home’s internet experience.

Whether you’re troubleshooting a specific problem, restoring your router to its factory default settings, or simply seeking a fresh start, the insights and strategies outlined in this comprehensive guide will empower you to take charge of your home network. By mastering the art of resetting your AT&T router, you’ll be able to quickly and efficiently resolve a wide range of issues, enhance the overall performance and security of your network, and ensure your home’s digital connectivity remains reliable and robust.

As you navigate the ever-changing landscape of home networking, remember to stay proactive, keep your AT&T router’s firmware up-to-date, and don’t hesitate to leverage the power of a reset when necessary. By embracing the reset process and applying the troubleshooting techniques covered in this article, you’ll be well on your way to unlocking the full potential of your home’s internet connectivity.

Empower your home network by mastering the reset process for your AT&T router.

Can i use my ipad as a second monitor? Power of Your iPad

In the ever-evolving world of multi-device integration, the ability to use an iPad as a secondary monitor has emerged as a game-changing feature that can dramatically enhance your productivity and digital workflow. Gone are the days when your iPad was merely a content consumption device; with the right software and setup, it can now serve as an extension of your primary computer, providing you with an additional display and a versatile canvas for various tasks and applications.

In this comprehensive guide, we will explore the step-by-step process of using your iPad as a second monitor, equipping you with the knowledge and tools to unlock the full potential of this powerful dual-display setup. From understanding the necessary hardware and software requirements to mastering the configuration and setup, this article will guide you through the entire journey, empowering you to seamlessly integrate your iPad into your computing ecosystem and unlock a new level of efficiency and multitasking capabilities.

Prepare to unleash the power of your iPad and elevate your productivity by transforming it into a feature-rich secondary monitor.

Using an iPad as a Second Monitor

Understanding the Benefits of Using an iPad as a Second Monitor

Before diving into the technical aspects of setting up your iPad as a second monitor, it’s important to understand the compelling benefits that this configuration can offer, as it will help you determine if it’s the right solution for your specific needs and workflow.

Expanding Your Workspace

One of the primary advantages of using an iPad as a second monitor is the ability to expand your available workspace, providing you with an additional display for multitasking, content creation, and various other applications.

Improved Multitasking Capabilities

With a dual-display setup, you can seamlessly switch between different applications, reference materials, and communication tools, enhancing your overall productivity and efficiency.

Enhanced Workflow for Content Creation

Creative professionals, such as designers, video editors, and writers, can leverage the additional screen real estate to streamline their workflows, allowing them to access tools, reference materials, and various panels simultaneously.

Leveraging Portability and Flexibility

The inherent portability and versatility of the iPad make it an ideal choice for a secondary monitor, as it can be easily integrated into your existing setup and transported to different locations as needed.

Mobility and Remote Work Enablement

When working remotely or on-the-go, using your iPad as a second monitor can provide you with a compact, easily deployable display solution to complement your primary computer.

Adaptability to Various Environments

The iPad’s wireless connectivity and battery-powered operation allow you to position it in different areas of your workspace, providing you with greater flexibility and the ability to optimize your work environment.

Maximizing Screen Real Estate

By utilizing your iPad as a secondary display, you can effectively increase the total screen real estate available to you, enabling more efficient multitasking and the ability to view more content simultaneously.

Expanded Canvas for Visual Tasks

For tasks that involve visual elements, such as design, photo editing, or video production, the additional screen space can enhance your productivity and creative workflow.

Improved Ergonomics and Comfort

The strategic placement of your iPad as a secondary monitor can help reduce eye strain and neck tension, as you can adjust the viewing angles and distances to suit your needs.

Setting Up Your iPad as a Second Monitor

With a clear understanding of the benefits of using an iPad as a second monitor, let’s dive into the step-by-step process of setting up and configuring this dual-display solution.

Selecting the Appropriate Software

The first step in using your iPad as a second monitor is to choose the right software solution that will facilitate the seamless integration between your iPad and your primary computer.

Exploring Popular Mirroring and Extending Apps

Investigate and compare various third-party apps, such as Splashtop, Duet Display, and Luna Display, that specialize in turning your iPad into a secondary monitor.

Considering Compatibility and Features

Evaluate the compatibility of the apps with your specific devices and operating systems, as well as the range of features and customization options they offer.

Connecting Your iPad to Your Computer

Once you’ve selected the appropriate software, it’s time to establish the physical and wireless connection between your iPad and your primary computer.

Connecting via USB or Wireless Network

Depending on the software you’ve chosen, you may need to connect your iPad to your computer using a USB cable or through a wireless network connection.

Ensuring a Stable and Reliable Connection

Optimize the connection between your devices to ensure a seamless and responsive experience when using your iPad as a secondary monitor.

Configuring the Display Settings

After establishing the connection, you’ll need to configure the display settings to integrate your iPad seamlessly into your overall computing setup.

Adjusting the Screen Resolution and Orientation

Customize the screen resolution and orientation of your iPad to match your primary display and optimize the visual experience.

Customizing the Display Layout and Alignment

Position and align your iPad’s display in relation to your primary monitor to create a cohesive and ergonomic dual-screen setup.

Leveraging the Capabilities of Your iPad as a Second Monitor

With your iPad successfully integrated as a secondary monitor, it’s time to explore the various ways in which you can leverage this powerful configuration to enhance your productivity, efficiency, and overall computing experience.

Extending Your Desktop

One of the primary use cases for an iPad second monitor is to extend your primary computer’s desktop, providing you with additional screen real estate for multitasking and enhanced workflow.Using an iPad as a Second Monitor

Dragging and Dropping Content

Seamlessly transfer files, documents, and other digital assets between your primary computer and the iPad display by simply dragging and dropping them.

Dedicating the iPad to Specific Tasks

Allocate the iPad display to specific applications or windows, allowing you to focus on particular tasks without the distraction of your primary computer’s interface.

Utilizing the iPad’s Touchscreen Capabilities

The iPad’s touchscreen functionality can be a powerful asset when using it as a secondary monitor, enabling intuitive interactions and specialized use cases.

Annotating and Highlighting Content

Leverage the iPad’s touchscreen to annotate documents, mark up presentations, and highlight important information directly on the secondary display.

Integrating with Creative Applications

Creative professionals can take advantage of the iPad’s touch capabilities to seamlessly interact with digital art, photo editing, and video production tools on the secondary display.

Enhancing Presentations and Demonstrations

When delivering presentations or conducting demonstrations, using an iPad as a secondary monitor can significantly improve the overall experience for both the presenter and the audience.

Mirroring Your Primary Display

Seamlessly mirror your primary computer’s display on the iPad, allowing your audience to focus on the content while you maintain control over the presentation.

Displaying Supplementary Information

Dedicate the iPad display to showcasing supplementary information, such as presenter notes, talking points, or additional visual aids, without disrupting the primary presentation.Using an iPad as a Second Monitor

Conclusion: Unleash the Power of Your iPad as a Second Monitor

Transforming your iPad into a powerful second monitor is a game-changing capability that can significantly enhance your overall computing experience, productivity, and workflow. Through this comprehensive guide, you have gained the knowledge and confidence to successfully integrate your iPad into your computing ecosystem, unlocking a new level of multitasking, collaboration, and creative potential.

By understanding the compelling benefits of using an iPad as a secondary display, from expanded workspace and improved multitasking to enhanced portability and adaptability, you can now make an informed decision about whether this dual-display setup is the right solution for your specific needs. Furthermore, the step-by-step instructions and best practices outlined in this article have equipped you with the necessary skills to seamlessly set up, configure, and leverage the capabilities of your iPad as a second monitor.

As you continue to explore and optimize the use of your iPad as a secondary display, remember to stay open-minded and adaptable. Experiment with different software solutions, explore the various use cases, and continuously seek ways to integrate this powerful feature into your daily computing routine. By doing so, you’ll unlock new levels of efficiency, creativity, and overall satisfaction in your digital interactions.

Unleash the power of your iPad and transform it into a feature-rich secondary monitor that elevates your productivity, collaboration, and computing experience to new heights.

Connecting Your Monitor to Your PC: A Step-by-Step Guide

Integrating a monitor with your personal computer is a crucial step in setting up a functional and visually appealing workstation. Whether you’re building a new system, upgrading your existing setup, or simply connecting a secondary display, the process of connecting a monitor to a PC can seem daunting, especially for those who are less tech-savvy. However, with the right guidance and a few simple steps, you can easily establish a seamless connection and enjoy the benefits of a multi-monitor or enhanced display configuration.

In this comprehensive guide, we will walk you through the step-by-step process of connecting a monitor to your PC, covering the essential hardware components, the various connection options, and the necessary software configurations to ensure a smooth and successful integration. Whether you’re a seasoned computer user or a newcomer to the world of personal computing, this article will equip you with the knowledge and confidence to tackle this important task and unlock the full potential of your display setup.

Prepare to master the art of connecting your monitor to your PC and elevate your computing experience.

Connecting Your Monitor to Your PC

Gathering the Necessary Hardware

Before you can begin the connection process, it’s crucial to ensure that you have all the required hardware components on hand and ready to go.

Identifying Your Monitor’s Connectivity Options

The first step in connecting your monitor to your PC is to determine the available input ports on your monitor, as this will dictate the type of cable you’ll need to use.

Common Monitor Input Ports

Familiarize yourself with the most common monitor input ports, such as HDMI, DisplayPort, DVI, and VGA, and identify which ones are available on your specific monitor model.

Selecting the Appropriate Cable

Choose a cable that matches the input port on your monitor and is compatible with the output ports available on your PC.

Assessing Your PC’s Display Connectivity

Just as you’ve identified the connectivity options on your monitor, it’s equally important to understand the display outputs available on your PC.

Locating the Display Ports on Your PC

Carefully examine the rear or side of your PC chassis to identify the available display output ports, such as HDMI, DisplayPort, DVI, or VGA.

Verifying Port Compatibility

Ensure that the display output port on your PC is compatible with the input port on your monitor, as this will determine the type of cable you’ll need to use.

Connecting the Monitor to Your PC

With the necessary hardware components in hand, it’s time to proceed with the physical connection process and establish the link between your monitor and PC.

Powering Down Your PC and Monitor

Before making any connections, it’s crucial to power down both your PC and monitor to prevent potential damage or issues during the setup process.

Unplugging the Power Cables

Disconnect the power cables from both the PC and the monitor to ensure a safe and secure connection.

Preparing the Connection Cables

Locate the appropriate connection cable based on the input and output ports identified in the previous step.

Establishing the Physical Connection

With your PC and monitor powered down and the connection cable ready, it’s time to physically link the two devices.

Connecting the Cable to the Monitor

Plug one end of the cable into the appropriate input port on your monitor, ensuring a secure and snug fit.

Connecting the Cable to the PC

Plug the other end of the cable into the compatible display output port on your PC, again making sure the connection is firm and secure.

Powering On and Verifying the Connection

After making the physical connection, it’s time to power on your devices and ensure that the connection is successful.

Powering On the PC and Monitor

Turn on your PC and monitor, and observe the display to verify that the connection has been established.

Troubleshooting Any Connection Issues

If the display does not appear or if you encounter any other issues. Refer to the troubleshooting tips provided in the next section.

Configuring the Display Settings

Once the physical connection between your monitor and PC is established. You’ll need to configure the display settings to optimize the visual experience and ensure compatibility between the two devices.

Accessing the Display Settings

Depending on your operating system, you’ll need to navigate to the appropriate display settings menu to manage the configuration of your connected monitor.

Windows Display Settings

In a Windows-based system, access the display settings through the Control Panel or the Settings app.

macOS Display Settings

On a Mac, you can adjust the display settings through the System Preferences.

Adjusting the Display Resolution and Refresh Rate

One of the most critical settings to configure is the display resolution and refresh rate, as these parameters can have a significant impact on image quality and overall performance.

Selecting the Optimal Resolution

Choose the highest supported resolution for your monitor to ensure a sharp and detailed visual experience.

Setting the Appropriate Refresh Rate

Adjust the refresh rate to the maximum supported value, which can help provide a smooth and responsive display.

Enabling Multi-Monitor Support (if applicable)

If you’re connecting a secondary or multiple monitors to your PC. You’ll need to configure the display settings to support a multi-monitor setup.

Arranging the Displays

Organize the placement of your displays within the settings to match their physical arrangement on your desk.Connecting Your Monitor to Your PC

Adjusting Display Scaling and Orientation

Ensure that the display scaling and orientation are properly configured to provide a seamless and cohesive visual experience across all connected monitors.

Troubleshooting and Maintenance

Even with a well-planned and executed connection process, you may occasionally encounter issues or encounter the need for ongoing maintenance to keep your monitor-PC setup functioning at its best.

Troubleshooting Common Connection Issues

Should you encounter any problems during the connection process or when using your connected monitor. Refer to these troubleshooting tips to identify and resolve the issue.

Verifying Cable Connections

Double-check that all cable connections are secure and properly seated in the respective ports.

Updating Drivers and Firmware

Ensure that you have the latest drivers and firmware installed for both your monitor and graphics card.

Performing Routine Maintenance

Regularly maintaining your monitor and PC connection can help ensure the longevity and optimal performance of your setup.

Cleaning the Monitor and Ports

Gently clean the monitor screen and the input/output ports on both the monitor and PC to prevent dust buildup.

Checking for Software Updates

Stay up-to-date with the latest software updates for your operating system and display drivers to address any known issues or vulnerabilities.Connecting Your Monitor to Your PC

Conclusion: Mastering the Art of Monitor-PC Integration

Connecting a monitor to your personal computer is a fundamental task that lies at the heart of creating a functional and visually appealing computing setup. Through this comprehensive guide, you have gained the knowledge and confidence to tackle this important process, from identifying the necessary hardware components to configuring the display settings and troubleshooting any issues that may arise.

By mastering the art of monitor-PC integration, you have unlocked the ability to unleash the full potential of your display setup, whether it’s for gaming, content creation, productivity, or simply enjoying a more immersive and visually stunning computing experience. Whether you’re building a new system, upgrading an existing one, or adding a secondary monitor. The step-by-step instructions and expert tips provided in this article have equipped you with the skills to seamlessly connect your monitor to your PC and ensure a smooth, hassle-free integration.


Exploring the Benefits of a 32-Inch Curved Monitor

In the ever-evolving world of computer displays, the rise of curved monitors has captured the attention of tech-savvy consumers and professionals alike. Offering a unique and immersive viewing experience, the 32-inch curved monitor has emerged as a prime choice for those seeking to elevate their visual experience, whether it’s for gaming, content creation, or general productivity.

In this comprehensive guide, we will delve into the compelling features and benefits of a 32-inch curved monitor, equipping you with the insights and knowledge to determine if this innovative display solution is the right choice for your needs. From the enhanced field of view and reduced eye strain to the improved ergonomics and heightened visual immersion, we will explore the transformative impact a 32-inch curved monitor can have on your digital interactions. Whether you’re a seasoned tech enthusiast or simply seeking to optimize your workspace, this article will provide you with the information necessary to make an informed decision about the investment in a 32-inch curved monitor.

Prepare to embrace the curve and unlock the secrets to a more engaging, comfortable, and productive computing experience.

32-Inch Curved Monitor

Understanding the Allure of Curved Monitors

Before diving into the specific benefits of a 32-inch curved monitor, it’s essential to understand the underlying technology and the rationale behind the growing popularity of this display format.

The Anatomy of a Curved Monitor

Curved monitors differ from their flat-panel counterparts in their unique design, which features a gently arched display surface that wraps around the user’s field of vision.

The Science Behind Curved Displays

The curvature of the monitor is designed to mimic the natural shape of the human eye, providing a more natural and comfortable viewing experience.

The Evolution of Curved Monitor Technology

Advancements in display manufacturing and panel technologies have enabled the creation of larger, higher-quality curved monitors that offer a more immersive and visually appealing experience.

The Advantages of Curved Monitors

The curved design of monitors brings a host of benefits that have captured the attention of users across various industries and applications.

Enhanced Field of View and Depth Perception

The curved display can provide a wider field of view and a more immersive sense of depth, creating a more engaging and natural viewing experience.

Reduced Eye Strain and Fatigue

The curvature of the monitor can help minimize the amount of eye movement required, potentially reducing eye strain and fatigue during prolonged use.

Exploring the Benefits of a 32-Inch Curved Monitor

With a solid understanding of the underlying technology and the general advantages of curved monitors, let’s dive deeper into the specific benefits of the 32-inch curved monitor format.

Immersive Viewing Experience

The expansive 32-inch curved display can transform your digital interactions, offering a level of visual immersion that flat-panel monitors struggle to match.

Increased Sense of Depth and Realism

The curved screen can create a more lifelike and three-dimensional perception, enhancing the viewing experience for gaming, movies, and content creation.

Reduced Distortion and Improved Peripheral Vision

The curvature of the 32-inch monitor can minimize visual distortion and provide a more natural and expansive field of view, reducing the need for excessive head and eye movement.

Enhanced Ergonomics and Comfort

The ergonomic design of a 32-inch curved monitor can contribute to a more comfortable and user-friendly computing experience, reducing the risk of physical strain and discomfort.

Reduced Neck and Eye Strain

The curved display can help minimize the amount of neck and eye movement required, potentially alleviating the strain associated with prolonged use of flat-panel monitors.

Improved Posture and Desk Positioning

The curved design can encourage a more natural and relaxed posture, allowing users to position their workstation in a way that promotes better overall ergonomics.

Increased Productivity and Efficiency

The unique benefits of a 32-inch curved monitor can translate into tangible improvements in productivity and efficiency, especially for users engaged in complex tasks or multitasking.

Enhanced Multitasking and Window Management

The expansive display and curved design can facilitate more effective window management and multitasking, enabling users to seamlessly switch between various applications and tasks.

Improved Concentration and Focus

The immersive nature of a 32-inch curved monitor can help users stay engaged and focused on their work, reducing the risk of distractions and improving overall productivity.

Factors to Consider When Choosing a 32-Inch Curved Monitor

While the benefits of a 32-inch curved monitor are compelling, it’s essential to carefully evaluate the specific features and specifications that align with your needs and preferences to ensure a wise investment.

Display Resolution and Refresh Rate

The display resolution and refresh rate of a 32-inch curved monitor can have a significant impact on the overall visual quality and performance.

Exploring High-Resolution Displays

Opting for a 32-inch curved monitor with a high-resolution display, such as 2K or 4K, can provide a sharper, more detailed image quality.

Prioritizing High Refresh Rates

For users engaged in fast-paced activities like gaming, a 32-inch curved monitor with a high refresh rate can deliver a smoother and more responsive visual experience.

Connectivity and Compatibility

Ensuring that the 32-inch curved monitor you choose offers the necessary connectivity options and compatibility with your existing hardware and software is crucial for a seamless integration.32-Inch Curved Monitor

Evaluating Port Selection and Versatility

Look for a 32-inch curved monitor that provides a diverse range of input/output ports, such as HDMI, DisplayPort, and USB-C, to accommodate your various devices and needs.

Considering Compatibility with Your Existing Setup

Verify that the 32-inch curved monitor you’re considering is compatible with your computer’s hardware and operating system to ensure a hassle-free setup and integration.

Ergonomic Features and Adjustability

In addition to the curved design, the 32-inch curved monitor should offer a range of ergonomic features and adjustability options to enhance user comfort and customization.

Tilt, Swivel, and Height Adjustment

Look for a 32-inch curved monitor that allows for tilt, swivel, and height adjustments to enable a personalized and ergonomic viewing experience.

Incorporating Other Comfort-Enhancing Features

Consider additional features like built-in blue light filters or anti-glare coatings that can further contribute to reduced eye strain and improved comfort during prolonged use.32-Inch Curved Monitor

Conclusion: Embrace the Curve and Elevate Your Computing Experience

The 32-inch curved monitor has emerged as a compelling choice for those seeking to enhance their digital interactions, offering a unique blend of immersive visuals, improved ergonomics, and increased productivity. Through this comprehensive guide, you have gained the insights and knowledge necessary to determine if this innovative display solution is the right fit for your needs.

By understanding the underlying technology and the distinct advantages of curved monitors, as well as exploring the specific benefits of the 32-inch format, you are now equipped to make an informed decision that aligns with your personal preferences and the demands of your computing activities. Whether you’re a passionate gamer, a creative professional, or simply someone seeking to optimize their workspace, the 32-inch curved monitors can deliver a transformative experience that elevates your digital interactions and enhances your overall productivity and well-being.

As you continue your journey of exploring and embracing the curve, remember to carefully evaluate the specific features and specifications that matter most to you, ensuring that your investment in a 32-inch curved monitor delivers the performance, comfort, and visual impact you desire. By doing so, you’ll unlock the secrets to a more engaging, immersive, and productive computing experience that will redefine the way you interact with the digital world.

Embrace the curve and elevate your computing experience by investing in a 32-inch curved monitors that aligns with your unique needs and preferences.

« Older posts