Resetting your Orbi router can be a necessary procedure. Network issues can arise unexpectedly, leading you to desire a fresh start. Whether you’re facing connectivity problems or planning to sell your device, a reset may be the solution. In this guide, we will walk you through the steps for resetting your Orbi router. We will also explore when it is appropriate to complete a factory reset. This article will help you regain control of your network.
When to Consider Resetting Your Orbi Router
Understanding when to reset your router can save time. There are several scenarios when a reset might be necessary. For instance, if your internet connection is unstable, a reset may resolve the issue. Additionally, if you’ve forgotten your Wi-Fi password, resetting the router restores default settings. Any troubleshooting measures you’ve tried may not have solved the problem. In such cases, a reset becomes an essential step.
Another situation where a reset is beneficial involves selling or giving away your router. When transferring ownership, sensitive data should not remain accessible. A factory reset deletes all personal data and settings, ensuring your information is secure. Moreover, if you’ve made numerous changes to configurations and need a clean slate, a reset is the answer. After evaluating these scenarios, you can make an informed decision.
Preparing for the Reset
Small pin or paperclip
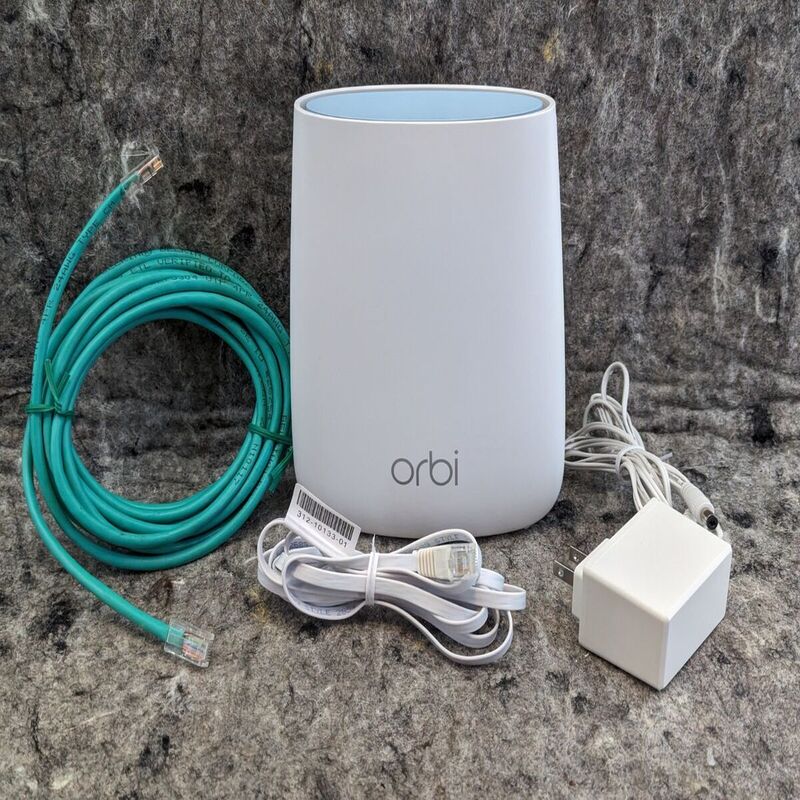
Before proceeding with a reset, gather necessary materials. You’ll need the Orbi router itself and a small pin or paperclip. This tool is essential for accessing the reset button. Additionally, make sure you have backup copies of any important configuration settings. Documenting your Wi-Fi name, password, and other changes can be useful. Thus, when setting up the router again, you won’t miss any important details.
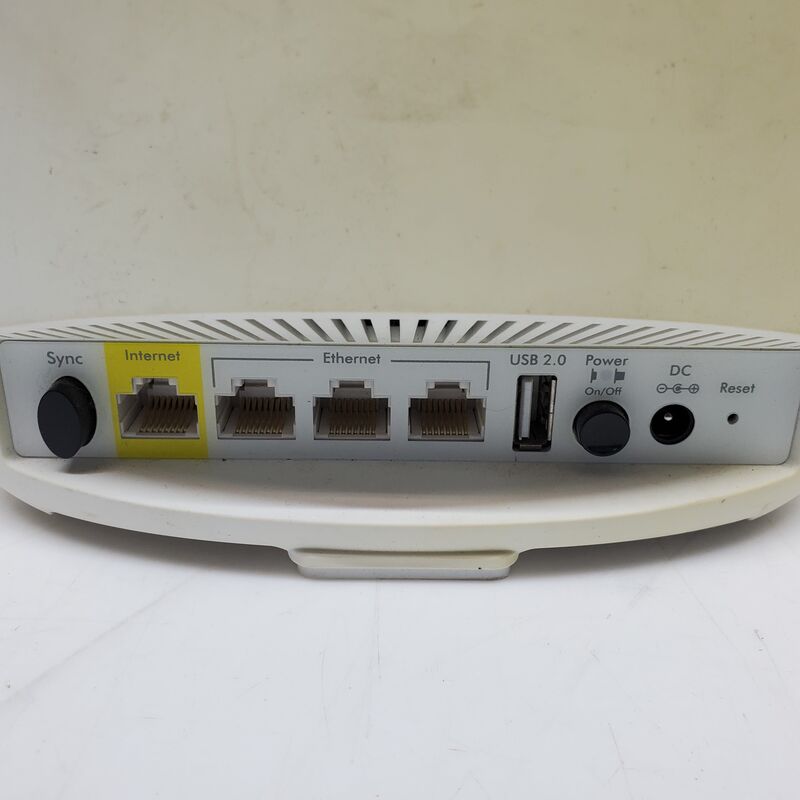
Furthermore, ensure you have access to an internet-connected device. This device could be a smartphone, tablet, or computer. After the reset, you will need this device to complete the Orbi’s new configuration. Also, power on the router and locate the reset button. This button is usually small and recessed. It is found on the back of the device. Being aware of this information can help streamline the process.
Understanding the Reset Button
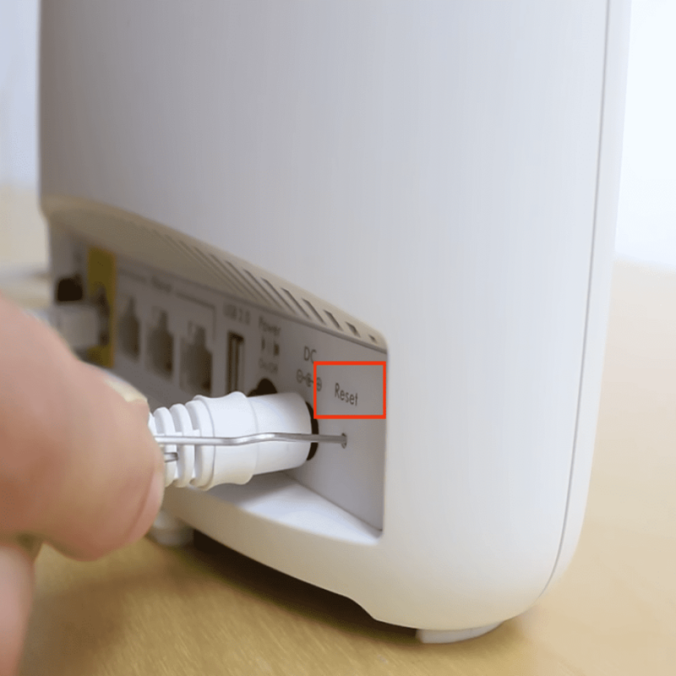
The reset button serves a crucial purpose in the functioning of the Orbi router. This small button is typically pressed using a pin. When pressed, it initiates a factory reset. A brief press may not suffice, so a longer button press is usually required. Holding it for about ten seconds is often necessary. The router’s LEDs will flicker, indicating that the reset process has begun.
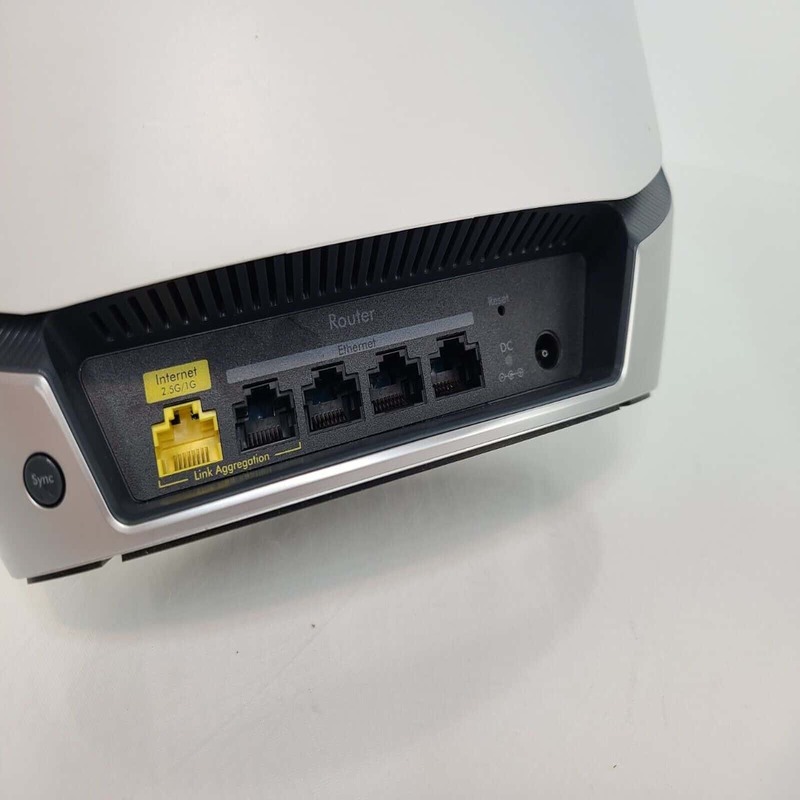
The reset button can be identified easily. It is usually marked as “Reset”. Often, it is located close to the power port. Knowing its location is vital for an efficient reset procedure. Therefore, finding it before attempting to reset makes the overall process smoother. Familiarity with the button and its function simplifies troubleshooting issues. With this knowledge, you’re prepared for the reset process.
Steps to Reset Your Orbi Router
Powering on the router
Resetting your Orbi router is an accessible process. Start by powering on the router. Make sure the device is fully functional by observing the LED lights. Next, take your pin or paperclip and insert it into the reset button hole. Hold the button down for approximately ten seconds. Pay close attention to the LED lights during this time.
After ten seconds, you will notice the LED lights flashing. This flashing indicates that the router is resetting. Once the lights stabilize, your Orbi router has successfully completed the reset process. All previous settings, including Wi-Fi passwords, have been erased. The device has now returned to its factory settings, and you can begin the setup process anew.
Reconfiguring Your Orbi Router
After the reset, it’s time to reconfigure your Orbi router. Start by connecting the router to your modem. Use an Ethernet cable for a direct connection. It improves stability and efficiency during the setup process. Next, reconnect your device to the default Wi-Fi network, using the credentials printed on the router’s label. This information can often be found on a sticker located on the bottom or back of the router.
Once connected, open a web browser on your device. Type the default IP address into the address bar to access the configuration page. Commonly, this IP address is 192.168.1.1 or 192.168.0.1. If you cannot access the page, double-check your connections. Furthermore, ensure that you’re connected to the router’s default network. You should now see the router’s setup wizard, which guides you through the configuration process.
Completing the Setup Process
Follow the on-screen instructions
Completing the setup involves several steps. Firstly, follow the on-screen instructions provided by the configuration wizard. It will usually ask for a new Wi-Fi network name. Choose a unique name that is easy to remember. Additionally, you will need to create a strong password. Consider using a mix of uppercase letters, lowercase letters, numbers, and symbols. This helps secure your network from unauthorized access.
After entering this information, the wizard may prompt you for additional settings. For instance, you may need to configure your internet connection type. Depending on your internet service provider, select the appropriate option. Most users will select “Automatic” or “Dynamic IP.” However, ensure you consult your ISP’s specific requirements if needed.
Choosing Advanced Settings
Once basic settings are complete, you may have the option to explore advanced settings. Advanced settings often include options for parental controls, guest networks, and security protocols. These features help you customize your network to suit your needs. Setting up a guest network can be especially useful for visitors. It allows them internet access without compromising your personal network.
Additionally, you may want to enable specific security features. WPA3 is the newest and most secure wireless encryption standard. If supported, it is advisable to use. Moreover, consider enabling the automatic firmware update option. This ensures your router remains up to date with the latest security features. Regular updates protect your network from potential threats.
Troubleshooting Common Issues
Know some troubleshooting steps
Even after a successful reset, issues may still arise. Therefore, it’s essential to know some troubleshooting steps. For example, if your router fails to connect to the internet, check all cable connections. Ensure the modem is powered on and operational. Restart both the modem and the router. This simple action can often resolve connectivity issues.
If you continue facing problems, revisit the configuration settings. Double-check that the right internet connection type is selected. Sometimes, ISPs require specific configurations for optimal performance. If you are uncertain, contacting your ISP for support can be beneficial. They often provide guidance on avoiding common pitfalls.
Confirming Device Compatibility
Another aspect of troubleshooting involves device compatibility. Ensure that your devices are compatible with your Orbi router. Some older devices may struggle to connect to newer routers. In such cases, check for firmware updates on those devices. Updating firmware can enhance compatibility and connectivity.
You may also want to check the distance between your device and the router. A weak Wi-Fi signal might hinder the connection. Move closer to the router and see if performance improves. This step can often clarify whether the issue stems from a weak signal or settings configurations.
Importance of Regular Maintenance
Regular maintenance
Regular maintenance of your newly reset Orbi router is crucial for continued performance. Change the default admin username and password if you haven’t done so already. This helps secure your router against unauthorized access. It adds an additional layer of protection to your network. Always monitor connected devices through the router’s settings.
Be proactive about checking for firmware updates periodically. New updates often contain security patches and performance enhancements. Setting notifications for firmware updates can make this process easier. Timely updates can ensure your network remains strong and secure, preventing potential vulnerabilities.
Monitoring Network Performance
Monitoring network performance is crucial after resetting. You can do this through the Orbi app or web interface. Look for unusual activities, such as unknown devices connected to your network. If you notice any, consider changing your password immediately. This added precaution helps maintain the integrity of your network.
Consider utilizing parental control features to manage your family’s internet usage. These features allow you to set limits and monitor activity. Effective monitoring ensures that all family members maintain healthy internet habits. This is particularly useful in households with children and teenagers.
Conclusion: Mastering Your Orbi Router
Mastering your Orbi router may seem daunting at first, but it’s a manageable process. Resetting can breathe new life into a problematic network. By understanding when to reset and how to do it properly, you can navigate these challenges with ease. Following the steps outlined in this guide, you should feel confident in resetting and reconfiguring your router.
As technology evolves, so do the needs of your home network. Regular maintenance, monitoring, and updates are crucial components in managing your Orbi router. You now possess the knowledge to ensure that your internet experience remains smooth and uninterrupted. Embrace the advantages of your newly reset Orbi router and enjoy the benefits of a well-functioning network. Thank you for following along this comprehensive guide!
Leave a Reply