making our professional lives more efficient, productive, and interconnected.

Tag: router (Page 1 of 6)

Setup VPN on Router: Home Network Protection Guide

In today’s interconnected world, securing your home network is more crucial than ever. One powerful tool for enhancing security is a router VPN. A router VPN extends protection across all devices on your network with a single setup, ensuring each one benefits from encryption and privacy safeguards. This includes devices that might not support standalone VPN applications.
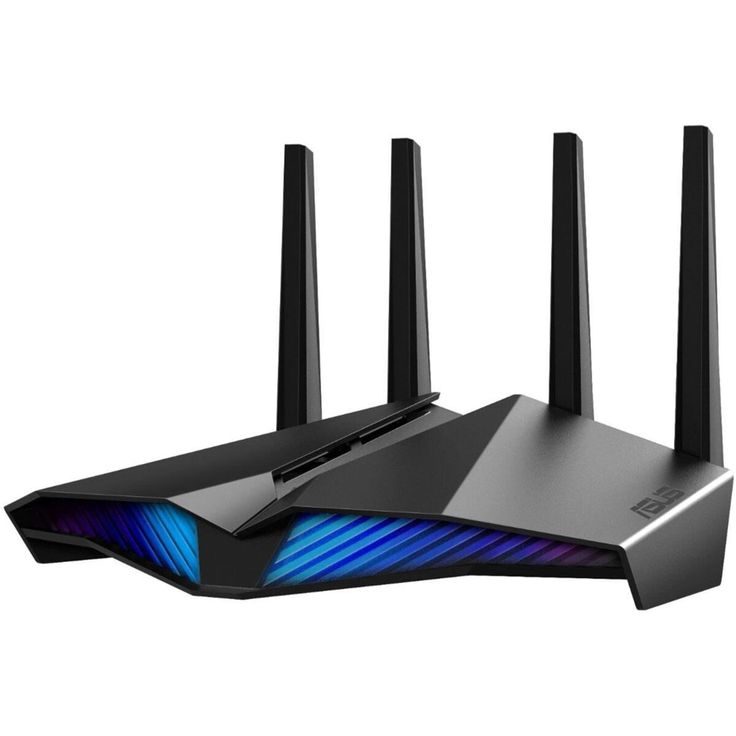
router VPN

Why Consider a VPN for Your Router

When contemplating the advantages of installing a Virtual Private Network (VPN) on your router, the most compelling reason is the comprehensive protection it provides. A router-based VPN shields every connected device within your home network, which can range from smart fridges and security cameras to gaming consoles and smartphones. This means that all your internet activities remain private and secure, far removed from the prying eyes of hackers and other malicious entities. Furthermore, a router VPN keeps your Internet Service Provider (ISP) from tracking your online movements or engaging in data throttling. For anyone who is serious about enhancing their digital security, implementing a VPN at the router level is a wise decision that extends protection to every device on the network.

The Basics of VPN Router Functionality

Understanding router VPN functionality is straightforward. Once set up, the router encrypts internet traffic and routes it through a VPN server. This process hides your IP address, making your online actions harder to track. All devices connected to the router automatically enjoy this level of protection without needing individual VPN configurations. It’s a seamless solution for entire-home network security.

Checking Router Compatibility

Before diving into the setup, it’s critical to ensure that your router can handle a VPN. Not all routers have this capability, and confirming compatibility is the first step. This section will guide you through identifying if your router is ready for a VPN and what to do if it isn’t.

Identifying VPN-Capable Routers

Start by checking your router’s manual for any VPN functionality mentions. No manual? Look up the model online with ‘VPN compatibility’ as a search term. Some routers, like Aircove, come with built-in VPN capabilities. Alternatively, lists from VPN providers might include your router model as supported. Key router models often compatible with VPNs are Asus RT-AC56(U/R/S), Linksys WRT32X, Netgear R6300v2, and Netgear Nighthawk R6700v3.

What to Do If Your Router Isn’t VPN-Compatible

If it turns out your router doesn’t support VPN, you’re not out of options. You can either upgrade the firmware to a version that supports VPNs, like DD-WRT or Tomato, or consider purchasing a new router with built-in VPN functions. Upgrading firmware can be technical, so if you’re unsure, it may be safer to buy a new router like the plug-and-play Aircove VPN router, which is designed for easy VPN integration.

Types of VPN Routers Explained

Choosing the right VPN router can be daunting. There are several types, each suited to different needs. Here’s a rundown of the main types, so you can pick the best one for you.

Routers with Built-In VPN Software

Routers with built-in VPN software come ready to go. They need no extra setup. Just log in, and your network is secure from day one. Examples include Aircove, which has ExpressVPN software pre-installed. These are often the simplest solution but may cost more.

Compatible Routers for VPN Installation

Some routers are built to work with downloadable VPN software. You install the VPN client on these routers. They offer flexibility as you can choose from many VPN services. But, the setup can be complex. Models like Asus RT-AC56 and Linksys WRT32X are known to support this.

VPN Router Boxes for Easy Setup

These are small, plug-and-play devices. You connect them to your existing router. No need to replace your current setup. They’re portable, ideal for travel, and require minimal effort to get running. However, they may not be as powerful as traditional routers.

setup vpn on router

Step-by-Step Guide to Setting Up a VPN on Your Router

Preparing for Installation

Before you begin installing a VPN on your router, gather the necessary information. This includes your VPN account credentials and any specific configurations or settings from your VPN provider. Ensure your router is powered on and connected to the internet. Also, it’s advisable to have a computer or device available for accessing the router’s settings.

Accessing Router Firmware

Access your router’s admin panel by entering its IP address into a web browser. Common addresses are ‘192.168.1.1’ or ‘192.168.0.1’. Log in with your router’s username and password. If you’re unsure of these, they’re often found in your router’s manual or on a label on the router itself.

Uploading VPN Configuration

In the router’s admin panel, locate the VPN settings, often under ‘Advanced’ or ‘Security’. Follow your VPN provider’s guidelines for the specific setup. This may involve entering server addresses, your VPN account details, and selecting VPN protocols. If provided, upload your VPN configuration file directly to the router.

Testing and Verifying VPN Connection

After setting up the VPN, test the connection to confirm it’s active. You can do this by checking your IP address on a website like ‘whatismyipaddress.com’. The displayed IP should differ from your original one. Additionally, try accessing geo-restricted content to ensure your VPN is working correctly and providing the necessary protection.

Advantages and Disadvantages of Router VPN

SetupVPN on router has both pros and cons. It’s vital to assess these factors before proceeding with a router VPN installation.

Always-On Security and Privacy Considerations

One major benefit is ‘always-on’ security. A router VPN continuously protects all connected devices without extra steps. Your entire network enjoys encryption. This means improved privacy for smart gadgets, PCs, and phones alike. A router VPN also hampers ISP tracking, offering more online freedom and less data throttling. It’s a solid shield against external threats, safeguarding digital life at home.

However, it’s not all straightforward. Router VPNs mean all network traffic is encrypted, which may slow internet speeds. Plus, some online services may challenge or block VPN IP addresses. Users must balance security with potential latency and accessibility trade-offs.

Challenges with Setup and Device Limitations

Setting up a VPN on a router can be challenging. It often requires technical knowledge, especially with configuration and troubleshooting. Those not tech-savvy may find the process daunting. And, not all routers are VPN-ready, which could mean extra cost for a compatible device, like the user-friendly Aircove VPN router.

Furthermore, device limitation is a concern. Some older devices or specific gadgets may not support VPN connection via router. Users may also face difficulties if they desire different VPN settings for specific devices. These factors demand careful planning and potentially, the acceptance of certain limitations.
router

Maximizing Your VPN Router’s Performance

To get the most from your VPN-enabled router, optimize setup and maintain it regularly. Here’s how.

Tips for Optimal Setup and Maintenance

  1. Position your router centrally to avoid signal weak spots.
  2. Use strong, unique passwords for both router and VPN access.
  3. Reboot the router periodically to refresh the connection.
  4. Check and adjust your VPN settings for optimal speed and security.
  5. Manage connected devices, less can mean more bandwidth for each.
  6. Keep tabs on bandwidth usage, especially during VPN-heavy tasks.

Selecting the Right VPN Server

Choose servers closest to your physical location for the fastest speeds. Experiment with different servers when facing connection issues or if seeking content from specific regions. Your VPN provider may also recommend servers optimized for streaming or downloading.

Keeping Your Router Firmware Updated

Router manufacturers and VPN services often release updates. These can fix security lapses, add features, or boost performance. Enable auto-updates where possible. If manual updates are needed, check the official websites regularly and follow their update guidance. An up-to-date router is a secure router.

Arris Router Reset: A Step-by-Step Guide for Home Users

Introduction to Arris Routers

Arris routers have established a formidable reputation in the networking landscape, primarily due to their reliable internet connectivity coupled with a variety of advanced features specifically designed to cater to the needs of today’s tech-savvy users. These routers excel in managing high-speed internet and handling multiple devices simultaneously, which makes them an increasingly popular choice for both residential homes and corporate environments. However, as with all technology, Arris routers are not without their challenges. Over time, users may encounter a range of common issues, including sluggish internet speeds, intermittent connectivity problems, and complications related to firmware updates, which can affect overall performance. Understanding these challenges and their potential solutions is essential for anyone looking to maximize their Arris router’s capabilities.

arris router reset

Understanding the Need for Resetting

When faced with persistent connectivity issues, sluggish internet speeds, or other technical challenges, resetting your Arris router may prove to be the most effective solution. This straightforward process involves restoring the router’s settings back to their factory defaults, which often resolves a myriad of issues and can significantly improve overall performance.

By understanding the key reasons when and why a reset is necessary, users can better maintain their router’s functionality and ensure a stable internet connection. For instance, frequent disconnections, inability to connect new devices, or poor network performance are clear indicators that a reset may be in order.

In this discussion, we will delve deeper into the essential aspects of Arris routers, highlighting their features and capabilities. Additionally, we will outline the specific situations that warrant a reset and provide practical guidance on how to execute the process effectively. This will equip users with the knowledge needed to enhance their internet experience and resolve issues promptly.

Reasons to Reset Your Arris Router

Resolving connectivity issues often requires a reset of your Arris router. This could be due to the router failing to connect to the internet, or devices being unable to join your network. Slow internet speeds are another common trigger for a reset. These can arise from corrupted settings or after a firmware update that didn’t go as planned. Other times, you might experience frequent disconnects or poor signal strength, indicating that a reset might help.

Resetting can also be a necessary step in securing your network. If you suspect a breach, reverting to factory settings can help close any vulnerabilities. Moreover, if you’ve lost or forgotten the admin password, a reset will allow you to regain access to your router’s settings. Lastly, if you’re selling or giving away your router, a reset ensures all your personal settings and information are wiped clean, safeguarding your privacy.

router

Preparing to Reset Your Arris Router

Resetting your Arris router requires careful preparation to ensure a smooth process. Here are essential steps to follow:

  1. Backup Your Router Settings
    Before initiating a reset, it’s vital to back up your current configurations. You can save these settings to a file on your computer. This precaution allows for easy restoration, preserving custom preferences and important configurations.
  2. Ensure Power Stability
    Verify that your router has a reliable power source during the reset process. Uninterrupted power is crucial to avoid issues such as data corruption. If you often experience power outages, consider using an Uninterruptable Power Supply (UPS) to provide backup power, ensuring the reset proceeds without interruption.
  3. Disconnect All Devices
    Temporarily disconnect all connected devices from the router. This step helps to prevent any interference during the reset and ensures that the router can start fresh without lingering connections.
Methods to Reset Router

Once you’ve prepared to reset your Arris router, you have two main methods to follow. Resetting can resolve persistent issues and bring your device back to its original settings. Below, we’ll discuss two efficient ways to reset your Arris router.
Using the Reset Button

The simplest method to perform an arris router reset is by using the physical reset button. This is usually a small, recessed button on the back or bottom of the router. To use it, make sure your router is powered on. Then, press and hold the reset button for about 10 seconds. You can use a paperclip or similar tool to press it. After releasing the button, the router will reboot automatically. Wait a few minutes for the reset process to complete.

Via the Router Web Interface

If you have access to your router settings, you can reset it through its web interface. First, connect a computer or mobile device to your router. Open a web browser and enter the router’s IP address into the address bar. Log in with your admin username and password. Look for a section called ‘Utilities’ or ‘Factory Default’. Then, select the option to ‘Restore Factory Defaults’ or ‘Reset’. Confirm your choice and wait for the router to restart. Remember that this method will erase your settings, so use it wisely.
arris router

Step-by-Step Guide to Physically Resetting the Router

Resetting your Arris router physically can be an effective and quick solution to a variety of network issues. Follow this step-by-step guide to ensure a successful reset:

  1. Locate the Reset Button:
    • Begin by finding the reset button on your router. This button is typically found at the back or bottom of the device. It’s often labeled as “Reset” or indicated by a small circular icon.
  2. Ensure the Router is Powered On:
    • Verify that your router is plugged in and powered on. The LED lights should indicate that the device is functioning normally before you proceed with the reset.
  3. Prepare the Reset Tool:
    • Gather a paperclip or another small, pointed tool, as you’ll need this to press the recessed reset button effectively. Ensure the tool is long enough to reach and press the button without obstruction.
  4. Press and Hold the Reset Button:
    • Firmly press and hold the reset button using your paperclip or tool. Maintain the pressure for about 10 seconds to ensure the router recognizes the reset command.
  5. Release the Button:
    • After holding the button for the required duration, release it. You should notice the router lights flicker or change, indicating that the reboot process has begun.
  6. Wait for the Reboot:
    • Allow the router to reboot automatically. This process may take a few minutes, so be patient. Avoid turning off or unplugging the router during this time to prevent any issues.
  7. Factory Settings Restored:
    • Once the reboot is complete, your router will be restored to its factory settings. Note that all previous configurations, including Wi-Fi passwords and network settings, will be erased.

By following these steps, you will successfully complete the physical reset process for your Arris router, potentially resolving any network connectivity issues you experienced.

Troubleshooting Post-Reset Issues

After performing an arris router reset, you may still encounter issues. Troubleshooting is an important step to ensure your network runs smoothly post-reset. Here are common problems and how to solve them.

Connectivity Problems

Sometimes after a reset, devices might struggle to connect. Ensure the router is on and the lights indicate a stable connection. Check if the device’s Wi-Fi is enabled and try reconnecting. If issues persist, verify the Wi-Fi network name and password are correct.

Slow Internet Speeds

If the internet is slow, test the speed online. Compare it with your internet service provider’s promised speed. If there’s a significant difference, restart your router and try again. Disconnect unused devices to reduce network load. If slow speeds continue, contact your ISP.

Maintaining Router Health Post-Reset

Once you’ve completed the Arris router reset, maintaining its health is crucial for ongoing performance. Here are some steps to ensure your router continues to function optimally:

Regular Updates

Keep your router’s firmware up to date. Manufacturers release updates to improve security and functionality. Check the manufacturer’s website regularly for updates and download them as they become available. This helps protect against vulnerabilities and maintains router efficiency.

Monitoring Router Performance

Regularly check your router’s performance. Look out for any unusual activity or changes in speed and connectivity. Use your router’s web interface to monitor traffic and device connections. Disconnect devices that are not in use, and reset your router if you notice a consistent drop in performance. This proactive approach helps in early detection of issues and can extend the life of your router.

Asus Router Access: Step-by-Step Setup for Beginners

How to Asus Router Access Dashboard

Gaining entry to your Asus router‘s dashboard is a straightforward process. To start, ensure your device connects to the Asus router network. Open a web browser of your choice on your device. In the address bar, type the Asus router’s default IP address. For most Asus routers, this IP is either 192.168.1.1 or 192.168.0.1. Press ‘Enter’ and wait for the login page to appear. Here, you will use the default credentials, unless you’ve changed them before. Typically, both the username and password are ‘admin’. Once you input these, hit ‘Log in’ to enter the Dashboard. Now, you have full access to tweak and configure your router’s settings to your liking.

Remember, if ‘admin’ doesn’t work, check the router‘s manual. It may have a unique set of credentials. Also, ensure you’re directly connected to the router and not via a repeater or extender. Direct connection avoids access issues that might arise. If problems persist, resetting the router to factory settings can help, but keep it as a last resort.

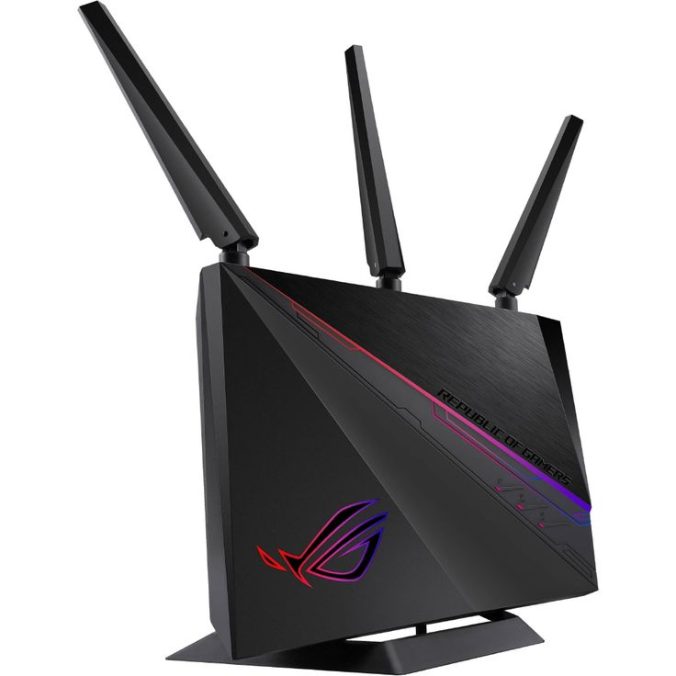
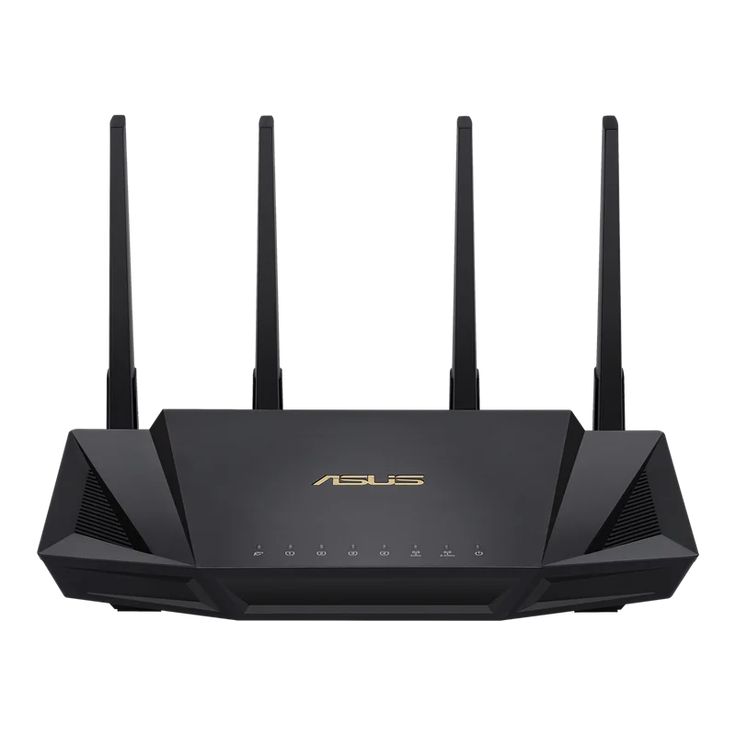
asus router access

Default Login Credentials for Asus Routers

To manage your Asus router, you need the correct login credentials. Most Asus routers come with a pre-set username and password. The common default username is ‘admin’. The default password is usually ‘admin’ as well. These credentials give you access to the Asus router dashboard when entered correctly.

Securing your router is vital. After you initially log in using the default credentials, it’s wise to change them. Use a strong, unique password for better security. This reduces the risk of unauthorized access to your network. Here’s how you can do it:

  1. Log into the Asus router dashboard as outlined above.
  2. Navigate to the ‘Administration’ or ‘System’ section.
  3. Select the option to change the username or password.
  4. Enter a new username and a strong password. Combine upper and lower case letters, numbers, and symbols.
  5. Save the changes to ensure the new credentials are active.

Remember to keep the new login details secure. Write them down or store them in a password manager for future reference. If you forget the customized credentials, you may need to reset the router. This brings it back to default settings and you’ll need to reconfigure your network again.

Step-by-Step Guide to Changing Network Settings

Modifying the network settings on your Asus router allows for customized internet access. This guide provides a simplified, clear approach to adjusting these settings effectively. Below are the essential steps to follow:

  1. Log into your Asus router dashboard: Start by accessing the Asus router’s dashboard using the method described previously. Ensure you’re connected to the router’s network.
  2. Navigate to the ‘Network’ section: Once logged in, look for a tab or link labeled ‘Network’ or ‘LAN’ in the dashboard menu.
  3. Change the network settings: Here you can configure various parameters such as the SSID (network name), network password, and router IP address. Each of these settings is adjustable.
  4. Adjust the DHCP settings: DHCP is responsible for assigning IP addresses to the devices on your network. You might want to enable or disable DHCP or modify the range of IP addresses assigned.
  5. Save your changes: After making the desired changes, always remember to save them. There will typically be an ‘Apply’ or ‘Save’ button at the bottom of the settings page. Click it to ensure your changes take effect.
  6. Restart the router: It’s often recommended to restart your router to apply changes thoroughly. This can be done directly from the router’s dashboard or by manually unplugging the device and plugging it back in.

By following these steps, you can tailor your network settings to meet your specific internet access needs. These changes can enhance your network’s efficiency and security. Remember, accessing and adjusting your Asus router is much easier when you understand how to navigate its dashboard.

asus router

Setting Up Security Features on an Asus Router

Securing your Asus router is crucial to protect your network from unauthorized access. Here are the key steps to enhance the security of your Asus router:

  1. Change Default Login Credentials: As mentioned earlier, the default username and password for most Asus routers are ‘admin’. Change these to something more secure as soon as you log in for the first time.
  2. Enable WPA3 Encryption: Access the ‘Wireless’ section in your Asus router dashboard. Select the option for WPA3, the latest security protocol, to secure your Wi-Fi network.
  3. Disable WPS: While WPS (Wi-Fi Protected Setup) offers a quick method to connect devices, it can be vulnerable. Turn it off in the router settings to prevent potential breaches.
  4. Update the Router’s Firmware Regularly: Manufacturers often release updates to improve security features. Check for updates in the ‘Administration’ tab and install them promptly.
  5. Limit Access to Router’s Dashboard: Restrict dashboard access by changing the router’s IP address and disabling remote management in the ‘System’ settings.
  6. Use a Guest Network: Create a separate network for guests. This keeps your main network secure. Enable the guest network option and set a different password.

Implementing these security steps will strengthen your Asus router’s defenses and ensure a safer internet environment.

Configuring Wi-Fi and Guest Networks

Configuring your Asus router to tailor Wi-Fi and guest network settings is crucial. This setup enhances network management and security. Here are the steps to customize these settings efficiently:

  1. Access the Wi-Fi Settings: First, log into your Asus router dashboard. Navigate to the ‘Wireless’ section. Here, you can manage your Wi-Fi settings.
  2. Set Up Your Main Wi-Fi Network: Customize the SSID (network name). Choose a strong, unique password to secure it. Select a Wi-Fi encryption protocol, with WPA3 being the most secure option.
  3. Configure Guest Networks: Guest networks allow visitors to access the internet without compromising your main network’s security. To set up a guest network, find the ‘Guest Network’ option in the wireless settings. Enable the guest network and set a distinct SSID and password for it.
  4. Adjust Bandwidth and Access: You can control how much bandwidth the guest network uses. Limit access times for guests, if necessary.
  5. Apply and Save Changes: After configuring your settings, click ‘Apply’ or ‘Save’. This ensures all changes are implemented.
  6. Test the Networks: Finally, connect devices to the main and guest networks to test if they work as expected.

By following these simple steps, you can effectively manage and secure your Wi-Fi and guest networks using your Asus router. This setup not only improves the overall security but also enhances the user experience for both household members and guests.

router

Troubleshooting Common Access Issues

Facing issues accessing your Asus router can be frustrating. Here are common problems and their solutions:

  1. Incorrect Login Credentials: Ensure you’re using the correct username and password. If you’ve forgotten, reset your router.
  2. Router Not Responding: Check if the router is powered on and all cables are secure. Restart if necessary.
  3. IP Conflicts: Make sure no other device uses the router’s IP address. Change it if needed.
  4. Browser Cache Issues: Clear your browser cache. It may prevent you from accessing the dashboard.
  5. Firewall Restrictions: Disable firewall settings temporarily to see if they block access to the router.
  6. Firmware Outdated: Update the router’s firmware. Old firmware can cause access issues.

Apply these fixes to solve common access issues with your Asus router.

Updating Firmware for Enhanced Performance

Keeping your Asus router’s firmware up-to-date is crucial for maintaining good performance and security. Here’s how to update your firmware effectively:

  1. Check the Current Firmware Version: Log into your Asus router dashboard. Look for the ‘Administration’ or ‘System’ section. Here, you can see your current firmware version.
  2. Visit the Asus Support Site: Go to the official Asus website. Navigate to the ‘Support’ section. Enter your router model to find the latest firmware.
  3. Download the Latest Firmware: If a new version is available, download it to your computer. Ensure the file matches your router model to avoid issues.
  4. Upload the Firmware to Your Router: Return to your router dashboard. Go to the ‘Firmware Upgrade’ section. Use the upload tool to select and install the downloaded file.
  5. Apply the Update: Follow the on-screen instructions to apply the update. This process may take a few minutes. Do not turn off the router during this time.
  6. Restart the Router: Once the update completes, restart your router. This ensures all changes take effect properly.
  7. Verify the Update: Log back into the dashboard. Check the firmware version to confirm the update was successful.

By following these steps, you can ensure your Asus router runs the latest firmware. This enhances your network’s performance and security.

Tips for Optimizing Router Configuration

Optimizing your Asus router configuration boosts performance and enhances security. Here are tips to get the most out of your router settings:

  1. Update Regularly: Always ensure your router’s firmware is current. This improves security and functionality.
  2. Optimize Wi-Fi Channels: Choose the least crowded Wi-Fi channel to minimize interference and enhance speed.
  3. Enable Quality of Service (QoS): QoS prioritizes traffic to ensure high performance for critical applications.
  4. Set Strong Encryption: Use WPA3 encryption for your Wi-Fi to protect your network from unauthorized access.
  5. Limit Bandwidth on Guest Network: Apply limits to ensure your main network retains high speeds.
  6. Disable Features You Don’t Use: Turn off services like WPS, UPnP, or remote administration if not in use to reduce vulnerabilities.
  7. Regularly Change Passwords: Update your Wi-Fi and admin passwords frequently to reduce the risk of breaches.
  8. Monitor Connected Devices: Regularly check and manage devices connected to your network to avoid unknown access.

By implementing these tips, you can optimize your Asus router for better performance and a more secure network. Remember to regularly check and adjust these settings to maintain an optimal setup.

Asus Router Settings: A Step-by-Step Guide

Introduction to Asus Router Configuration

Navigating the world of networking can be daunting, particularly when it comes to configuring routers. An Asus router provides robust performance and extensive features. However, to get the most out of your device, understanding the basic asus router settings is critical. In this section, we’ll introduce you to the fundamental aspects of configuring your Asus router to ensure optimal performance and a secure, stable network.

asus router settings

When tweaking asus router settings, we focus on several key areas. These include network parameters like IP allocation and bandwidth control, wireless configurations for the best connectivity, security protocols to protect your network, and QoS settings for traffic management. Keeping firmware up to date is also crucial for both security and performance. We’ll guide you step-by-step through these elements for a seamless and efficient networking experience.

Remember, a well-configured router means a smoother internet experience. Whether you use your network for casual browsing, streaming media, or intense gaming sessions, the right settings can make a significant difference. Let’s dive in and streamline your Asus router for the best possible performance.

Accessing Your Asus Router’s Admin Panel

To start optimizing your Asus router settings, you first need to access the admin panel. This is where you can adjust all the necessary parameters. Follow these simple steps to log in:

  1. Connect your device to the Asus router via Wi-Fi or with an Ethernet cable.
  2. Open a web browser and type the router’s IP address. It’s usually 192.168.1.1 or 192.168.0.1.
  3. Enter the default username and password. If you have changed these details, use the updated credentials.
  4. Once logged in, you’ll see the dashboard or homepage of the router’s settings.

Navigating through the admin panel is straightforward. Look for tabs or menus labeled ‘Network’, ‘Wireless’, or ‘Security’ to find various settings. If it’s your first time, take time to explore and get familiar with the layout. For any changes you make, be sure to save them before exiting.

Accessing the admin panel is the first step in enhancing your network’s performance. In the following sections, we’ll delve into specific settings that will help fine-tune your network’s efficiency.

Essential Network Settings for Performance

To optimize your Asus router for high performance, adjust essential network settings with precision. Here’s how:

Set a Static IP Address

Assign static IP addresses for devices you use frequently. This prevents IP conflicts and aids faster connection.

Adjust the DHCP Pool

Limit the DHCP pool size to the number of devices you expect to use. It reduces IP allocation issues.

Optimize MTU Size

Match the Maximum Transmission Unit (MTU) size with your ISP recommendations to enhance internet speed.

Streamline Bandwidth Allocation

Set bandwidth limits for devices not requiring high speed. It ensures more bandwidth for critical applications.

Enable Quality of Service (QoS)

Prioritize your traffic by enabling QoS; assign higher priority to gaming or streaming for uninterrupted service.

Fine-tuning these Asus router settings allows your network to function efficiently, providing a solid foundation for all your online activities.

asus router

Optimizing Wireless Settings for Better Connectivity

To enhance your Asus router’s wireless performance, focus on these adjustments.

Position Your Router Strategically

Place the router in a central location. Avoid obstructions like walls and electronics.

Select the Optimal Wireless Channel

Use tools to find less crowded channels. Switch to improve signal quality.

Update SSID and Passwords

Change the default SSID. Create a strong, unique password for security.

Enable Dual-Band Functionality

If available, activate both 2.4GHz and 5GHz bands. Connect devices appropriately for better performance.

Adjust Antenna Direction

Position antennas vertically for wider coverage. Adjust depending on your space layout.

These Asus router settings steps bolster wireless connectivity significantly. They help achieve a faster and more reliable network.

Security Enhancements: Safeguarding Your Network

Ensuring network security is crucial when configuring your Asus router.

Update the Router Firmware Regularly

Keeping your router’s firmware up-to-date is vital. It helps protect against the latest security vulnerabilities.

Enable Network Encryption

Activate WPA2 or WPA3 encryption to secure your Wi-Fi network. It prevents unauthorized access.

Use Strong Passwords

Choose complex passwords for your admin panel and Wi-Fi network. Avoid common or default passwords.

Disable WPS and Remote Management

Turn off WPS to prevent external attacks. Disable remote management to increase security.

Monitor Connected Devices

Regularly check the devices connected to your network. Unrecognize devices should be investigated and removed if necessary.

These steps are essential for keeping your Asus router secure from potential threats.

router

Managing QoS: Prioritizing Your Traffic

Quality of Service (QoS) is a key feature in your Asus router settings. When you enable QoS, you prioritize certain types of traffic over others. This ensures that high-priority activities like gaming or video conferencing run smoothly, even when the network is busy. Let’s look at how to manage QoS for the best user experience.

Identify High-Priority Applications

Start by listing the applications that need priority. This could include online games, streaming services, or VoIP calls.

Configure QoS Settings

In the admin panel, find the QoS settings. Here, you can set rules that give higher priority to your chosen applications.

Test Your QoS Configuration

After setting up QoS, test your network. Make sure high-priority apps perform well, even during peak hours.

Adjust As Needed

You may need to tweak the settings over time. Monitor how your choices impact the overall network performance and adjust accordingly.

By managing the QoS on your Asus router, you make sure your most important internet activities have the bandwidth they need to perform well. This results in a smoother experience for those activities that matter most to you.

Firmware Updates: Ensuring Your Router is Up-to-Date

Regular firmware updates are crucial for maintaining your Asus router’s performance and security. These updates often contain fixes for bugs and patches for security vulnerabilities that, if left unaddressed, could expose your network to attacks. Here’s how to keep your router’s firmware up-to-date:

Check for Updates Regularly

Visit the official Asus website or use the admin panel to check for firmware updates. Set a monthly reminder to ensure consistency.

Download from Trusted Sources

Always download firmware updates directly from the official Asus website. This prevents the risk of installing malicious software.

Follow Proper Update Procedures

Ensure your router is connected to a power source during the update. Follow instructions carefully to avoid interruptions.

Verify the Update

After updating, log into your router to verify the firmware version. Ensure all functions operate correctly.

Updating your router’s firmware improves performance and enhances security features, keeping your network safe and efficient.

Troubleshooting Common Asus Router Issues

Even with optimal Asus router settings, issues may arise. Here’s how to tackle common problems effectively:

Slow Internet Speeds

Firstly, check if other devices have similar slow speeds. If it’s a router issue, restart it. Also, ensure that bandwidth-consuming apps are limited.

Connection Drops Frequently

Inspect the router’s location for interference sources like microwaves. Also, make sure that the router’s firmware is up-to-date to avoid stability problems.

Difficulty Accessing the Admin Panel

Ensure you have the correct IP address and login credentials. If the problem persists, reset your router using the reset button. This reverts settings to factory defaults.

Inconsistent Wireless Coverage

Try repositioning the router or adjusting the antennas. Optimal placement and antenna adjustment can significantly improve coverage.

Security Concerns

Regularly update your passwords and firmware. This minimizes risks from vulnerabilities and unauthorized access.

Facing these issues can be frustrating, but with these tips, you can quickly restore your network’s performance. Regular checks and adjustments ensure a stable and efficient network.

How to Set Up Your ATT New Router: A Step-by-Step Guide

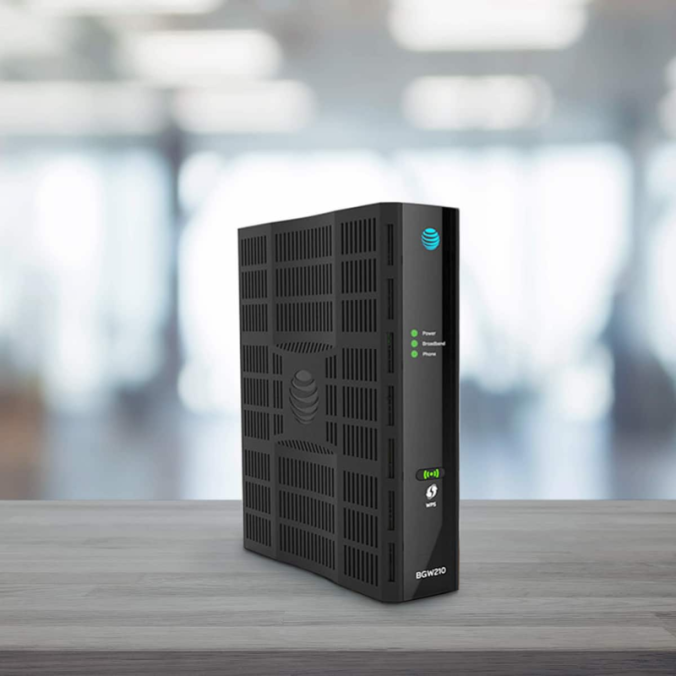
Unboxing Your ATT Router

Setting up your att new router starts with a proper unboxing. Here’s how to do it safely and efficiently:

  1. Find a clean, flat surface to work on. This will help avoid damages and keep all parts organized.
  2. Gently remove the router from its box. Avoid using sharp objects that could harm the device.
  3. Check for accessories. There should be a power adapter, ethernet cable, and setup guide inside.
  4. Inspect the router and accessories for any damage. If you spot any, contact ATT support immediately.
  5. Keep all packaging. In case of returns or warranty claims, you’ll need it.

Now that you have unboxed your att router, you’re ready to move on to connecting the hardware and setting it up for use.

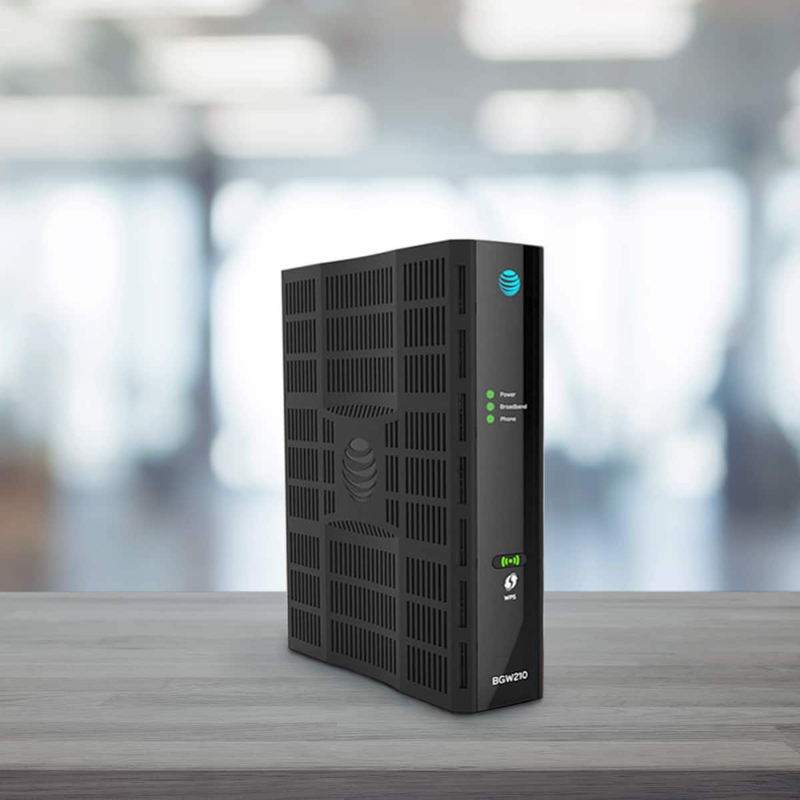
new att router

Connecting the Hardware

After unboxing your att new router, the next step is connecting the hardware. Here’s how to do it effectively:

  1. Position Your Router: Place the router in a central location. This enhances Wi-Fi coverage.
  2. Connect to Power Source: Plug the router’s power adapter into a power outlet.
  3. Attach the Ethernet Cable: Connect one end of the Ethernet cable to the router and the other to your modem.
  4. Power On the Router: Press the power button on the router. Look for the light indicators to confirm it’s on.
  5. Check Connections: Ensure all cables are firmly connected. Loose connections can cause issues later.

With these steps, your att new router’s hardware setup is complete. You can now proceed to the software configuration.

Accessing the ATT Router Web Interface

To configure your att new router, accessing the web interface is crucial. It allows you to manage settings and customize your network as needed. Here’s a straightforward process to help you access the web interface easily:

  1. Connect to the Network: First, ensure your computer or device is connected to the ATT router’s network. You can connect using Wi-Fi or an Ethernet cable.
  2. Open a Web Browser: On the connected device, launch any web browser of your choice.
  3. Enter the Router’s IP Address: Type the default IP address for your att new router into the browser’s address bar. You can find this in the router’s manual or on the device label.
  4. Log in to the Interface: You’ll be prompted to enter a username and password. Use the default credentials provided by ATT, usually found in the setup guide or on the device.
  5. Explore the Dashboard: Once logged in, you’ll see the router’s dashboard. Here, you can navigate to different settings and start customizing your network.

Remember, if you change the default login details, always keep a note in a secure place. This will ensure you can always access the router settings when needed.

ATT Router

Configuring Basic Settings

Once you access the ATT router’s web interface, it’s time to configure the basic settings. This step is key to getting your network up and running. Here’s how to navigate through the basic configuration:

  1. **Set Up Internet Connection: Start by configuring your internet connection type. The ATT router will typically detect this automatically, but you may need to enter details provided by your ISP.
  2. **Change the Network Name (SSID): Personalize your Wi-Fi by changing the default network name. Make it unique to easily identify your network.
  3. **Set a Wi-Fi Password: Create a strong password for your Wi-Fi to keep it secure. Use a mix of characters, numbers, and symbols.
  4. **Adjust Network Settings: Configure your LAN settings, such as IP address range and subnet mask, if needed.
  5. **Set Time Zone: Ensure your att new router has the correct time zone. It helps in scheduling features like parental control.
  6. **Save Settings: After making changes, always save them. Look for a ‘Save’ or ‘Apply’ button on the settings page.

By completing these steps, you have set up the basic functions of your att new router. Always remember to save your configuration changes to avoid losing them. With these basic settings adjusted, your network should now be operational and secure.

Securing Your Wireless Network

Securing your att new router goes beyond setting a Wi-Fi password. Here are additional steps to ensure your wireless network is safe:

  1. Enable Network Encryption: Check your router’s settings for encryption options such as WPA2 or WPA3. Select the strongest encryption available to protect your data.
  2. Update the Default Username and Password: The default login credentials for your router are common knowledge. Change them to something only you know.
  3. Disable WPS: While Wi-Fi Protected Setup (WPS) can be convenient, it’s also a potential security risk. Turn it off in your router settings.
  4. Turn Off Remote Management: This prevents access to your router’s settings from outside your network. Find this option in your att new router settings and make sure it’s off.
  5. Filter MAC Addresses: Add an extra layer of security by allowing only known devices to connect to your network. Use MAC address filtering for this purpose.
  6. Disable Broadcasting SSID: Hide your network from others by not broadcasting the SSID. This makes it less visible to malicious actors.
  7. Set Up a Guest Network: If visitors need internet access, set up a separate guest network. This keeps your main network more secure.

By following these steps, you improve the security of your att new router and your wireless network significantly.

router

Updating Router Firmware

Keeping your att new router’s firmware up to date is crucial. It ensures your network runs smoothly and stays secure. Firmware updates often contain fixes for known issues, improve performance, and can provide new features. Here’s a simple guide to updating your router’s firmware:

  1. Check for Updates: Log in to the ATT router’s web interface. Look for a section labeled ‘Firmware Update’ or ‘Router Update’.
  2. Download Firmware: If an update is available, follow the prompts to download the firmware file. Ensure not to interrupt the download.
  3. Install the Update: After downloading, click the ‘Update’ button to start the installation. It may take several minutes to complete.
  4. Wait Patiently: Do not turn off the router or use the internet during the update. It might cause the router to malfunction.
  5. Reboot the Router: Once the update completes, your router will likely reboot automatically. If not, manually restart it to apply changes.
  6. Confirm the Update: After rebooting, log back into the web interface. Check the firmware version to confirm the update was successful.

Updating your att new router’s firmware is a simple but essential task. It should be part of your regular maintenance routine to keep your network at its best. Always follow the official steps provided by ATT to avoid any issues.

Troubleshooting Common Setup Issues

It is common to encounter issues when setting up your att new router. Here are solutions for frequent problems:

  1. No Internet Connection: Ensure that all cables are properly connected. Check the modem and router lights.
  2. Slow Internet Speed: Position the router away from walls and electronic devices. This can help improve the signal.
  3. Frequent Disconnections: Update your router’s firmware. This often resolves stability issues.
  4. Can’t Access the Web Interface: Verify the IP address you entered. Use the correct credentials to log in.
  5. Forgotten Password: Reset the router to its default settings. Then use the default login.
  6. Limited Devices Can Connect: Make sure your SSID is broadcasting. Also, check for MAC address filtering.

By following these steps, most common issues with att new routers can be resolved easily.

Additional Features and Customization Options

Exploring the additional features and customization options of your ATT new router can enhance your network experience. Here are some notable capabilities:

  1. Parental Controls: Manage what content is accessible on your network. Set usage times and block unwanted websites.
  2. Quality of Service (QoS): Prioritize traffic to ensure critical applications get the bandwidth they need.
  3. VPN Setup: Securely access your network remotely by setting up a VPN.
  4. Guest Network Setup: Offer internet access to visitors without exposing your main network.
  5. Network Monitoring Tools: Keep an eye on connected devices and track usage patterns.
  6. Custom DNS Settings: Improve browsing speed and reliability with custom DNS.

These features allow for a more tailored and secure network environment with your att new router. Don’t forget to save changes and confirm they take effect to enjoy these benefits.

Secure Your Network: Asus Router Admin Login Guide

Introduction to Asus Router Admin Access

Gaining administrative access to your Asus router unlocks extensive control over your network. In essence, it allows you to manage settings, monitor connections and ensure optimal performance at home. This guide intends to simplify the admin login process so you can enhance your network’s security and functionality effectively.

To start, you’ll need a connected device and the correct login credentials. This section of our blog will walk you through the necessary preparations and steps to securely access your Asus router‘s admin panel. With this access, you can tailor your WiFi settings and monitor connected devices at your leisure.

Essential Prerequisites for Accessing Asus Router

Before embarking on the Asus router admin login process, ensure that you have everything needed. Correct preparation is crucial for a successful login, avoiding common pitfalls that can frustrate users.

How to Connect Your Device to WiFi

To start, your device must connect to the WiFi network broadcasted by your Asus router. Whether using a smartphone, tablet, or computer, ensure the device’s WiFi is on. Locate your network in the list of available WiFi networks and connect using the password.

Identifying Your Asus Router IP Address and Login Credentials

Every Asus router has a unique IP address and default login credentials. Often, the default IP address is 192.168.1.1, but check your specific model’s documentation to be sure. The usual default credentials are ‘admin’ for both username and password. Change these details during initial setup for enhanced security.

Step-by-Step Guide for Logging into Asus Router

Gaining access to your Asus router settings requires a few simple steps. Follow this guide carefully to ensure a smooth login process.

Connecting Your Device to the Router

Before attempting to log in, ensure your device connects to the Asus router’s WiFi. Use either a WiFi connection or an Ethernet cable for a stable link.

Accessing the Asus Router Login Page

Open a web browser on your connected device. Type the Asus router’s IP address, typically 192.168.1.1, into the browser’s address bar and press enter.

Entering Your Login Credentials

A login page will appear. Enter the default username and password, usually ‘admin’ for both, unless you have changed them. Press ‘login’ to access the admin panel.

By following these steps, you will access the Asus router’s settings where you can manage your network preferences effectively.

Essential Prerequisites for Accessing Asus Router Before embarking on the Asus router admin login process, ensure that you have everything needed. Correct preparation is crucial for a successful login, avoiding common pitfalls that can frustrate users. How to Connect Your Device to WiFi To start, your device must connect to the WiFi network broadcasted by your Asus router. Whether using a smartphone, tablet, or computer, ensure the device's WiFi is on. Locate your network in the list of available WiFi networks and connect using the password. Identifying Your Asus Router IP Address and Login Credentials Every Asus router has a unique IP address and default login credentials. Often, the default IP address is 192.168.1.1, but check your specific model's documentation to be sure. The usual default credentials are ‘admin’ for both username and password. Change these details during initial setup for enhanced security.

Managing Your Asus Router Settings

Once you’ve logged in to your Asus router, you unlock the potential to tailor your home network to your needs. The range of settings available for customization allows you to optimize your WiFi network for security, performance, and convenience. Here’s an overview of the key router settings you can adjust and how to navigate through them.

Overview of Key Router Settings You Can Customize

In the admin panel, several options let you manage your network effectively. Look for sections labeled ‘Wireless’, ‘LAN’, ‘WAN’, ‘Firewall’, and ‘System’. You can update firmware, configure guest networks, monitor attached devices, and more. Each section offers unique settings; explore each to understand what you can change.

How to Change WiFi Name and Password

To enhance network security, regularly update your WiFi name (SSID) and password. Navigate to the ‘Wireless’ section in your router’s settings. Here, find the fields for SSID and password. Enter new details and save changes. This simple step can prevent unauthorized access and keep your connection stable.

How to Reset Your Asus Router

If you encounter issues or forget your login details, resetting the router might help. Locate the reset button on your Asus router. Press and hold it for about 10 seconds. The router will reboot and restore factory defaults. After this, set a new username and password to secure your network again.

By managing these settings, you can ensure your network meets your needs. Stick to simple changes at first, and as you get comfortable, experiment with more advanced settings to further enhance your network’s performance.

Troubleshooting Common Login Issues

Logging into your Asus router should be simple, but sometimes issues can arise. This section addresses common problems and offers solutions to help you regain access to your router’s admin settings.

Solutions When You Can’t Access the Login Page

If you’re struggling to reach the login page, try these steps:

  1. Confirm the IP address you’ve entered is correct. It’s typically 192.168.1.1 for Asus routers.
  2. Check your device’s connectivity. Ensure it’s connected to your Asus WiFi network.
  3. Clear your browser’s cache or try a different browser.
  4. Restart your router. Unplug it, wait for a minute, and plug it back in.
  5. Disable any VPN services. They could redirect your network traffic and prevent access.

Following these measures should resolve access issues, letting you log into your router efficiently.

What to Do if You Forget Your Asus Router Login Password

If you forget your login credentials, don’t panic. Here are steps to restore access:

  1. Try the default ‘admin’ username and password, if you haven’t changed them.
  2. If you’ve set a custom password and can’t remember it, reset your router. Use the reset button, holding it down for 10 seconds.
  3. After a reset, log in with the default credentials and create a new password.

By tackling these common login issues promptly, you maintain control over your Asus router and ensure continuous network security and performance.

router

Enhancing Router Security Post-Login

Once you’ve successfully logged into your Asus router, the next step is fortifying your network. Strengthening security settings is crucial to prevent unauthorized access and potential attacks.

Why Keeping Your Login Credentials Secure Is Crucial

Your Asus router admin credentials are the keys to your network kingdom. Keeping them secure prevents unwanted changes to your settings and safeguards your personal information. Treat these details as you would any sensitive password.

  • Regularly update your login details, avoiding easy-to-guess combinations.
  • Consider using complex passwords that include a mix of letters, numbers, and symbols.
  • Never share your admin login with others unless absolutely necessary.

Tips for Stronger Network Security Configurations

Post-login, take these steps to ensure a robust security posture for your home network:

  • Change the default network name to something unique that doesn’t include personal details.
  • Set a strong WiFi password, and update it periodically.
  • Enable network encryption, selecting WPA3 if possible, as it provides the highest level of security currently available.
  • Disable WPS (WiFi Protected Setup) as it can be a vulnerability if exploited.
  • Keep the router’s firmware up to date to patch any security flaws.
  • Consider creating a guest network for visitors to keep your primary network more secure.
  • Monitor connected devices regularly and remove any you don’t recognize.

By taking these precautions, you create a more secure environment for all devices connected to your Asus router. Remember, staying proactive with network security keeps your digital life safe from intruders.

Conclusion and Best Practices

To cap off this Asus router admin login guide, we’ve outlined key steps and tips to secure your network. By following this guide, you can manage your router’s settings to create a secure, optimized home network environment. Let’s wrap up with some best practices:

  • Make sure to keep your router’s firmware up-to-date for security and performance enhancements.
  • Change your Asus router admin and WiFi passwords regularly, making them strong and unique each time.
  • Check your network periodicially for unfamiliar devices and disconnect them if needed.
  • Use a secure and preferably encrypted connection when managing your router settings to prevent data interception.
  • Log out of the admin panel once you are done configuring your settings to avoid unauthorized access.
  • If you have guests, set up a separate network for them to use without compromising your main network’s security.

Through these actions, you not only safeguard your Asus router but also enhance the overall integrity and performance of your home network. Remember, as with any aspect of cybersecurity, vigilance and regular maintenance are key. Regularly review and update your network settings to stay ahead of potential risks. Your Asus router is a powerful tool that, when managed wisely, will serve you well in creating a reliable and secure digital space for all your online activities.

Asus Router Not Connecting to Internet: A Step-by-Step Guide

Identifying Connectivity Problems with Your ASUS Router

Before diving into advanced troubleshooting, it’s important to pinpoint if your ASUS router is indeed the source of your internet woes. Start with some essential checks:

  • Examine the Router Lights: Your ASUS router has LED indicators that provide valuable information. A solid light typically indicates good connectivity, while a blinking light may signal an issue.
  • Check for Overheating: Routers can overheat due to continuous operation. Touch the device and if it’s unusually hot, let it cool down before resuming troubleshooting.
  • Test with Multiple Devices: Try connecting different devices to your network. If all devices are struggling, the issue likely lies with the router or network.
  • Evaluate Cable Connections: Make sure all cables are securely plugged into the correct ports on the router and modem.
  • Power Cycle the Router: Unplug your ASUS router for about 30 seconds and plug it back in. This can clear temporary glitches and restore connectivity.
  • Directly Connect to the Modem: By bypassing the router and plugging a device directly into the modem, you can determine if the problem is with your ISP or your ASUS router.

Spotting these initial signs and performing basic checks are vital first steps in resolving the ‘asus router not connecting to internet’ issue. If these quick fixes don’t restore your connection, it’s time to dig deeper for underlying causes.

asus router not connecting to internet

Common Causes of ASUS Router Connectivity Issues

When your ASUS router is not connecting to the internet, several factors could be at play. Understanding these common issues can guide you in troubleshooting effectively.

  • ISP Issues: Sometimes, the problem is not your ASUS router but your Internet Service Provider (ISP). If the ISP is facing outages or maintenance, it can disrupt your connection.
  • Faulty Router Hardware: Hardware malfunctions in the router can lead to connectivity problems. This could be due to wear and tear or defects.
  • Outdated Firmware: Routers run on firmware that requires updates. An outdated firmware can cause security vulnerabilities and connectivity problems.
  • Network Overload: Too many devices connected at once can overload the router’s capacity. This results in slow or no internet connections for connected devices.
  • Wrong Configuration Settings: Incorrect settings in the router can prevent it from connecting to the internet. This can be misconfigured network settings or incorrect IP configuration.
  • Signal Interference: Physical obstructions or interference from other electronic devices can weakens the router’s signal.

Addressing these issues can help restore your connectivity and improve your network performance. Start by identifying which of these issues is most likely affecting your network.

Step-by-Step Guide to Diagnosing ASUS Router Problems

Diagnosing issues with your ASUS router involves several practical steps. Each step will help reveal more about why your ASUS router is not connecting to the internet.

  1. Restart Your ASUS Router: Often, a simple restart resolves many connectivity issues. Turn off your router, wait for a minute, then turn it back on.
  2. Check Firmware Updates: Visit the ASUS support website from a device with internet access. See if your router’s model has any firmware updates available. If yes, apply them.
  3. Access Router Settings: Use a computer or mobile device connected to your router. Open a web browser and type in the router’s IP address to access the settings. Look for signs of incorrect configurations.
  4. Run Network Diagnostics: Most operating systems (like Windows or macOS) have a network troubleshooter. Run this tool to identify networking issues.
  5. Change Wireless Channels: In your router’s settings, try changing the wireless channel. This can reduce interference and boost connectivity.
  6. Disable Advanced Features Temporarily: Features like MAC address filtering or firewall settings could be blocking Internet access. Disable these to check if connectivity improves.

Take each step at a time and test your internet connection after every measure. This methodical approach often reveals the root cause of the issue.

Asus Router

Resolving IP Conflict and DHCP Errors on ASUS Routers

When your ASUS router faces IP conflicts or DHCP errors, it disrupts internet connectivity. These issues can be challenging but are solvable with the right steps.

  • Check for IP Conflicts: Every device on your network should have a unique IP address. If two devices share the same IP, it causes a conflict. Scan your network and ensure each device has a unique IP.
  • Renew and Release IP Addresses: On a connected device, open the command prompt or terminal. Use the ‘ipconfig /release’ and ‘ipconfig /renew’ commands on Windows, or ‘sudo dhclient -r’ and ‘sudo dhclient’ on Linux to refresh IP addresses.
  • Review DHCP Settings: Log in to your router’s admin panel. Ensure the DHCP server is enabled. Check the range of IP addresses assigned to avoid conflicts.
  • Update the DHCP Lease Time: If devices frequently disconnect, try extending the DHCP lease time. This gives devices longer access to their current IP addresses before needing renewal.
  • Restart the Router and Devices: After making changes, restart your ASUS router and connected devices. This can clear old IP assignments and resolve DHCP issues.

If these steps do not resolve the IP conflicts and DHCP errors, further investigation may be necessary. The ‘asus router not connecting to internet’ problem might stem from deeper network issues.

Updating Firmware to Fix ASUS Router Connection Errors

Firmware updates are crucial for maintaining the performance and security of your ASUS router. When faced with the ‘asus router not connecting to internet’ problem, verifying and updating the router’s firmware is an essential step. Here’s how to do it:

  • Check Current Firmware Version: Log in to the admin panel of your router to see the current version of the firmware.
  • Visit ASUS Support Page: Go to the ASUS support website using a device with internet access. Look for the latest firmware for your router model.
  • Download Firmware Update: If a new version is available, download the firmware file to your computer.
  • Upload Firmware to Router: Access the router settings again. Find the firmware update section, and upload the new firmware file.
  • Apply the Update: Follow the on-screen instructions to apply the update. This may include a restart of the router.
  • Test Your Connection: After the update, check if your internet connection is restored.

Regular firmware updates can prevent many connectivity issues. They help fix bugs, enhance router features, and improve security. If updating the firmware does not solve the problem, you may need to explore other solutions such as resetting your router to factory defaults.

Router

Resetting Your ASUS Router to Factory Defaults

If the previous steps failed to solve the ‘asus router not connecting to internet’ issue, a factory reset might be necessary. This process will erase all the custom settings and return the router to its original state as if it were new. Follow these simple steps:

  • Locate the Reset Button: Find the small reset button on the back of your ASUS router. It is often recessed to prevent accidental resets.
  • Use a Paperclip or Pin: With the router powered on, use a paperclip or pin to press and hold the reset button. You’ll usually need to hold it for about 10 seconds.
  • Wait for the Router to Restart: Release the button and wait for the router to fully restart. This may take a few minutes.
  • Reconfigure Your Router: After the reset, you’ll need to set up your router again. This includes your Wi-Fi network name (SSID), password, and any custom settings.
  • Test the Internet Connection: Once you’ve reconfigured your router, test to see if the internet connection is working.

Remember, a factory reset should be a last resort as it will erase all your settings. You will need to reconfigure your router from scratch, which might include getting details from your ISP if you don’t have them on hand. After the reset, also ensure you update to the latest firmware to keep your network secure and functional.

Tips to Prevent Future ASUS Router Connectivity Issues

Preventing internet issues with your ASUS router requires consistent upkeep and mindful usage. Here are effective tips to ensure smooth connectivity:

  • Regular Firmware Updates: Always keep your firmware updated. This reduces bugs and improves functionality.
  • Monitor Device Load: Avoid overloading the router with too many devices. Assess and manage connected devices periodically.
  • Optimize Router Placement: Place your router in a central, open location. Make sure it’s away from large metal objects and microwaves to minimize signal interference.
  • Secure Network Settings: Regularly update your network’s security settings. Change passwords and check the encryption method to guard against unauthorized access.
  • Set Device Priorities: Utilize your router’s Quality of Service (QoS) features. Prioritize bandwidth for essential services or devices that require stable connectivity.
  • Schedule Regular Restarts: A periodic reboot can clear the router’s memory and refresh connections. Automate this process if possible.

By following these steps, you can maintain a stable connection and reduce future ‘asus router not connecting to internet’ issues.

Professional Assistance and Customer Support for ASUS Routers

When you’ve tried all troubleshooting steps and your ASUS router is still not connecting to the internet, it’s time to seek professional assistance. Here’s how you can get the help you need to solve persistent issues:

  • Contact ASUS Support: Visit the official ASUS support website or call their hotline. They provide technical help and guidance.
  • Use the Live Chat Feature: ASUS often offers a live chat feature on their website. It’s a quick way to get help from a professional.
  • Check the ASUS FAQ Section: The ASUS website has a comprehensive FAQ section that covers common router problems.
  • Community Forums: Join ASUS community forums. Other users may have faced similar issues and can offer practical solutions.
  • Warranty and Repairs: If your router is under warranty, ASUS may repair or replace it. Check your warranty status.
  • Authorized Service Centers: For hardware issues, visit an ASUS authorized service center. Tech experts can diagnose and fix your device.

Remember, it’s important to have your router’s model number and details of the issue ready when seeking help. Stay proactive by using the ASUS router’s tools and resources to diagnose problems. With professional assistance, your ‘asus router not connecting to internet’ issue can be resolved promptly.

Asus Router Firmware Update: Step-by-Step Guide for Users

Introduction to Firmware Updates for Asus Routers

Firmware is the backbone of any router, including your Asus device. It contains the essential code that runs your hardware. Think of it as the operating system for your router. Like any other software, firmware needs updates. Asus router firmware update bring improvements. These can include new features, increased performance, or stronger security measures.

Asus ensures their routers are up to date with the latest internet protocols and security standards through regular firmware updates. For you, this means better internet experience, safer connections, and more reliable network performance. Regular firmware updates can also fix bugs and enhance your router’s compatibility with devices.

Performing an asus router firmware update is a simple yet essential task. It ensures your router works well and remains secure against threats. In the upcoming sections, we’ll guide you through checking your current firmware version and updating it. Stay tuned for easy steps to keep your router’s performance at its peak.

asus router firmware update

Checking the Current Firmware Version on Your Asus Router

Before starting an Asus router firmware update, knowing your current firmware version is critical. This knowledge confirms if an update is necessary. It can also help troubleshoot issues. Here’s how to check the firmware version your Asus router is running on.

  1. Ensure Your Router is Powered On: Power up your Asus router and connect to the network.
  2. Access the Router’s Web Interface: Open a web browser, type in the router’s IP address in the address bar, and hit Enter. The default IP for most Asus routers is either 192.168.1.1 or 192.168.0.1.
  3. Login to Your Router: Enter your admin username and password. You should have set these during your initial router setup.
  4. Navigate to the Firmware Version: Once logged in, look for the ‘Firmware Version’ information. This is typically found within the ‘System Status’ or ‘About’ section in the router’s web interface.
  5. Note Your Current Firmware Version: Write down the firmware version displayed. This ensures you have a reference point before performing any updates.

By following these steps, you can easily find out the firmware version on your Asus router. With this information, you’re ready to proceed with the Asus router firmware update process if required.

Why It’s Important to Update Your Asus Router Firmware

Updating your Asus router firmware is crucial for several reasons. First, it enhances your router’s performance. New firmware often includes improvements that make your router faster and more efficient. It’s key to a better browsing and streaming experience.

Second, an Asus router firmware update increases security. Manufacturers like Asus constantly monitor threats and patch any vulnerabilities. By updating, you shield your network from new viruses and hacking techniques. This step protects your data and devices.

Third, firmware updates can introduce new features and functionalities. These innovations can improve user experience and add more utility to your device. For example, updates may offer better network management tools or enhanced parental controls. This leads to more customization and control over your home network.

Lastly, keeping your firmware up to date ensures compatibility with the latest devices and software. This prevents issues like connection errors or poor performance. It ensures your router continues to serve all your devices effectively.

Overall, failing to update your Asus router can leave you behind in terms of performance, security, and functionality. Regular updates are an easy way to keep your network healthy and efficient.

Asus router

Preparing Your Asus Router for a Firmware Update

Before you start the Asus router firmware update, it’s important to prepare your device. Proper preparation ensures a smooth update process. Here’s what to do:

  1. Backup Your Settings: Errors can happen. Backing up your current router settings is smart. It saves your custom configurations. You can restore them if needed after the update.
  2. Connect Using an Ethernet Cable: Wi-Fi isn’t stable for firmware updates. Use an Ethernet cable. This prevents update failures caused by connection drops. Connect your computer directly to the router.
  3. Turn Off Other Devices: Reduce network activity. Turn off devices that use the internet. This prevents interruptions during the update process.
  4. Charge Your Devices: Ensure your computer has enough battery power. Or keep it plugged in. Power loss during an update can damage your router.
  5. Download the Latest Firmware: Visit the Asus website. Find the latest firmware for your router model. Download it to your computer.
  6. Read the Update Instructions: Updates can have specific instructions. Read them carefully. Understand the process before you begin.

By taking these steps, your router will be ready for a successful firmware update.

Step-by-Step Guide to Updating Asus Router Firmware

Updating your Asus router firmware is a straightforward process. Here’s a detailed step-by-step guide to help you through it:

  1. Connect to the Internet: Ensure your Asus router is connected to the internet.
  2. Log in to the Router Interface: Use a web browser. Enter your router’s IP address and log in with your credentials.
  3. Go to the Firmware Update Section: Find this option in the ‘Administration’ or ‘System’ tab.
  4. Check for Available Updates: Click on ‘Check’ or ‘Check Now’ to let your router find any available firmware updates.
  5. Download and Install the Firmware: If an update is available, click ‘Download’, and then ‘Install’. Follow on-screen instructions.
  6. Wait for the Router to Update: Do not turn off or reset the router during this process. It might take a few minutes.
  7. Router Reboots Automatically: After the update, your router will restart itself. This is normal.
  8. Confirm the Firmware Update: Log back into the router interface. Check the firmware version to confirm the update was successful.

By following these steps, you can ensure your Asus router runs the latest firmware, keeping your network secure and efficient.

router

Troubleshooting Common Issues During Asus Router Firmware Updates

When updating your Asus router firmware, you may encounter a few common issues. Knowing how to address these can save you time and frustration. Here are some frequent problems and their solutions:

  1. Update Fails to Start: Ensure stable internet connection. Sometimes, restarting your router helps.
  2. Update Interrupted: Avoid using the internet on other devices during the update. This can cause interruptions.
  3. Error Messages: Check if you downloaded the correct firmware for your router model from the Asus website.
  4. Router Not Responding Post-Update: Wait a few minutes. Sometimes, routers take time to reboot after an update. If it doesn’t respond, a factory reset might be needed.
  5. Lost Custom Settings: Always backup your settings before an update. This will help you restore your preferences if they get lost.

By preparing in advance and knowing how to handle these common issues, you can smoothly perform your Asus router firmware update. Keep these tips in mind for a hassle-free update process.

Advanced Tips for Managing Asus Router Firmware

Once you’ve mastered the basics of updating your Asus router firmware, it’s time to delve into advanced management techniques. These tips will ensure you are getting the most out of your Asus router and its firmware capabilities.

  • Set up Firmware Update Reminders: To avoid missing critical updates, set calendar reminders. Most Asus routers do not auto-update, so regular manual checks are important.
  • Monitor Update Logs: Keep an eye on firmware update logs. These logs often contain important information about the changes made in each update.
  • Use the Asus Router App: If available for your model, use the Asus router app. It can often simplify the process of checking and updating firmware.
  • Keep Previous Firmware Versions: Sometimes updates may cause issues. Keeping older versions of the firmware can allow you to rollback if necessary.
  • Learn About Beta Firmware: Asus sometimes offers beta firmware for advanced users. This can give you early access to new features and improvements. But be cautious, as beta versions can be less stable.
  • Customize Firmware Notifications: Customize your Asus router settings to receive firmware update notifications that best suit your needs.
  • Use a UPS: Connecting your router to an Uninterruptible Power Supply (UPS) can prevent firmware corruption during power outages.

Implementing these advanced tips alongside regular updates will provide you a more robust and secure networking environment. Keep these pointers in mind to maintain the best possible performance for your Asus router.

How to Change IP Address on Router: Easy Methods Explained

Changing your IP address on a router can seem daunting, but with the right guidance, the process can be seamless. In this comprehensive guide, we’ll explore how to change IP address on router, offer effective methods, and address potential issues you may encounter. By the end, you’ll have the tools to manage your router settings confidently.

how to change IP address on router

Understanding Your Router’s IP Address

To learn how to change IP address on router effectively, it’s important to first understand the default IP address assigned to your router. Most Wi-Fi routers are configured with a default IP address, which typically takes the form of “192.168.1.1” or “192.168.0.1.” You can find this information in the user manual of your device or on the router itself. Furthermore, knowing the difference between a public IP address, which is assigned by your Internet Service Provider (ISP), and a private IP address, which is used within your home network, is crucial. Changing the private IP address can help improve network performance while safeguarding your home devices from potential external threats.

To find out your current IP address on a Windows PC, you can open the Command Prompt and type ipconfig. For Mac users, navigating to “System Preferences” and then “Network” will yield the same information. Understanding this step sets the foundation for successfully altering your router settings as we discuss how to change IP address on router in upcoming sections.

Accessing Your Router’s Admin Panel

The next step in learning how to change IP address on router is accessing your router’s admin panel. This is typically done by entering the router’s default IP address into a web browser. Enter the address and press Enter; you will be prompted to log in. The default username and password can often be found on the router or its user manual. Common combinations include “admin/admin” or “admin/password.” If you’ve changed these credentials before, make sure you use the updated information.

Once logged in, you will be greeted with the router’s dashboard. Here, you can see various settings and configurations for your network. It’s essential to navigate carefully, as incorrect settings can affect your internet connectivity. To change your IP address, look for a section labeled something like “Network Settings” or “LAN Setup.” Here, you’ll find fields to modify your router’s IP address. Familiarizing yourself with this interface is a key part of learning how to change IP address on router effectively and safely.

Wi-Fi router

Changing the Router’s IP Address

Now that you have accessed the router’s admin panel, let’s dive into the actual process of changing the IP address. To change the router’s IP address, simply enter a different combination of numbers within the allowable range for a private IP address. For example, if your current address is “192.168.1.1,” you could change it to “192.168.1.2.” The numbers must remain within the subnet defined by your current configuration, typically “192.168.x.x.”

After making the desired change, save your settings and reboot the router to apply the new configuration. This step ensures that the changes take effect correctly and that you can connect seamlessly to your network with the updated IP address. By following these straightforward steps, you can clearly see how to change IP address on router without any major technical hurdles.

It’s advisable to note down your previous address before making these changes, just in case you need to revert to the original settings for any reason. If you find that your devices experience connectivity issues after making the change, you can access the admin panel again and restore the old IP address quickly.

Assigning a Static IP Address to Devices

Assigning a static IP address to your devices is an essential aspect of managing your home network effectively. Here are the key points to consider:

  1. Understanding Static IP Addresses: A static IP address remains constant over time, which is beneficial for devices that require a reliable connection. This is particularly important for devices such as printers, gaming consoles, and home automation systems that need to be accessed regularly.
  2. Finding the MAC Address: The first step in assigning a static IP address is to locate the device’s MAC address. This unique identifier for network interfaces is usually found in the settings or information section of the device. Knowing the MAC address is crucial, as it allows the router to recognize and assign a specific IP address to that device.
  3. Accessing the Router’s Admin Panel: Once you have the MAC address, log in to the admin panel of your router. This can typically be done through a web browser by entering the router’s IP address. Look for the DHCP settings or a similar area where devices are managed.
  4. Designating IP Addresses: In the DHCP settings, you can assign a static IP address by entering the MAC address of the device along with the desired IP address you wish to assign. This ensures the device will always receive the same IP whenever it connects to your network.
  5. Benefits of Static IP Assignments: Assigning static IPs enhances network organization and minimizes the risk of IP address conflicts, which can occur when multiple devices request the same IP. This promotes stability, allowing devices to communicate effectively without interruptions.

By mastering the process of changing IP addresses on your router and implementing static IP assignments, you can significantly improve the reliability and efficiency of your home network.

router

Troubleshooting Common Issues When Changing IP Address

Sometimes, users will encounter difficulties when attempting to change their router’s IP address. Common problems include being unable to access the admin panel, forgetting login credentials, or losing internet connectivity after making changes. To troubleshoot these issues, start with the basics: ensure that your device is connected to the router, either via Ethernet or Wi-Fi. If you cannot remember your router’s login details, performing a factory reset can restore them to default settings.

To avoid losing internet access, consider documenting your current IP settings before making any modifications. If you find yourself in a situation where connectivity has been lost due to changes made, try resetting the router. Then, log back into the admin panel to revert to the original settings.

Keeping these troubleshooting tips in mind ensures you proceed confidently as you navigate through the process of learning how to change IP address on router. If issues persist, consulting the user manual can be helpful. Additionally, searching online forums for guidance specific to your router model may provide valuable insights.

Securing Your Network After Changing Your IP Address

Once you’ve successfully adjusted your router’s IP address and customized your settings. The last crucial step is to ensure your network remains secure. This involves changing the IP address. It also requires updating your router’s firmware, which can provide security enhancements and fix vulnerabilities.

In addition, it’s advisable to configure WPA3 encryption if your router supports it. This protection standard is more secure than previous versions and safeguards your network against unauthorized access. Restricting access to the router’s admin panel is crucial for maintaining your network’s integrity. One effective way to do this is by changing the default username and password.

Monitoring your network activity regularly can also help detect any unusual behavior that might indicate a security breach. By following these steps, you can ensure that your network is functional and fortified against potential threats. This approach demonstrates a comprehensive understanding of how to effectively change the IP address on your router.

Conclusion

In conclusion, changing the IP address on your router is a straightforward process that can significantly impact your network’s functionality and security. From understanding the various IP addresses involved to accessing your router’s admin panel and troubleshooting any arising issues. This guide has equipped you with the necessary knowledge to navigate this task confidently. By keeping your network secure and frequently reassessing your configurations, you ensure that your online activities remain safe and efficient. Remember, knowing how to change IP address on router is an invaluable skill in today’s digital age!

« Older posts