making our professional lives more efficient, productive, and interconnected.

Month: June 2024 (Page 1 of 2)

Exploring the Verizon CR1000A Router

In an increasingly digital world, a reliable internet connection is more critical than ever. The foundation of any robust home network begins with a high-quality router. The Verizon CR1000A router is designed to deliver exceptional performance, reliability, and advanced features. Consequently, understanding its capabilities and functionalities can significantly enhance your internet experience. Therefore, this comprehensive guide explores the key features, benefits, setup process, and troubleshooting tips for the Verizon CR1000A router. By delving into these aspects, you can make an informed decision and optimize your home network.

Key Features of the Verizon CR1000A Router

The Verizon CR1000A router boasts an array of advanced features designed to provide superior connectivity and user convenience. Understanding these features helps you maximize the router’s potential. Therefore, exploring the key features of the Verizon CR1000A router is essential.

Verizon CR1000A Router

Dual-Band Wi-Fi

One of the standout features of the Verizon CR1000A router is its dual-band Wi-Fi capability. The router operates on both the 2.4 GHz and 5 GHz frequency bands, offering greater flexibility and performance. The 2.4 GHz band provides broader coverage and is ideal for connecting devices at a distance or through obstacles. Conversely, the 5 GHz band offers higher speeds and is less prone to interference, making it suitable for bandwidth-intensive activities such as streaming and gaming. By understanding dual-band Wi-Fi, you can optimize your network for both range and speed. Therefore, recognizing the value of dual-band technology is crucial.

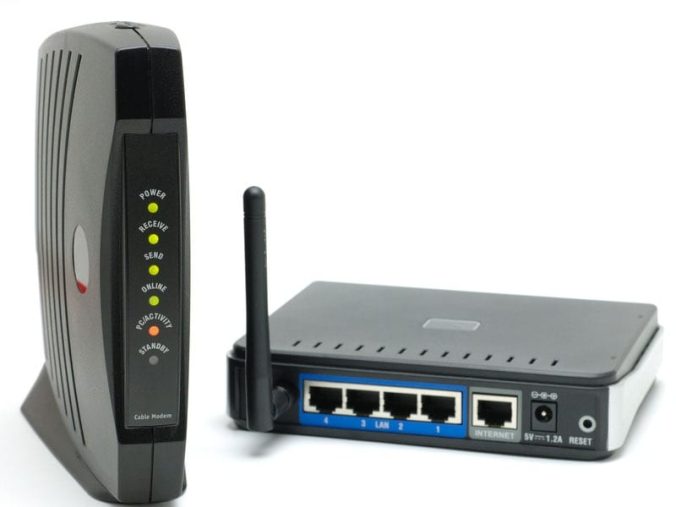
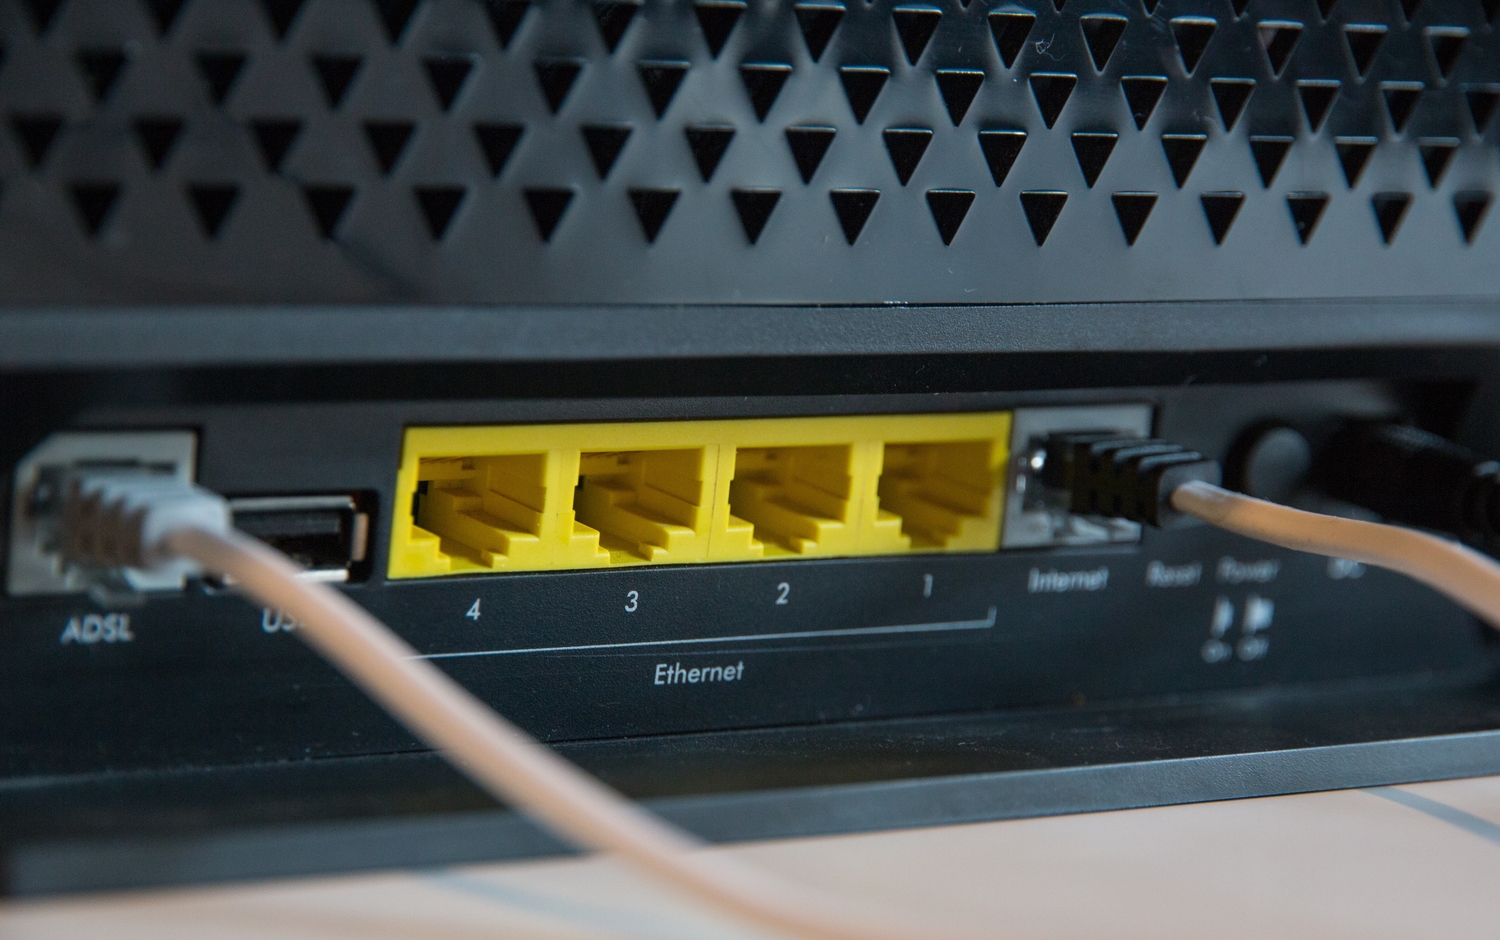
Gigabit Ethernet Ports

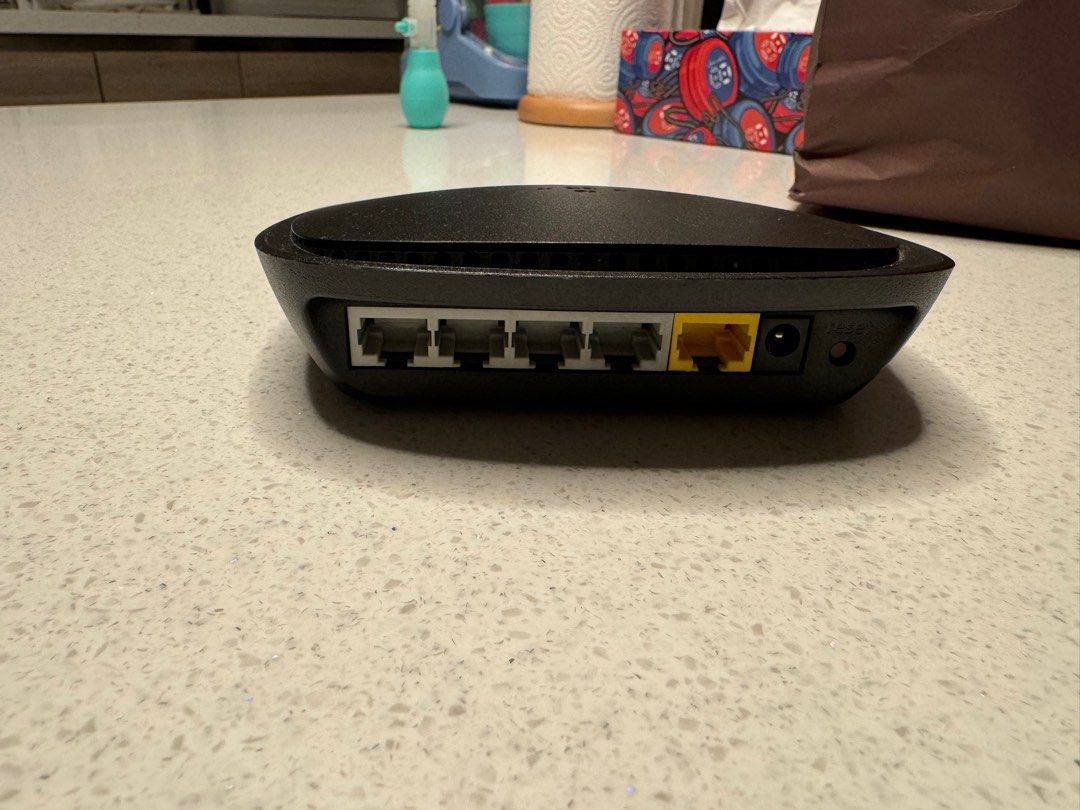
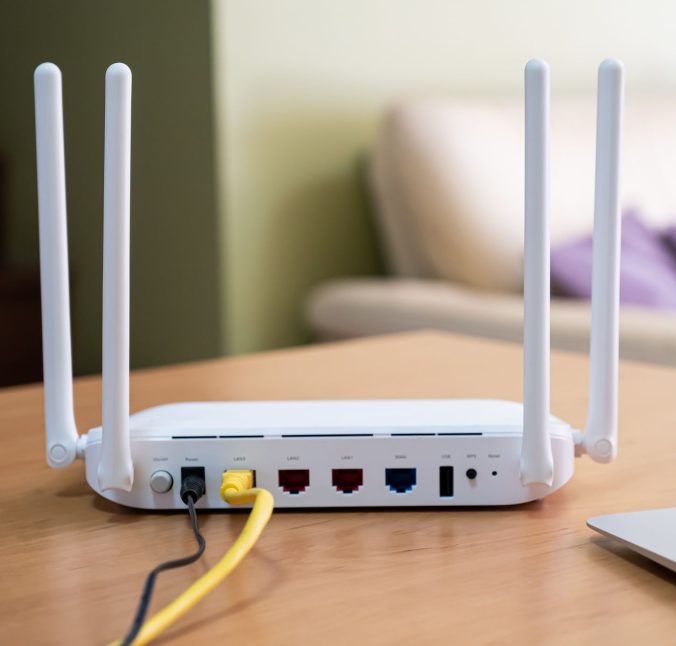
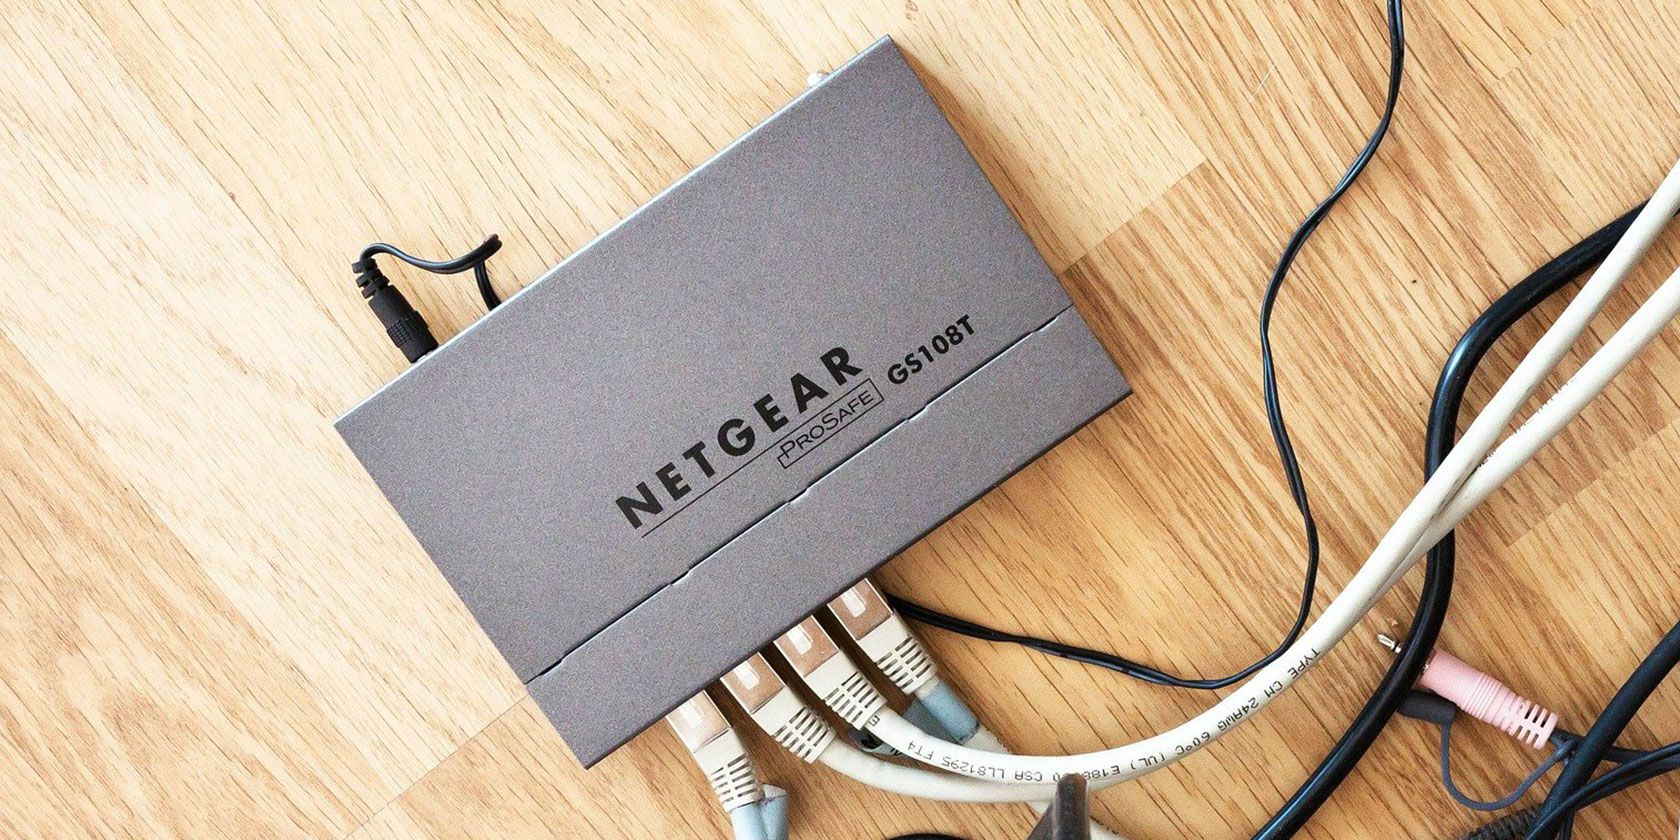
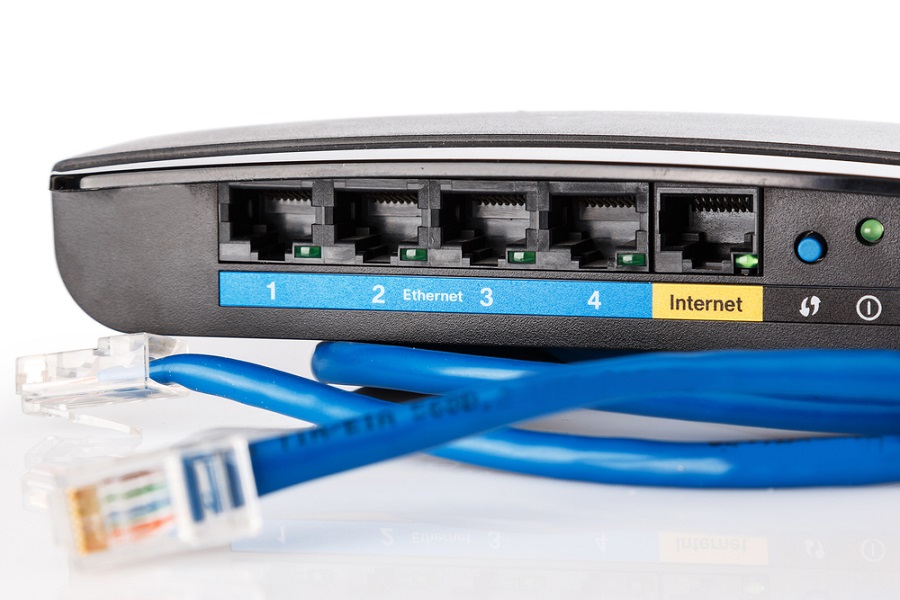
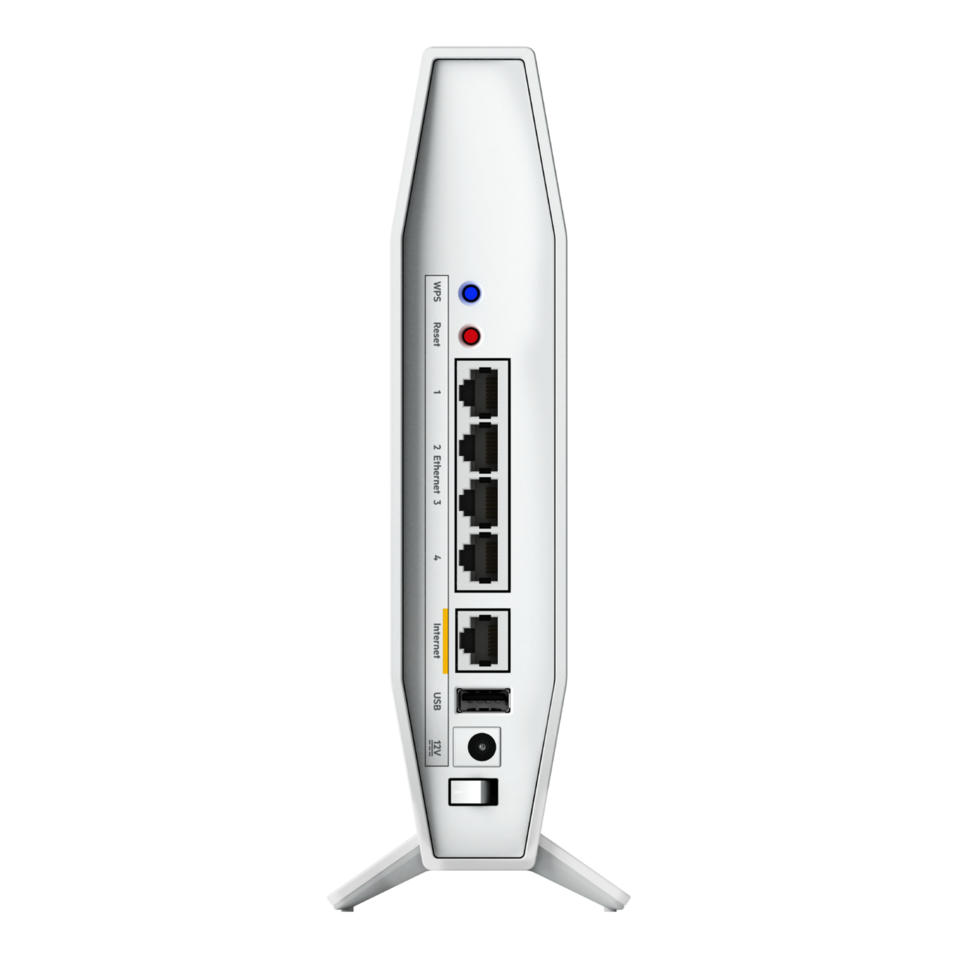
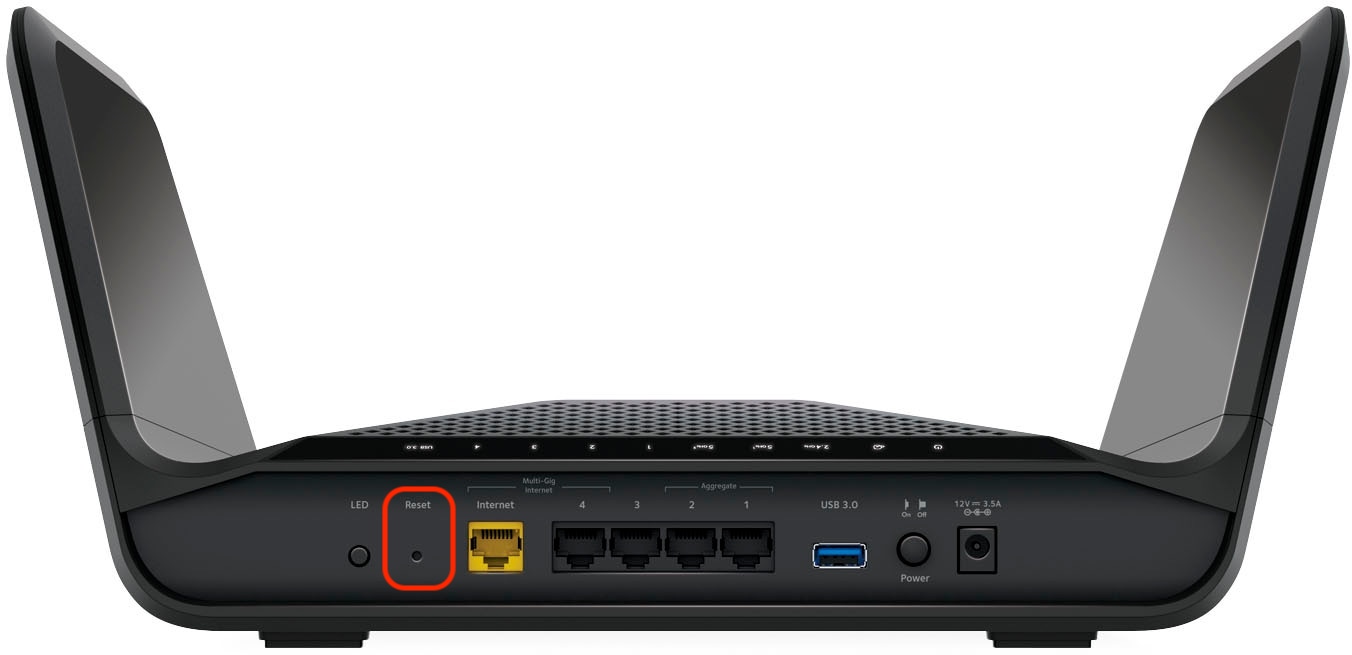
The Verizon CR1000A router is equipped with multiple Gigabit Ethernet ports, providing fast and reliable wired connections. These ports offer speeds up to 1000 Mbps, ideal for devices that require a stable and high-speed connection, such as gaming consoles, smart TVs, and desktop computers. By connecting these devices via Ethernet, you can minimize latency and maximize performance. By understanding the benefits of Gigabit Ethernet ports, you can enhance your network’s reliability and speed. Therefore, recognizing the importance of wired connectivity options is essential.

Advanced Security Features

Security is a paramount concern for any network, and the Verizon CR1000A router addresses this with a suite of advanced security features. These include WPA3 encryption, which provides enhanced protection for your Wi-Fi connections, and integrated firewalls to prevent unauthorized access. The router also supports regular firmware updates, ensuring your network remains secure against emerging threats. By understanding the security features, you can protect your network and personal data. Therefore, recognizing the significance of robust security measures is crucial.

Benefits of Using the Verizon CR1000A Router

Using the Verizon CR1000A router offers several benefits, from improved connectivity to enhanced network management. Understanding these benefits underscores the value of this advanced router. Therefore, exploring the benefits of the Verizon CR1000A router is essential.

Verizon CR1000A Router

Enhanced Network Performance

One of the primary benefits of the Verizon CR1000A router is its enhanced network performance. The dual-band Wi-Fi and Gigabit Ethernet ports ensure fast, stable, and reliable connections for all your devices. This improvement translates to smoother streaming, lag-free gaming, faster downloads, and more responsive browsing. By understanding the performance benefits, you can appreciate the router’s impact on your digital activities. Therefore, recognizing the importance of high-speed connectivity is crucial.

Improved Network Management

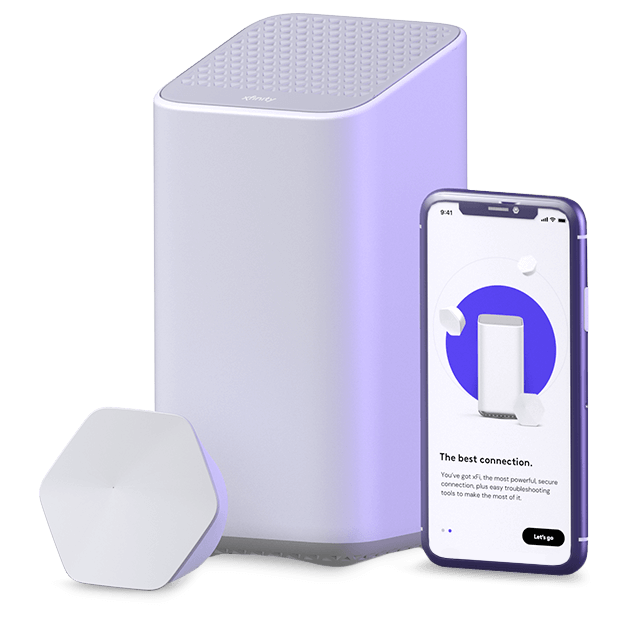
The Verizon CR1000A router offers advanced network management features, making it easier to monitor and control your home network. The router’s user-friendly interface allows you to manage connected devices, set up guest networks, and configure parental controls. With these tools, you can ensure optimal performance, security, and accessibility for all users. By understanding the network management capabilities, you can optimize your router’s functionality. Therefore, recognizing the value of effective network management is essential.

Future-Proof Technology

The Verizon CR1000A router is designed with future-proof technology, ensuring it remains relevant as internet speeds and connectivity demands increase. The dual-band Wi-Fi, Gigabit Ethernet ports, and support for the latest security standards make the router well-equipped to handle future advancements. By understanding the future-proof aspects, you can invest in a router that will continue to meet your needs over time. Therefore, recognizing the importance of future-ready technology is crucial.

Setting Up the Verizon CR1000A Router

Setting up the Verizon CR1000A router properly is crucial for optimal performance and connectivity. Understanding the setup process ensures a smooth and efficient experience. Therefore, exploring the steps to set up the Verizon CR1000A router is essential.

Verizon CR1000A Router

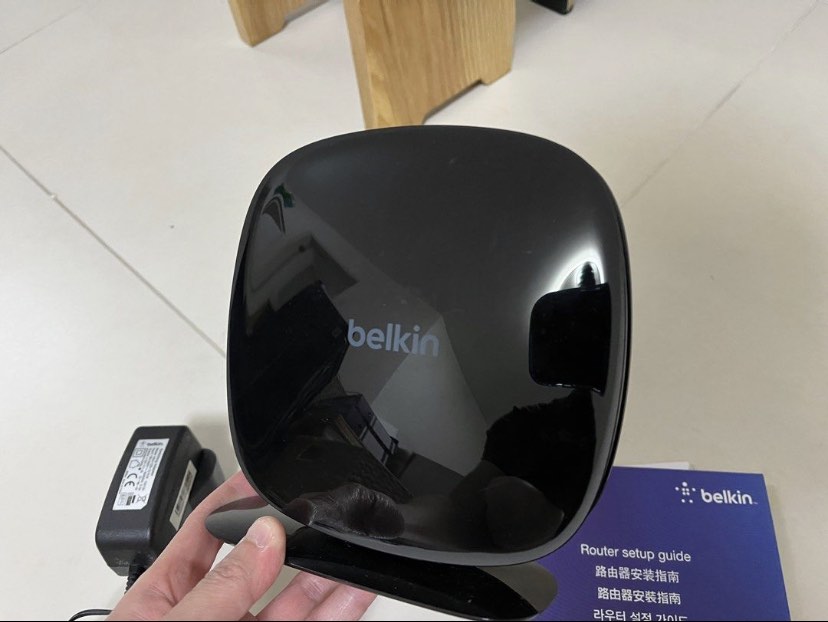
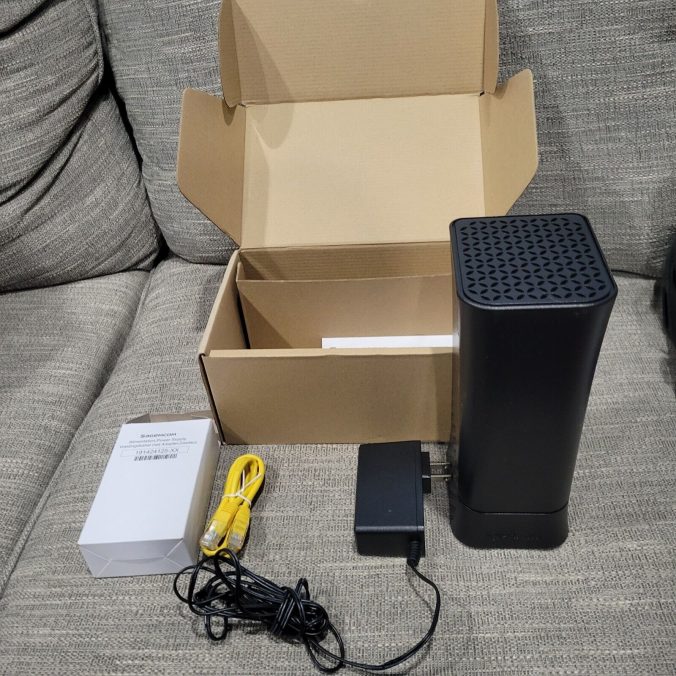
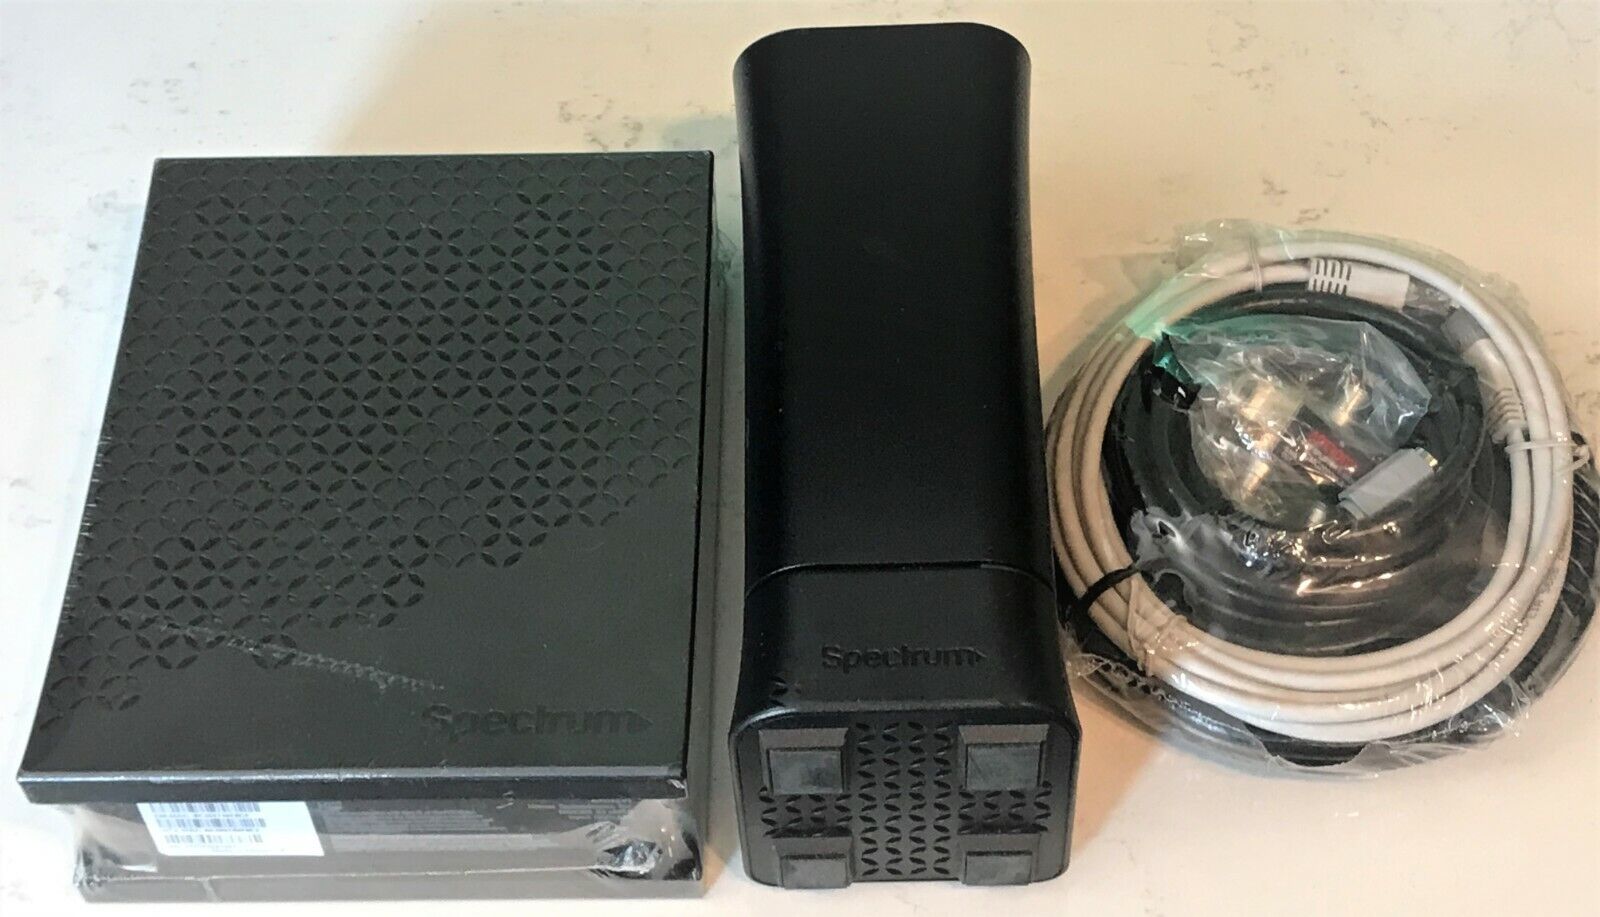
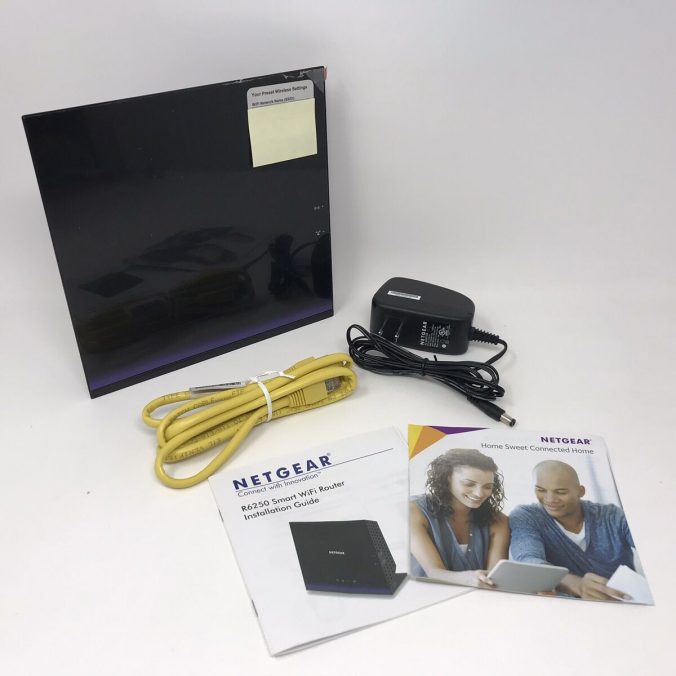
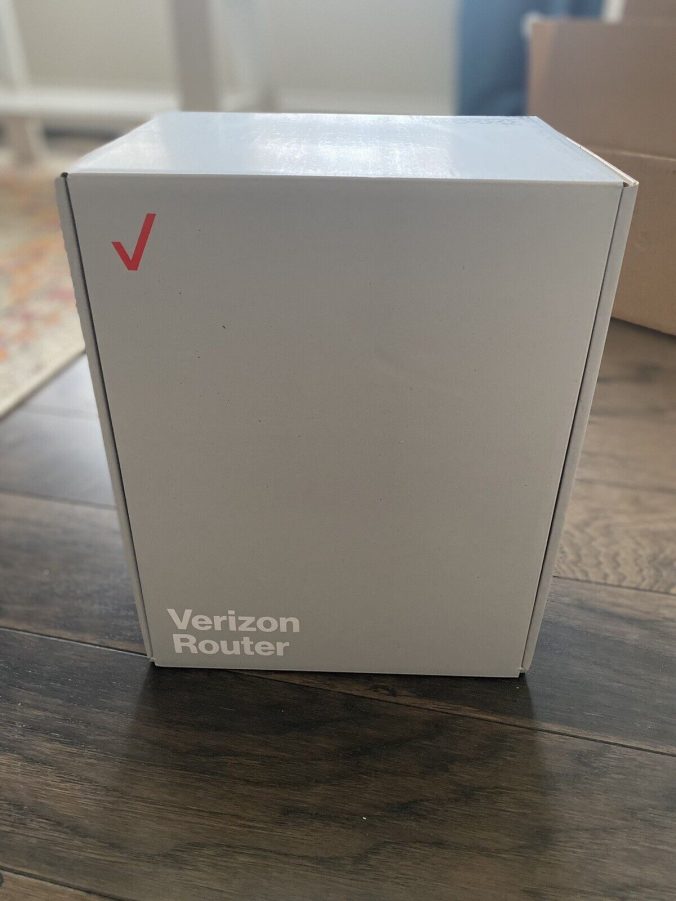
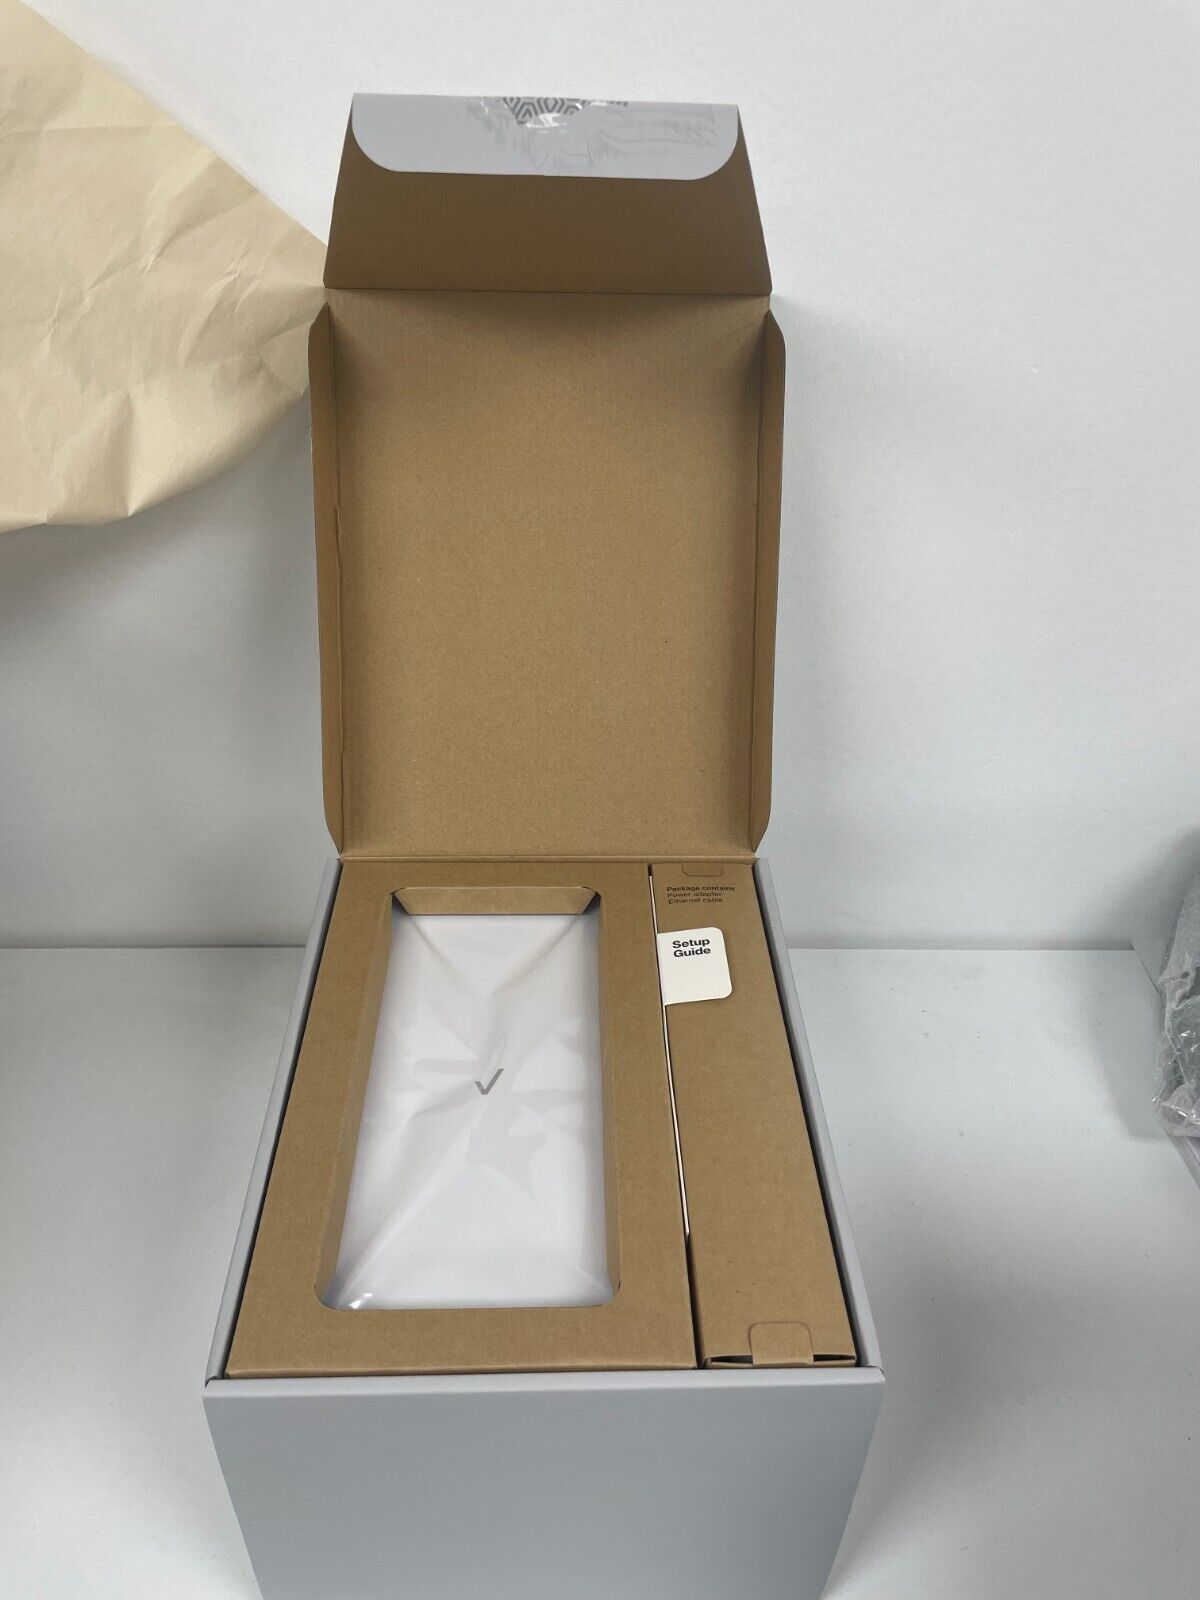
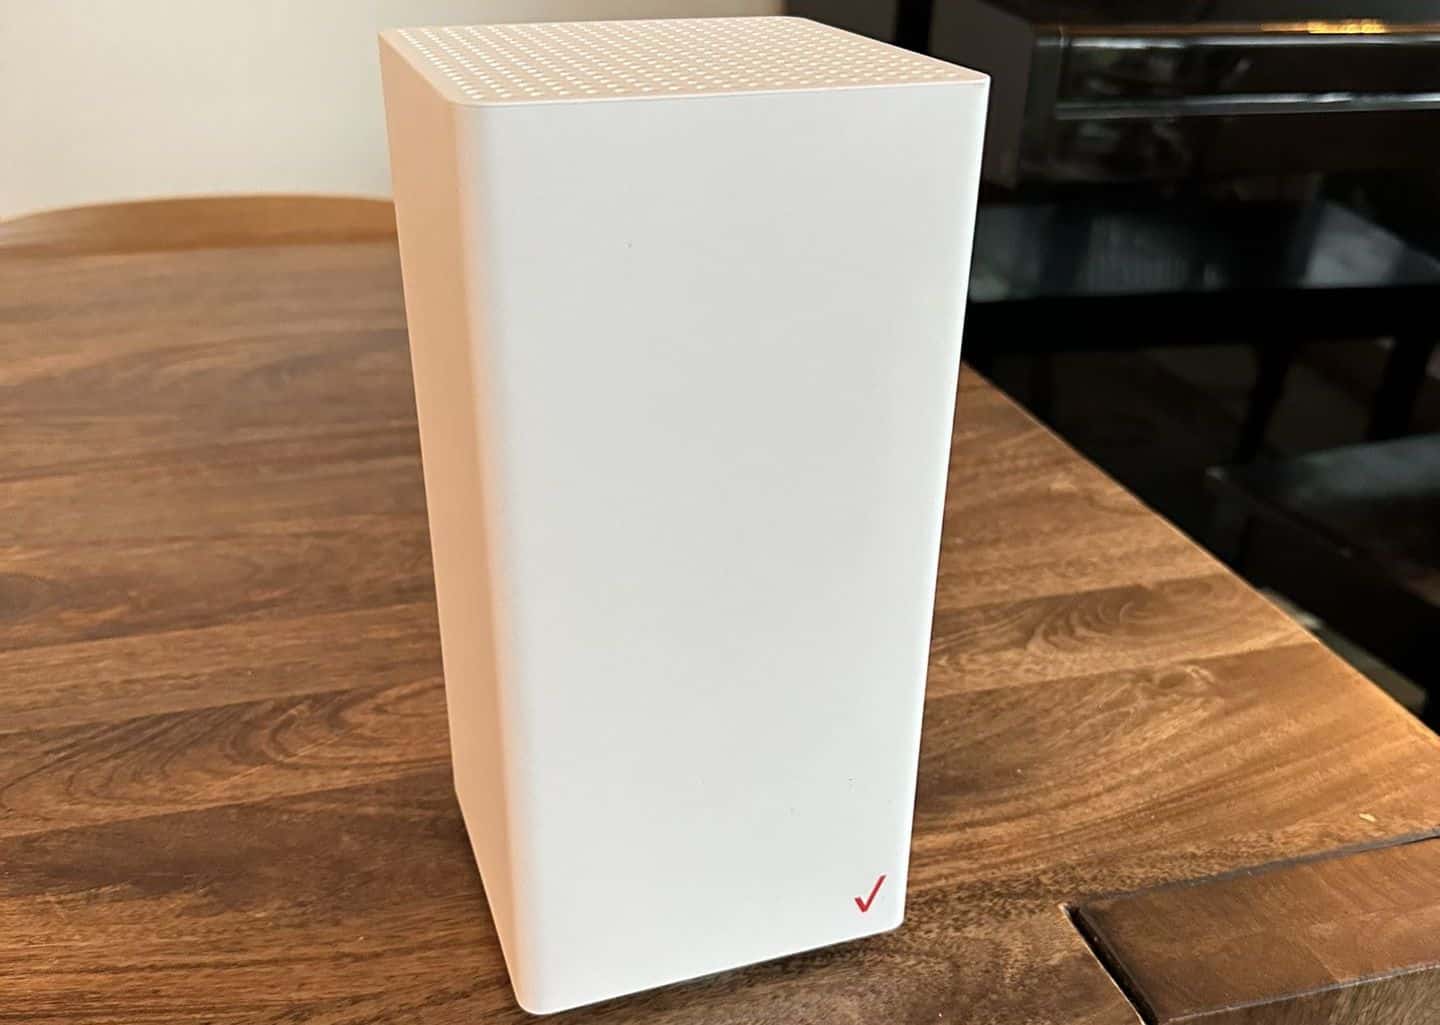
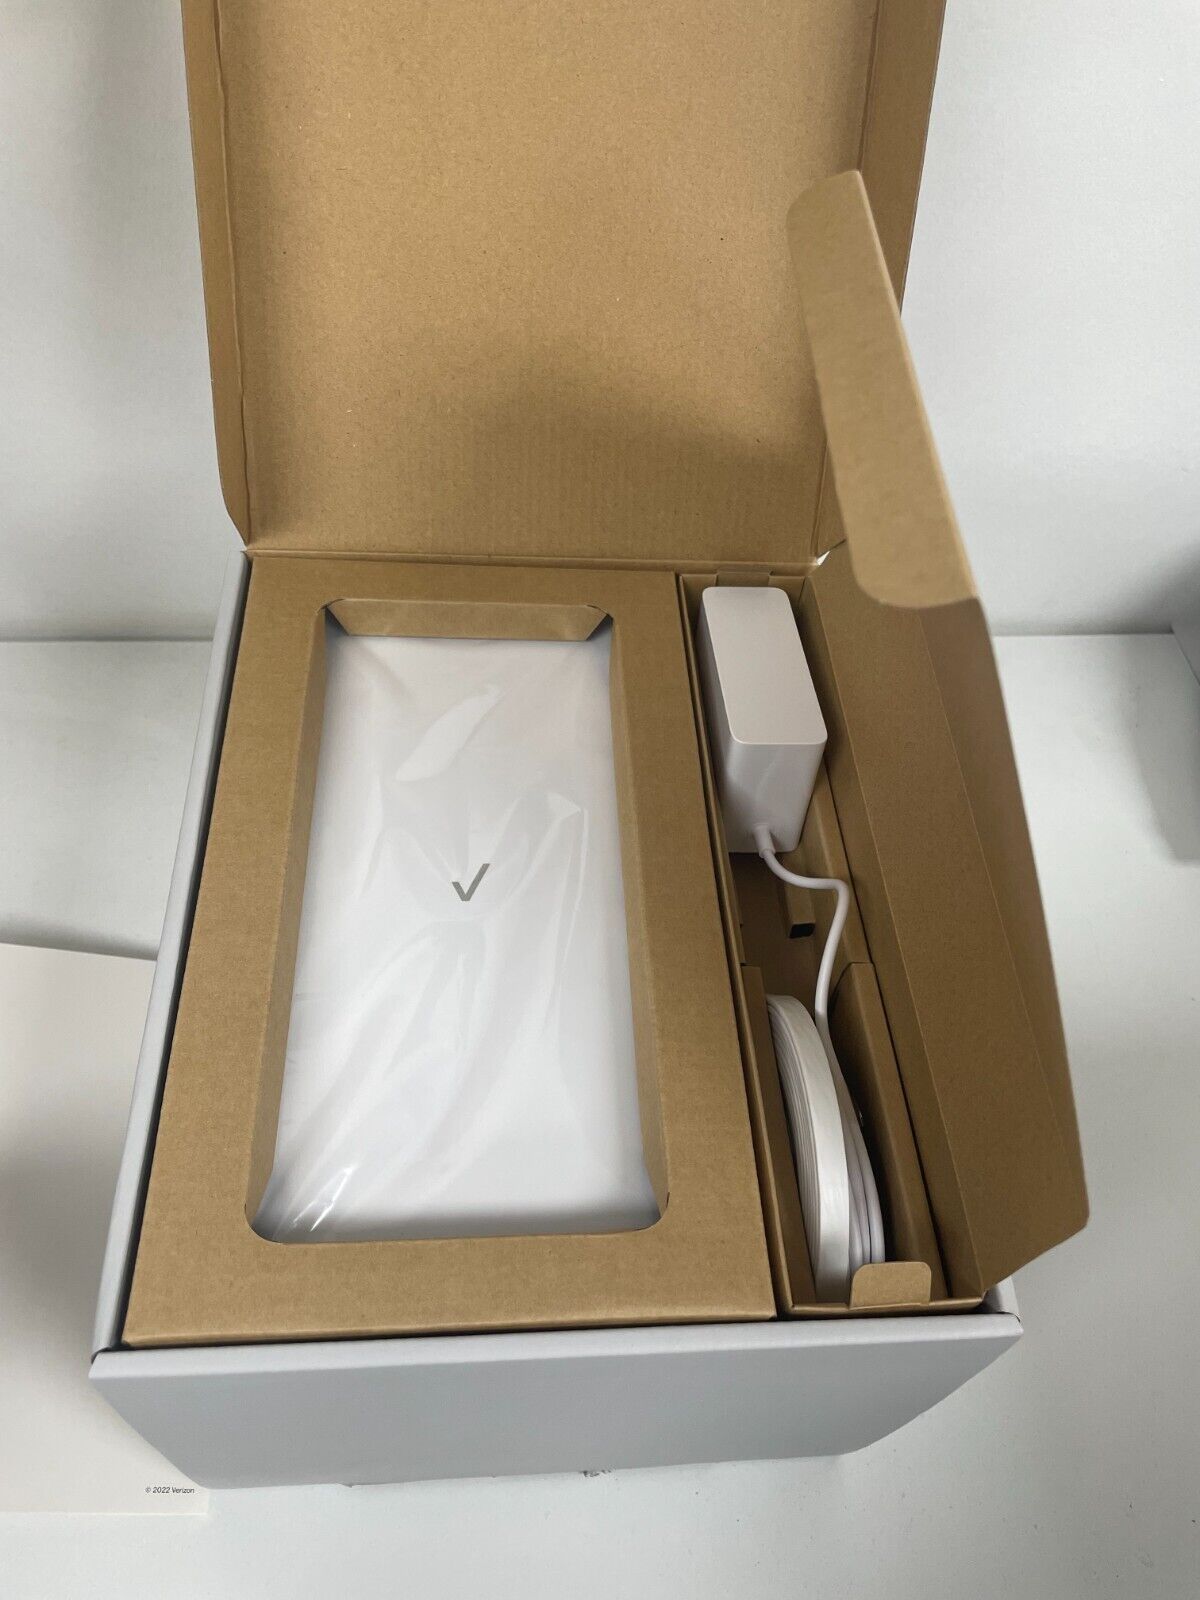
Unboxing and Initial Connections

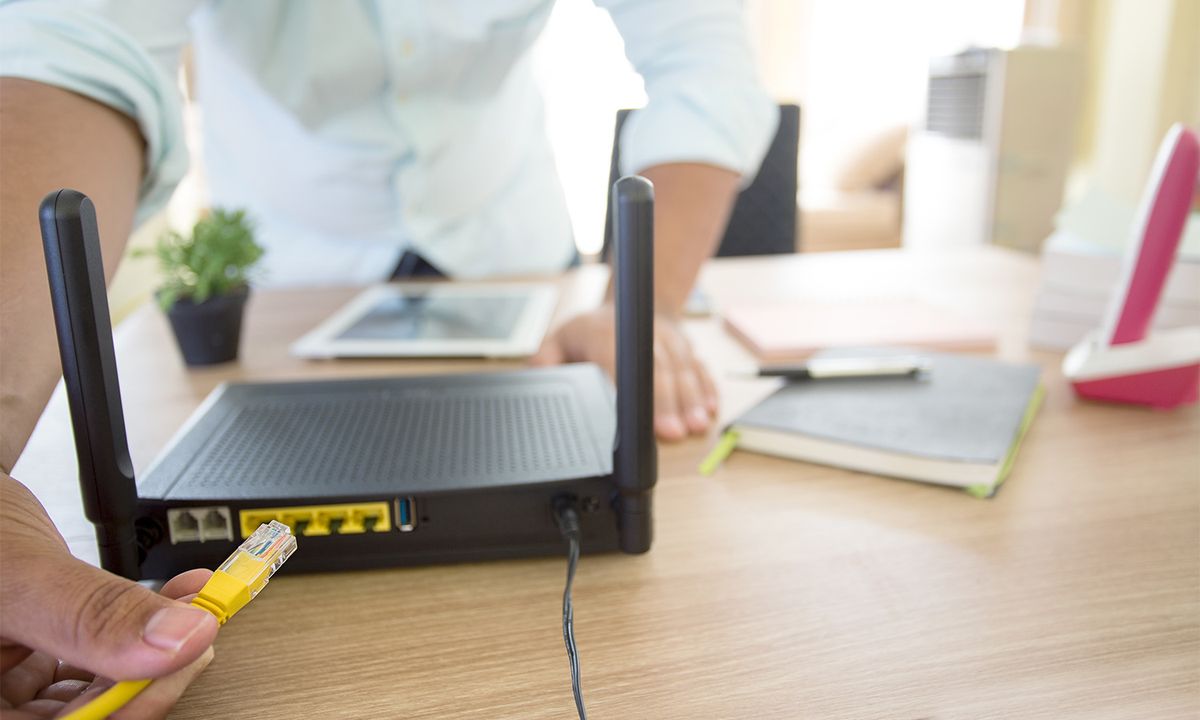
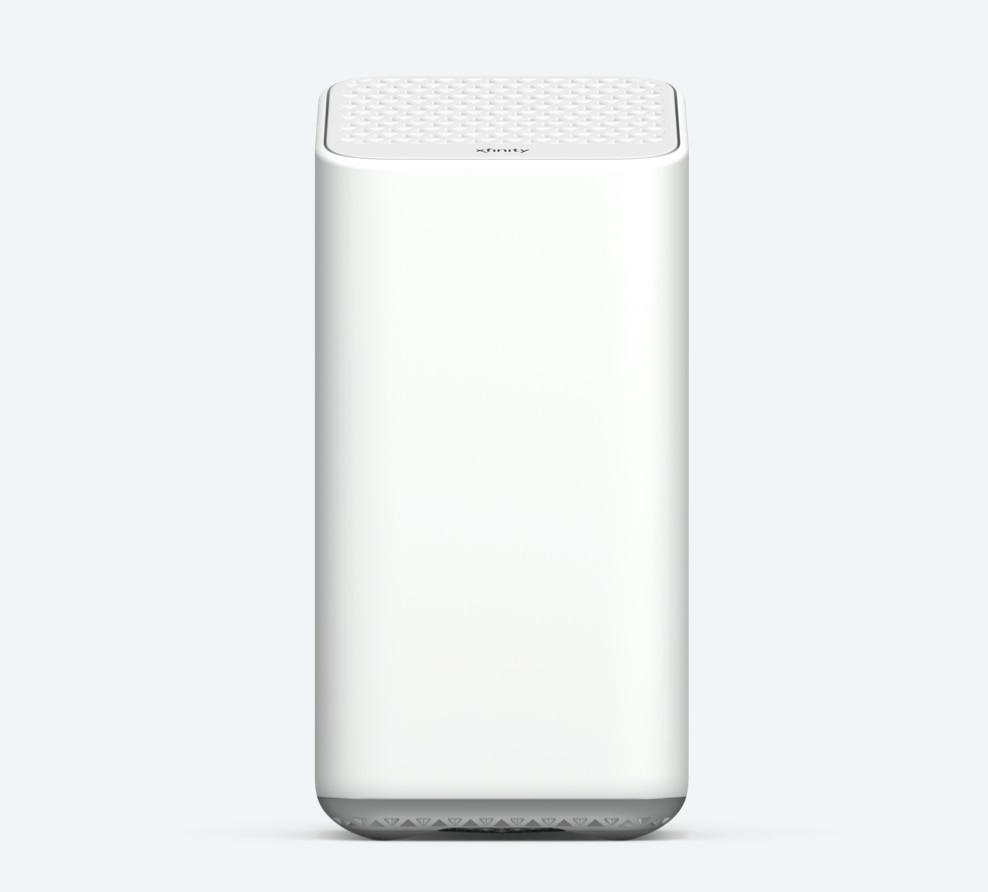
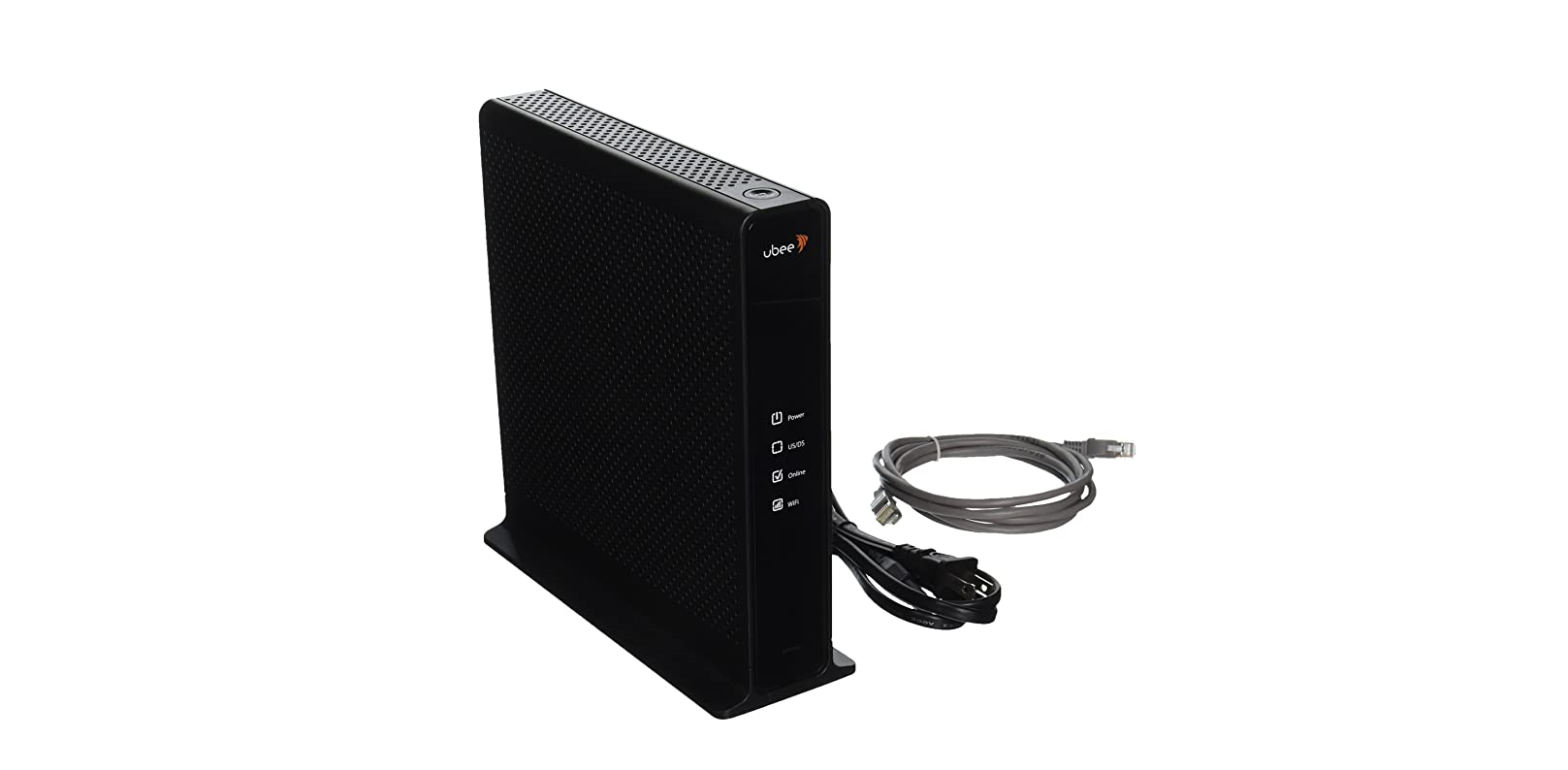
Begin by unboxing the Verizon CR1000A router and familiarizing yourself with its components. In the box, you should find the router, power adapter, Ethernet cable, and quick start guide. Place the router in a central location within your home to ensure even Wi-Fi coverage. Connect the power adapter to the router and plug it into an outlet. Next, connect the Ethernet cable from your modem to the WAN port on the router. By understanding these initial connections, you can prepare the router for configuration. Therefore, recognizing the importance of proper placement and connections is crucial.

Accessing the Router’s Interface

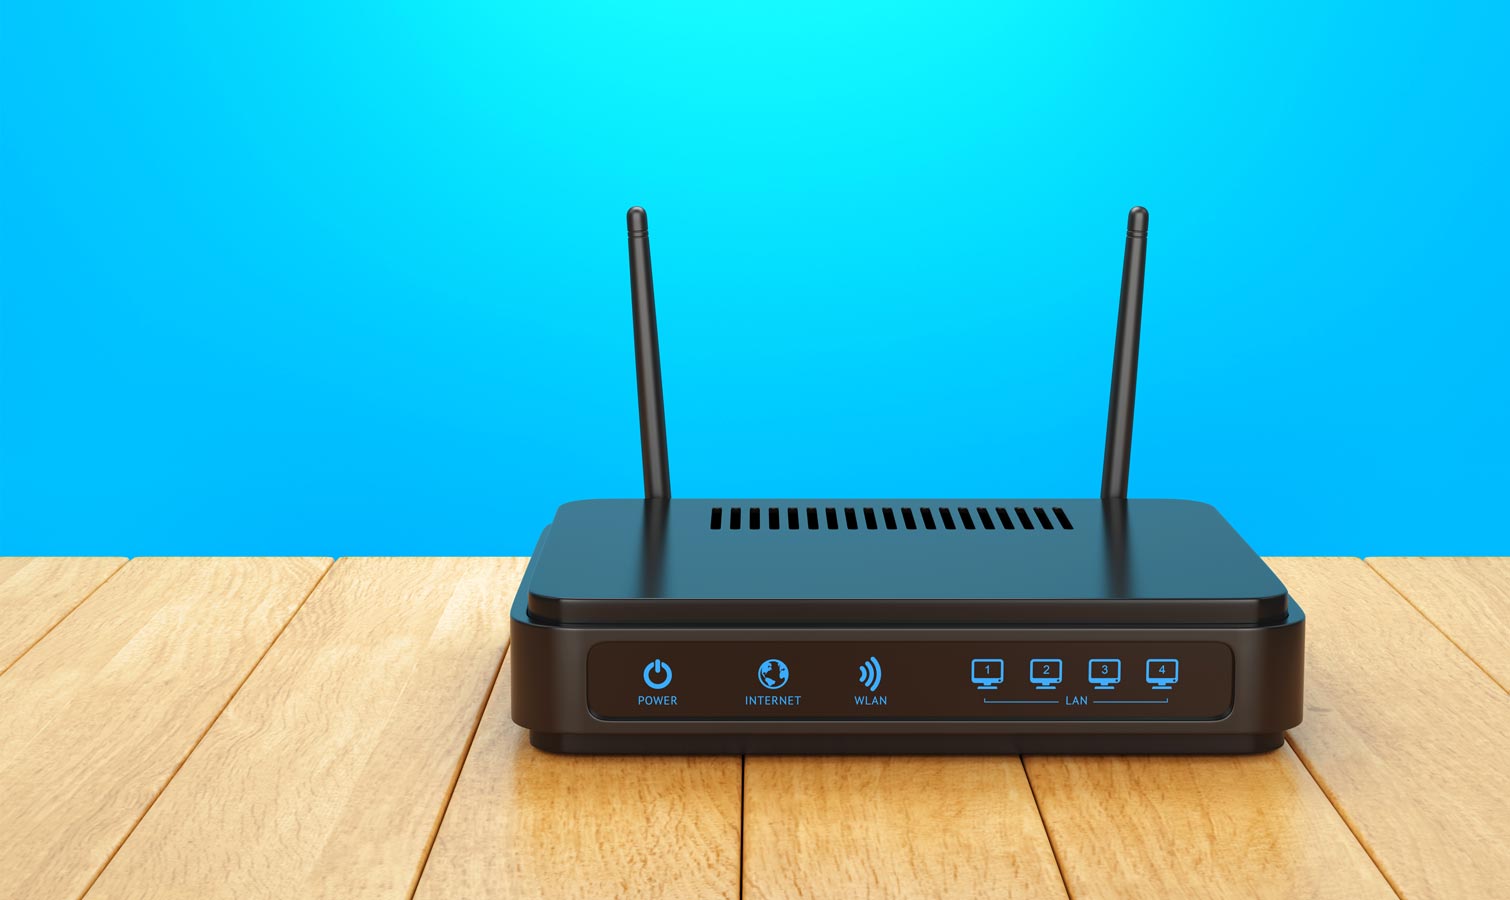
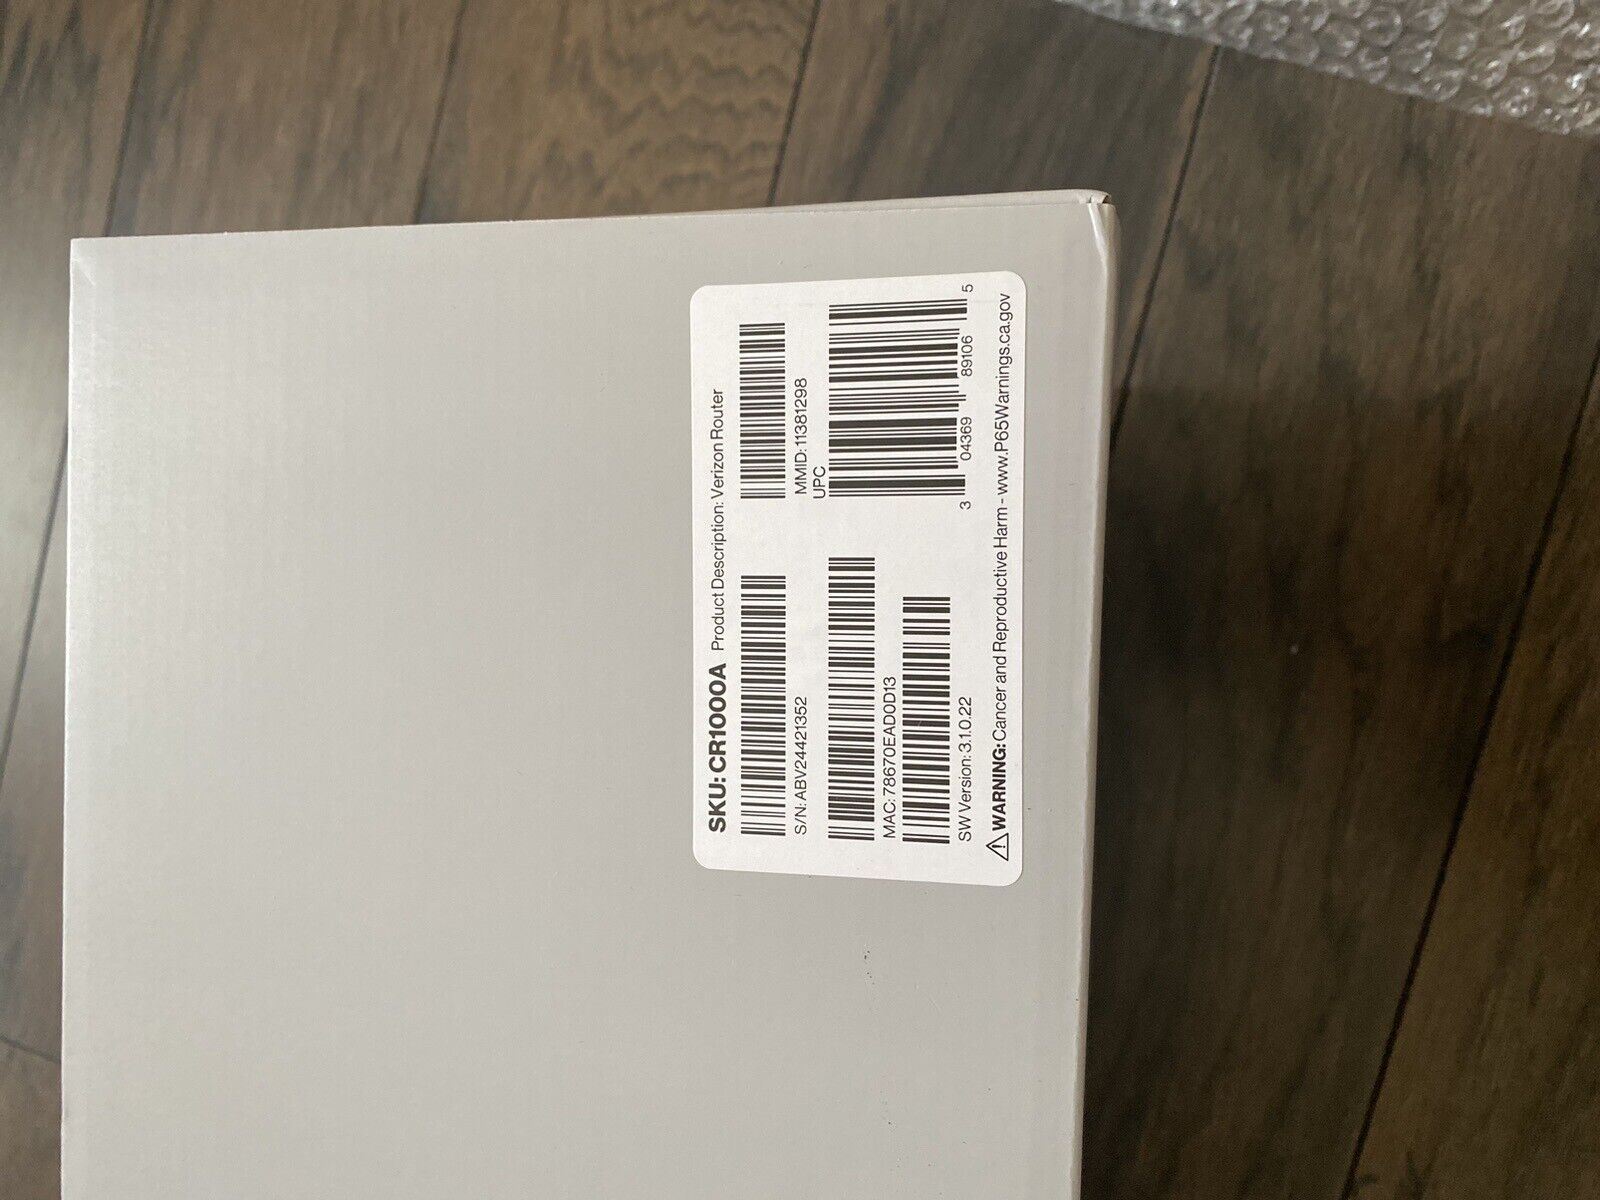
Once the physical connections are in place, access the router’s interface to configure settings. Open a web browser and enter the router’s IP address, typically 192.168.1.1. You will be prompted to log in using the default username and password, usually found on a sticker on the router or in the quick start guide. After logging in, you can customize settings such as Wi-Fi network name (SSID), password, and security options. By understanding how to access the router’s interface, you can tailor the settings to meet your needs. Therefore, recognizing the value of customizable settings is essential.

Configuring Wi-Fi and Security Settings

Configuring the Wi-Fi and security settings is a crucial step in the setup process. Set a unique SSID (network name) and a strong password to protect your Wi-Fi network. Enable the WPA3 encryption for enhanced security. Additionally, configure the guest network if you wish to provide internet access to visitors without giving them access to your main network. Regularly check for firmware updates to ensure the router remains secure and up-to-date. By understanding these configuration steps, you can optimize your network’s performance and security. Therefore, recognizing the importance of proper configuration is crucial.

Troubleshooting Common Issues with the Verizon CR1000A Router

While the Verizon CR1000A router is designed for reliability, occasional issues may arise. Understanding common troubleshooting steps helps you resolve problems quickly. Therefore, exploring troubleshooting tips for the Verizon CR1000A router is essential.
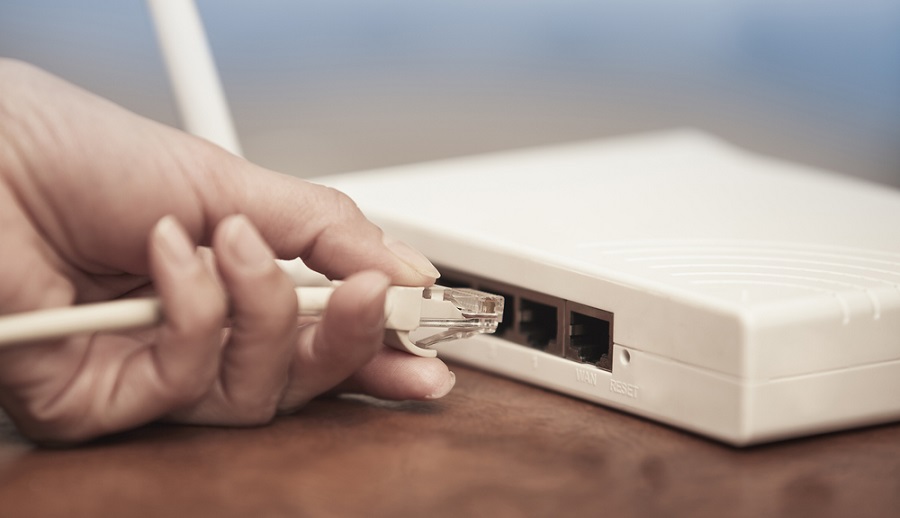
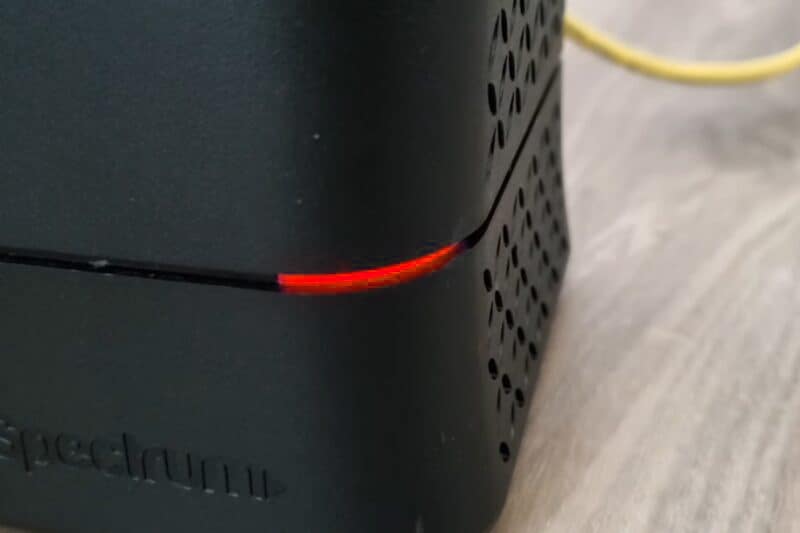
Verizon CR1000A Router

Connectivity Issues

Connectivity issues are common and can be caused by various factors. If you experience a loss of connection, restart both your modem and router by unplugging them for a few seconds and then plugging them back in. Ensure all cables are securely connected and check for any visible damage. Additionally, verify that your devices are connected to the correct Wi-Fi network and that the router’s firmware is up-to-date. By understanding these troubleshooting steps, you can address connectivity issues effectively. Therefore, recognizing the importance of maintaining connections is crucial.

Slow Internet Speeds

Experiencing slow internet speeds can be frustrating. First, run an internet speed test to determine if the issue is with your connection or the router. If the speeds are significantly lower than expected, check for interference from other devices, such as microwaves or cordless phones, which can impact Wi-Fi performance. Consider changing the Wi-Fi channel or band (2.4 GHz or 5 GHz) to reduce congestion. Additionally, ensure no bandwidth-heavy applications are running in the background. By understanding these steps, you can improve your internet speeds. Therefore, recognizing the significance of troubleshooting slow speeds is essential.
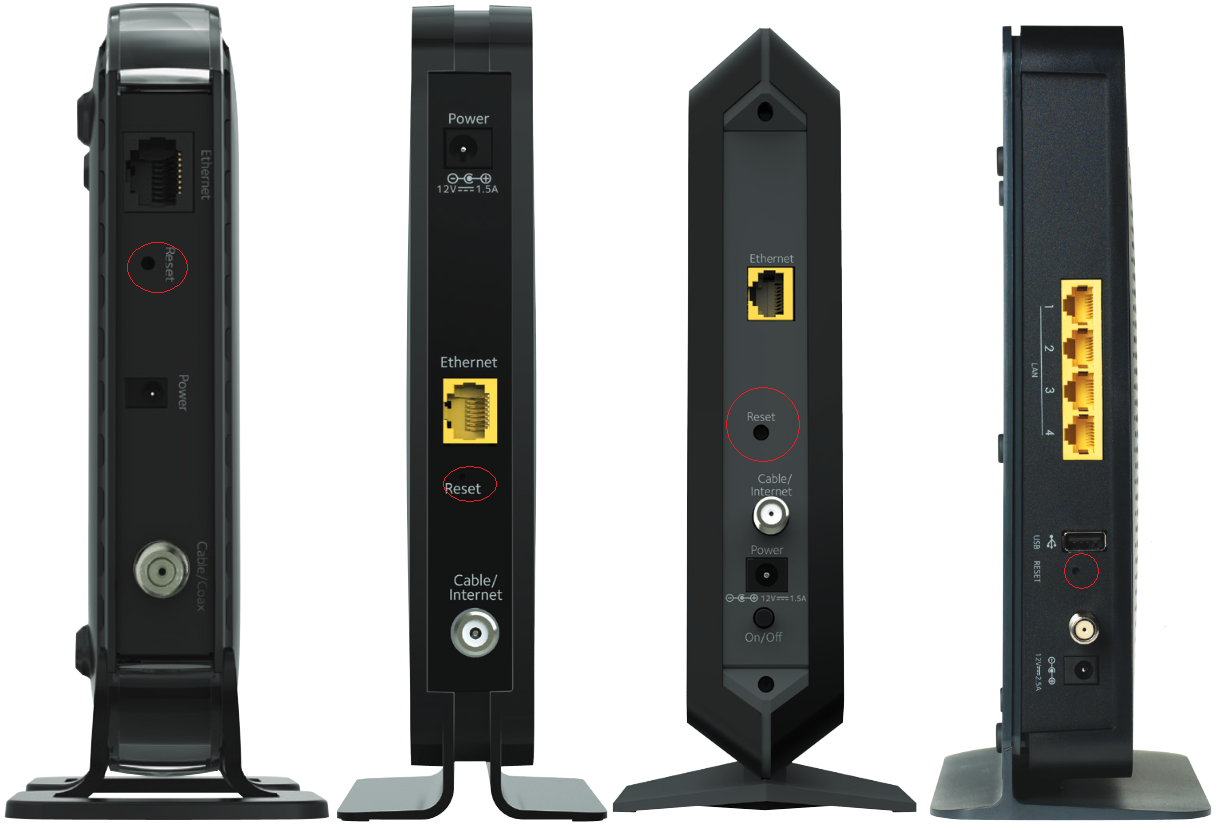
Unresponsive Router

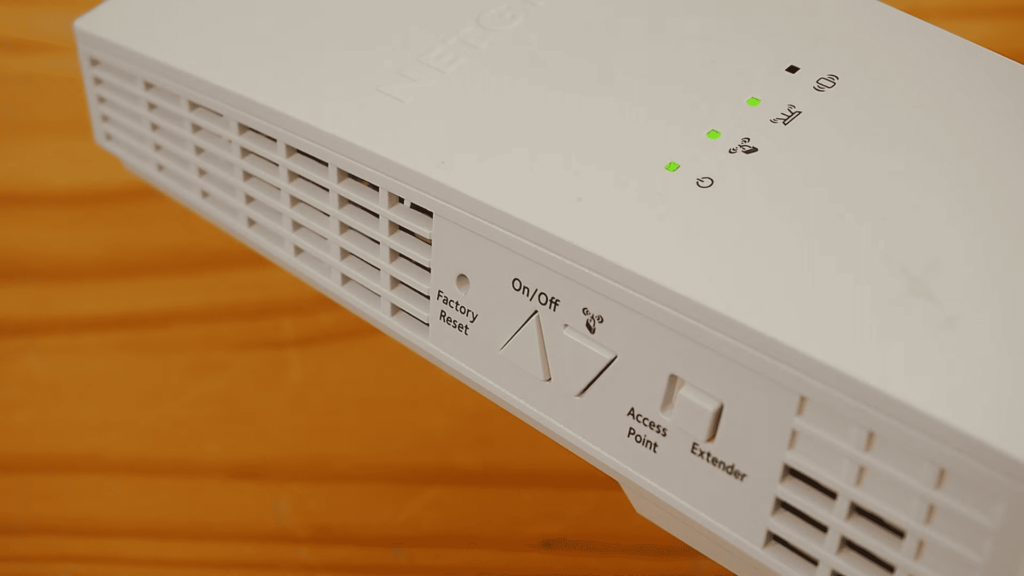
If the router becomes unresponsive, a factory reset may be necessary. Locate the reset button on the router, usually found on the back, and press it using a small, pointed object like a paperclip. Hold the button for about 10 seconds until the router restarts. Note that a factory reset will erase all custom settings, returning the router to its default state. After the reset, reconfigure the router settings as needed. By understanding how to perform a factory reset, you can resolve unresponsive issues effectively. Therefore, recognizing the importance of knowing reset procedures is crucial.

Addressing Common Questions About the Verizon CR1000A Router

Understanding common questions about the Verizon CR1000A router provides additional clarity and guidance for users. Knowledge of these answers ensures a better-prepared and successful networking experience. Therefore, exploring common questions is essential.

Is the Verizon CR1000A Router Suitable for Large Homes?

A common question is whether the Verizon CR1000A router is suitable for large homes. The router’s dual-band Wi-Fi and high-speed Ethernet ports make it capable of providing strong coverage in large homes. However, for exceptionally large homes or properties with multiple floors, additional Wi-Fi extenders or mesh systems may be necessary to ensure complete coverage. By understanding the router’s capabilities, you can evaluate its suitability for your space. Therefore, recognizing the importance of coverage considerations is crucial.

Can I Use the Verizon CR1000A Router with Other Internet Providers?

Another common question is whether the Verizon CR1000A router can be used with other internet providers. While the router is optimized for Verizon services, it can be configured to work with other broadband providers by adjusting the necessary settings within the router’s interface. It’s important to check with your internet provider for compatibility and specific configuration instructions. By understanding the flexibility of the router, you can adapt it for various service providers. Therefore, recognizing the versatility of the router is essential.

Addressing Common Misconceptions About Routers

Addressing common misconceptions about routers provides accurate information and dispels unwarranted concerns. Clearing up misunderstandings ensures an informed perspective. Therefore, this section explores common misconceptions about routers.

Verizon CR1000A Router

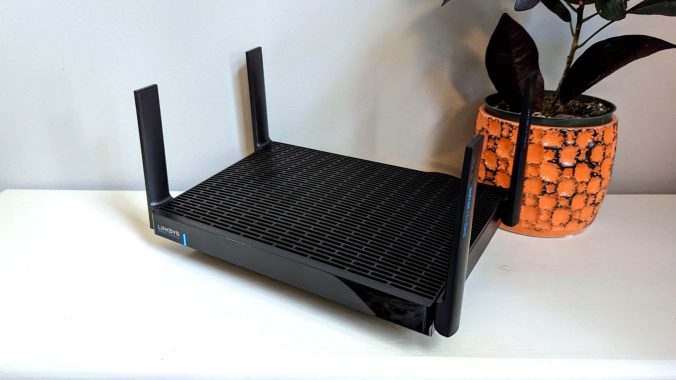
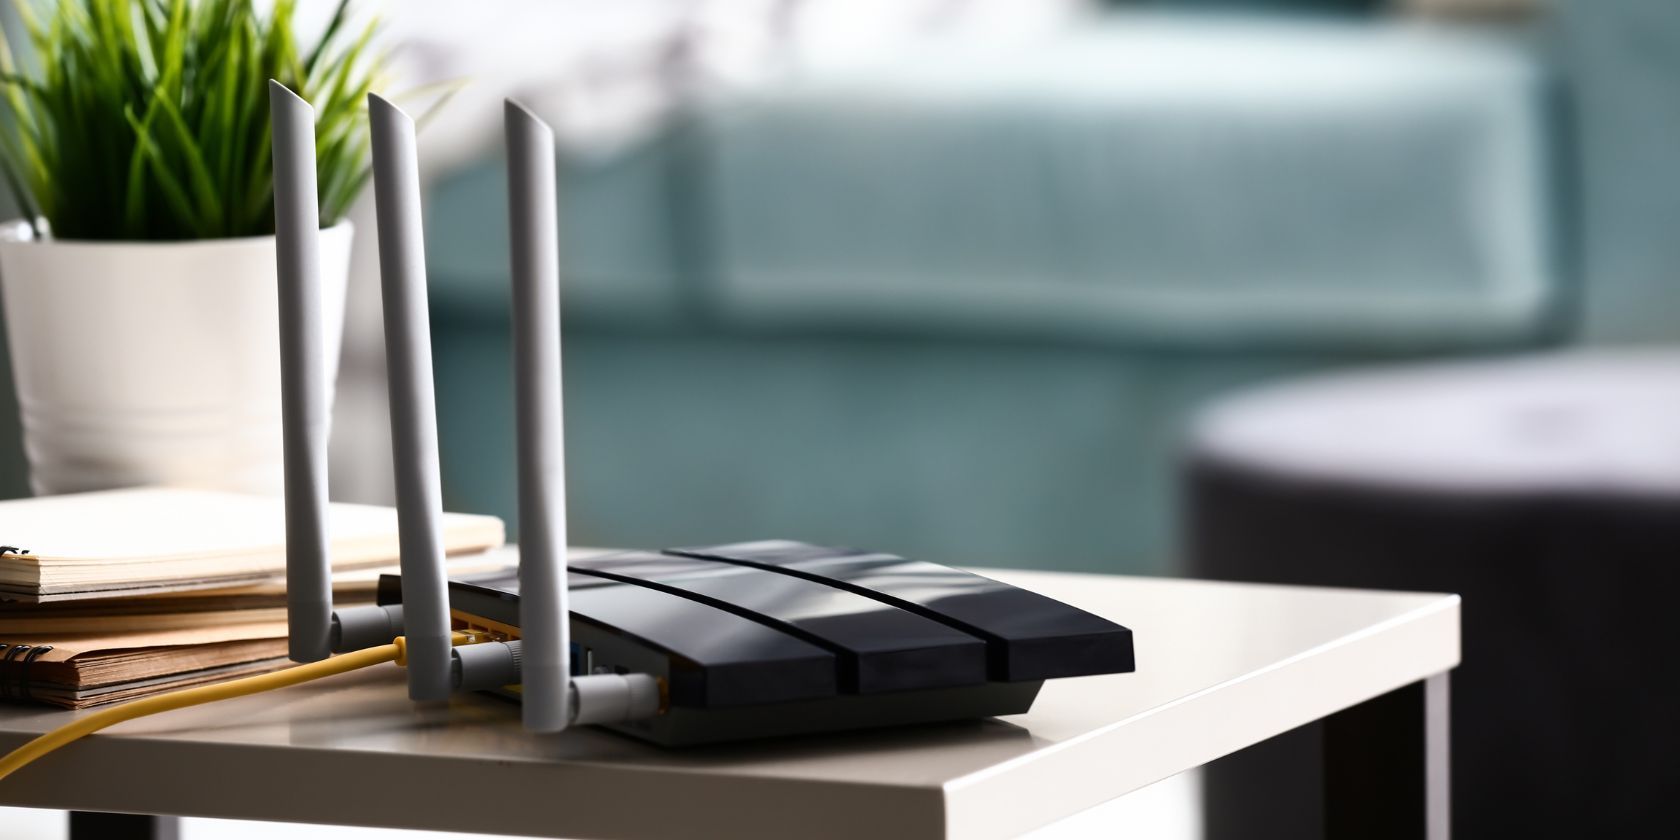
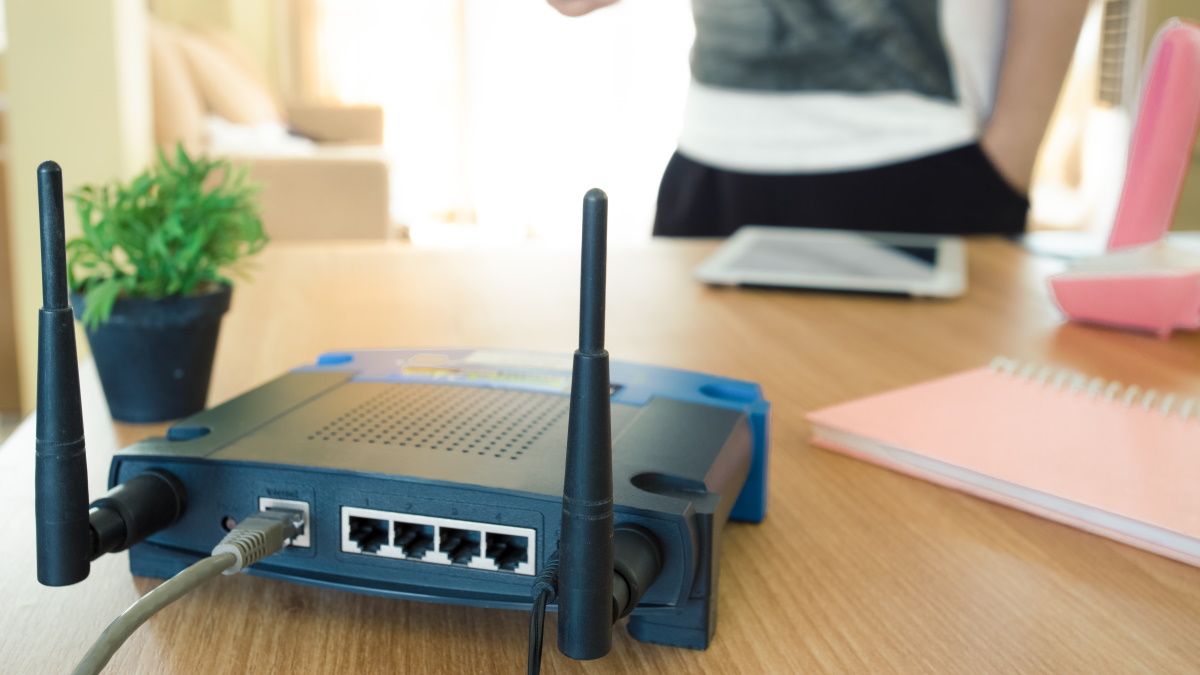
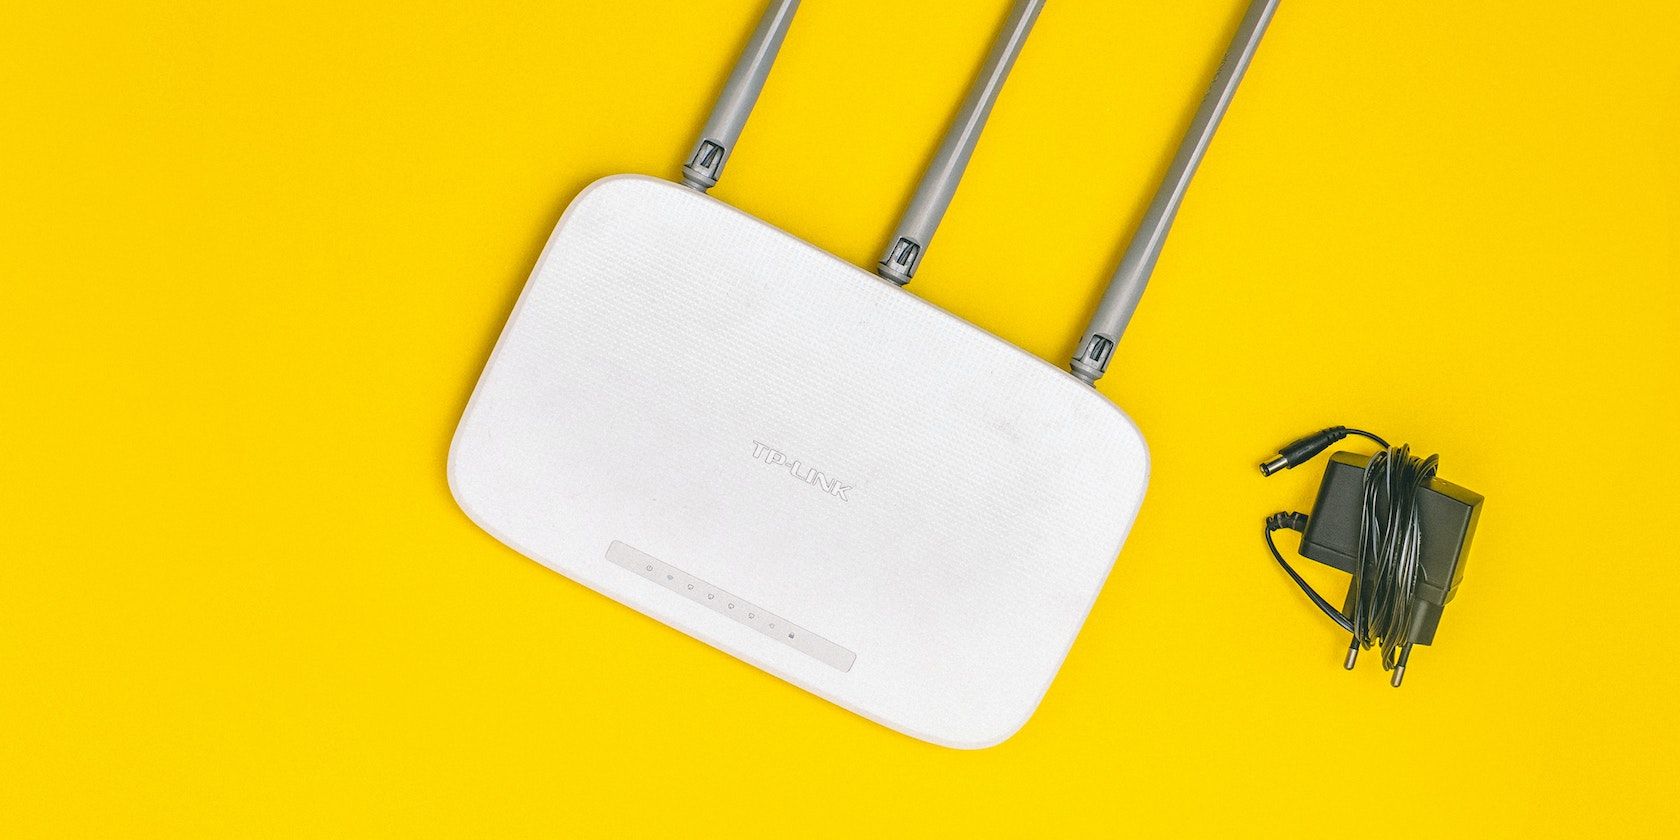
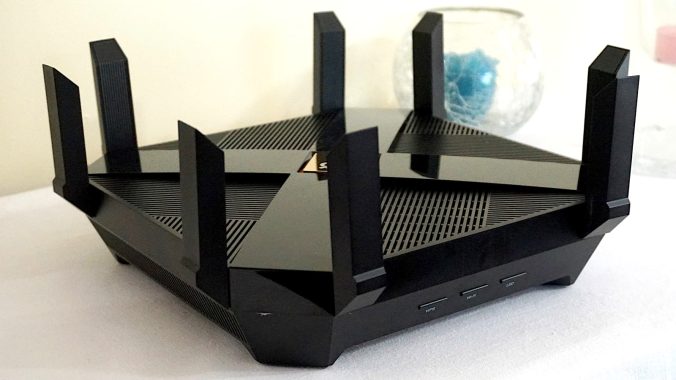
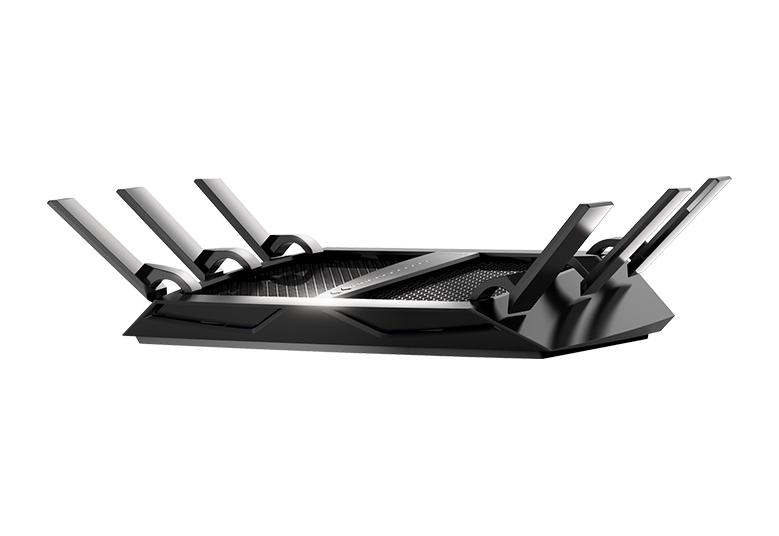
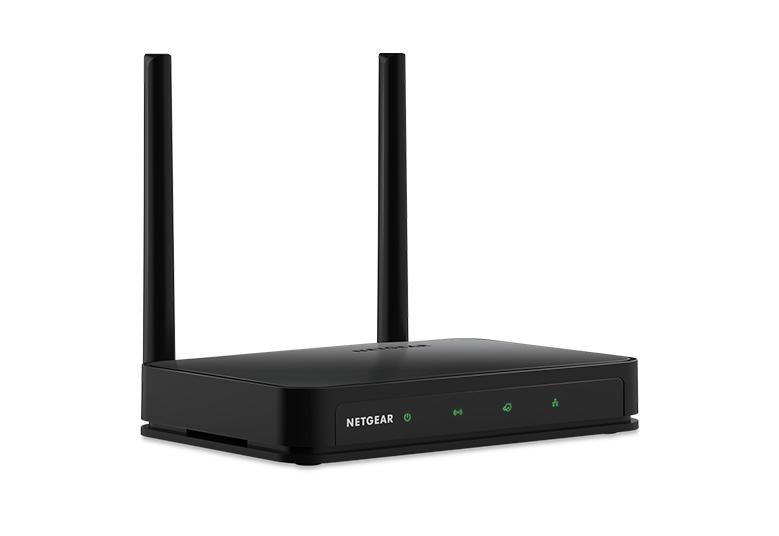
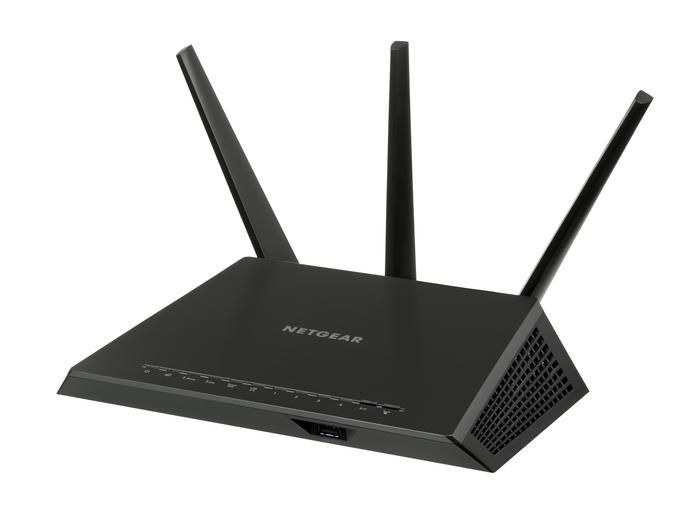
Misconception: More Antennas Always Mean Better Performance

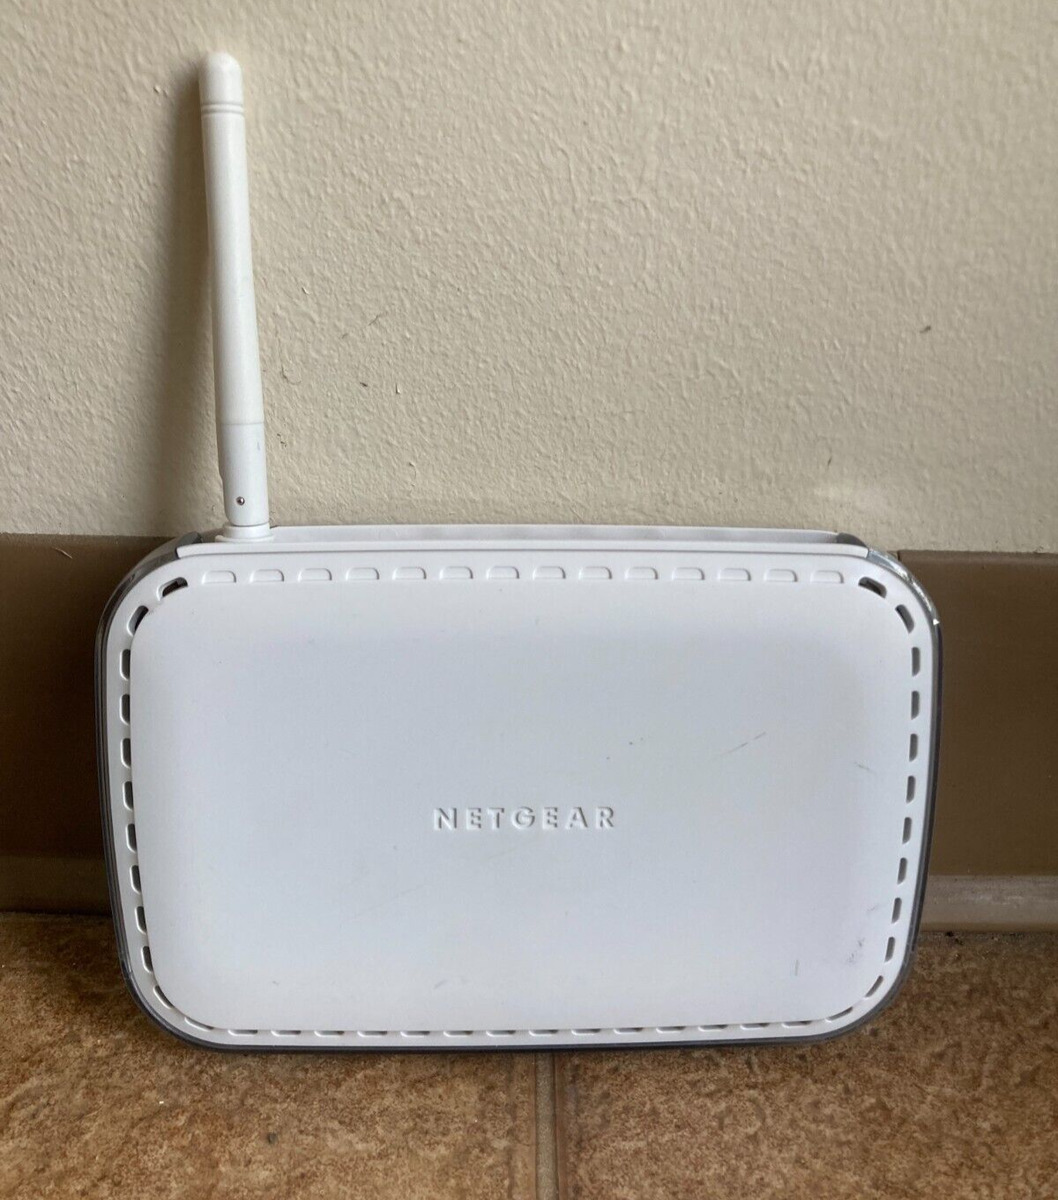
A common misconception is that more antennas always mean better performance. While antennas can improve signal strength and coverage, the router’s overall performance depends on various factors, including its design, technology, and placement. The Verizon CR1000A router is engineered to deliver strong, reliable performance even with a limited number of antennas. By understanding the real impact of antennas, users can make informed decisions about their networking equipment. Therefore, dispelling this misconception highlights the importance of overall router design.

Misconception: Higher Speeds Always Lead to Better Connectivity

Another misconception is that higher speeds always lead to better connectivity. While high-speed internet is important, connectivity quality also depends on factors such as network congestion, interference, and device compatibility. The Verizon CR1000A router’s advanced features, including dual-band Wi-Fi and Gigabit Ethernet ports, ensure balanced performance and connectivity. By understanding the nuances of connectivity, users can optimize their networks effectively. Therefore, dispelling this misconception emphasizes the importance of comprehensive connectivity solutions.

Conclusion: Enhancing Your Home Network with the Verizon CR1000A Router

Enhancing your home network with the Verizon CR1000A router involves understanding its key features, benefits, setup process, and troubleshooting tips. Proper knowledge of these aspects ensures a comprehensive and rewarding networking experience.

Exploring critical elements such as dual-band Wi-Fi, Gigabit Ethernet ports, and advanced security features provides a solid foundation for optimal use. Recognizing the benefits of improved network performance, management, and future-proof technology underscores the router’s value.

By engaging with these elements, users can confidently rely on the Verizon CR1000A router to deliver exceptional connectivity and network management. Therefore, whether you are setting up a new network or upgrading an existing one, understanding the Verizon CR1000A router offers practical and valuable insights. Embrace the opportunity to enhance your home network, knowing you have the knowledge and resources for a seamless internet experience!

Troubleshooting: Why Your Router Keeps Dropping Internet

Experiencing an unstable internet connection can be incredibly frustrating, especially when you’re in the middle of an important task or streaming your favorite show. One common issue that many people face is their router frequently dropping the internet connection. Understanding the potential causes and solutions for this problem can help you maintain a stable and reliable connection. Therefore, this comprehensive guide explores the common reasons behind internet drops, troubleshooting steps, and long-term solutions. By addressing these issues, you can ensure a more seamless online experience.

Common Causes for Router Internet Drops

Several factors can cause your router to drop the internet connection periodically. Identifying these potential causes allows you to take the necessary steps to resolve the issue. Therefore, exploring the common causes for router internet drops is crucial.

Router Issues

Interference from Other Devices

One significant cause of router internet drops is interference from other electronic devices. Many household appliances, such as microwaves, cordless phones, and baby monitors, can interfere with your Wi-Fi signal. These devices operate on similar frequencies, creating a noisy wireless environment that disrupts the router’s signal. By understanding the impact of interference, you can take steps to reduce it. Therefore, recognizing the importance of minimizing interference is crucial.

Outdated Firmware

Outdated firmware is another common reason for internet drops. Router manufacturers periodically release firmware updates to improve performance, fix bugs, and enhance security. If your router’s firmware is outdated, it may struggle to maintain a stable connection. Regularly checking for and installing firmware updates can prevent this issue. By understanding the role of firmware, you can keep your router functioning optimally. Therefore, recognizing the importance of up-to-date firmware is essential.

Overcrowded Wi-Fi Channels

Wi-Fi channels can become overcrowded, especially in densely populated areas where many networks operate simultaneously. An overcrowded channel can lead to slow speeds and dropped connections as multiple routers compete for the same bandwidth. Changing your router’s channel to a less congested one can improve performance. By understanding the significance of Wi-Fi channels, you can optimize your network’s stability. Therefore, recognizing the impact of channel congestion is crucial.

Hardware Issues

Hardware issues can also cause your router to drop the internet connection. Overheating, faulty cables, or a malfunctioning router can disrupt your network stability. Regularly inspecting and maintaining your hardware can help you identify and resolve these issues early. By understanding potential hardware problems, you can take proactive measures to ensure a stable connection. Therefore, recognizing the importance of hardware maintenance is essential.

Troubleshooting Steps to Resolve Internet Drops

When your router keeps dropping the internet connection, taking systematic troubleshooting steps can help resolve the issue. Understanding these steps ensures a methodical approach to identify and fix the problem. Therefore, exploring troubleshooting steps is essential.

Reboot Your Router

One of the simplest yet most effective troubleshooting steps is rebooting your router. This process can resolve temporary issues and refresh the connection. To reboot your router, unplug it from the power source, wait for about 30 seconds, then plug it back in. Allow the router to restart and re-establish the connection. By understanding the importance of rebooting, you can quickly address minor issues. Therefore, recognizing the effectiveness of a reboot is crucial.

Check for Firmware Updates

Next, check for any available firmware updates for your router. Access your router’s settings through the web interface, usually by entering the router’s IP address into your web browser. Navigate to the firmware or update section and follow the instructions to download and install any updates. Keeping your router’s firmware up-to-date ensures it operates with the latest enhancements and fixes. By understanding the importance of regular updates, you can maintain a stable connection. Therefore, recognizing the value of firmware updates is essential.

Change Wi-Fi Channels

If you suspect crowded Wi-Fi channels are causing the issue, changing the channel can help. Access your router’s settings and locate the wireless or Wi-Fi section. Most routers offer an option to select different channels. Choose a less crowded channel, or use the router’s automatic channel selection feature to find the optimal one. By understanding how to change Wi-Fi channels, you can improve network stability. Therefore, recognizing the significance of channel selection is crucial.

Long-Term Solutions for a Stable Connection

Implementing long-term solutions ensures a consistently stable internet connection. Understanding these measures helps prevent recurring issues and enhances overall network performance. Therefore, exploring long-term solutions is essential.

Upgrading Your Router

One of the most effective long-term solutions is upgrading your router. Older routers may struggle to handle modern bandwidth demands and multiple connected devices. Investing in a newer model with advanced features, such as dual-band or tri-band connectivity and improved range, can significantly enhance your network stability. By understanding the benefits of upgrading, you can future-proof your connection. Therefore, recognizing the importance of up-to-date equipment is crucial.

Optimizing Router Placement

Optimizing your router’s placement can also improve network stability. Place the router in a central location, elevated from the floor, and free from obstructions. Avoid placing it near walls, metal objects, or electronic devices that can interfere with the signal. Additionally, ensure the router’s antennas are positioned correctly to maximize coverage. By understanding the impact of router placement, you can optimize your network performance. Therefore, recognizing the value of strategic placement is essential.

Using Wi-Fi Extenders or Mesh Systems

For larger homes or areas with weak signal spots, using Wi-Fi extenders or mesh systems can provide a more stable connection. Wi-Fi extenders boost the signal range by amplifying the existing signal, while mesh systems use multiple nodes to create a seamless network. These solutions ensure consistent coverage throughout your space, reducing dead spots and improving overall stability. By understanding the benefits of extenders and mesh systems, you can enhance your network’s reach. Therefore, recognizing the importance of extended coverage is crucial.

Router Issues

Addressing Common Questions About Router Issues

Understanding common questions about router issues provides additional clarity and assistance. Knowledge of these answers ensures better preparation and troubleshooting. Therefore, exploring common questions is essential.

Why Does My Internet Drop During Specific Times?

A common question is why the internet drops during specific times. Peak usage times, such as evenings or weekends, can lead to network congestion, causing slower speeds and dropped connections. Additionally, interference from other electronic devices may be more prevalent at certain times of the day. By understanding the influence of peak times and interference, you can take measures to mitigate these effects. Therefore, recognizing the impact of timing is crucial.

How Can I Tell if My Router Is Overheating?

Another common question is how to determine if the router is overheating. Overheating can cause the router to malfunction and drop the connection. Signs of overheating include excessive warmth to the touch, frequent dropped connections, and slow performance. Ensure the router has adequate ventilation and is not placed in an enclosed or congested area. By understanding the signs and preventive measures, you can avoid overheating issues. Therefore, recognizing the importance of ventilation is essential.

Addressing Common Misconceptions About Router Performance

Addressing common misconceptions about router performance provides accurate information and dispels unwarranted concerns. Clearing up misunderstandings ensures an informed perspective. Therefore, exploring common misconceptions is important.

Misconception: More Expensive Routers Are Always Better

A common misconception is that more expensive routers are always better. While higher-priced models often come with advanced features and improved performance, they may not be necessary for all users. Assess your specific needs, such as coverage area, number of connected devices, and internet speed, before making a purchase. By understanding your requirements, you can choose a suitable router without overspending. Therefore, dispelling this misconception highlights the importance of informed choices.

Router Issues

Misconception: Wi-Fi Extenders Always Fix Connection Issues

Another misconception is that Wi-Fi extenders always fix connection issues. While extenders can improve coverage, they may not address underlying problems such as interference, outdated firmware, or hardware issues. Identifying and resolving the root cause of the issue ensures a more stable and reliable connection. By understanding the limitations of extenders, you can implement more comprehensive solutions. Therefore, dispelling this misconception emphasizes the need for proper troubleshooting.

Conclusion: Ensuring a Stable Internet Connection

Ensuring a stable internet connection involves understanding the common causes of drops, taking systematic troubleshooting steps, and implementing long-term solutions. Proper knowledge of these aspects ensures a comprehensive and effective approach.

Exploring critical elements such as interference, firmware updates, Wi-Fi channels, and hardware issues provides a foundation for identifying potential problems. Recognizing the importance of regular maintenance, strategic router placement, and upgrading equipment enhances overall performance and stability.

By engaging with these elements, you can confidently address internet drop issues and enjoy a seamless online experience. Therefore, whether you’re a tech-savvy individual or a casual user, understanding how to maintain a stable internet connection offers practical and valuable insights. Embrace the opportunity to improve your network reliability, knowing you have the knowledge and resources for a frustration-free online experience!

How to Find the IP Address of Your Router?

Understanding how to find the IP address of your router is crucial for managing home and office networks. Whether you need to configure settings, adjust security options, or troubleshoot connectivity issues, accessing your router’s IP address is often the first step. Consequently, knowing how to locate this information can save you time and frustration. Therefore, this comprehensive guide explores various methods to find your router’s IP address on different devices and operating systems. By following these steps, you can efficiently access your router’s settings and maintain a reliable network.

Why You Need to Know Your Router’s IP Address

Knowing your router’s IP address serves multiple purposes that are essential for network management. Understanding these purposes helps you appreciate the importance of this information. Therefore, exploring why you need your router’s IP address is essential.

Configuring Network Settings

One primary reason to know your router’s IP address is for configuring network settings. When you access your router’s admin interface, you can change your network name (SSID), password, and other settings to optimize performance and security. By understanding your router’s IP address, you can efficiently navigate these configurations and ensure a stable connection. Therefore, recognizing the importance of network configuration is crucial.

Finding Your Router’s IP Address

Troubleshooting Connectivity Issues

Another critical reason to know your router’s IP address is for troubleshooting connectivity issues. If you experience slow internet speeds, disconnections, or other network problems, accessing your router’s settings can help diagnose and resolve these issues. By understanding the role of your router’s IP address in troubleshooting, you can maintain a reliable and efficient network. Therefore, recognizing the value of effective troubleshooting is essential.

Finding Your Router’s IP Address on Windows

Finding your router’s IP address on a Windows computer is a straightforward process. Understanding these steps ensures you can access your router’s settings efficiently. Therefore, exploring how to find your router’s IP address on Windows is essential.

Using Command Prompt

One of the simplest ways to find your router’s IP address on a Windows computer is by using the Command Prompt. Follow these steps:

  1. Press the Windows key and type cmd in the search bar.
  2. Click on Command Prompt to open it.
  3. Type ipconfig and press Enter.

The Command Prompt will display various network details. Look for the “Default Gateway” under your network connection. This IP address is your router’s IP address. By understanding how to use the Command Prompt, you can quickly find your router’s IP address on a Windows computer. Therefore, recognizing the efficiency of this method is crucial.

Using Network and Sharing Center

Another method to find your router’s IP address on a Windows computer is through the Network and Sharing Center. Follow these steps:

  1. Click on the Start menu and select Settings.
  2. Go to Network & Internet and click on Status.
  3. Under the Network and Sharing Center, click on your network connection.
  4. In the new window, click on Details.

Look for the “IPv4 Default Gateway” entry. This IP address is your router’s IP address. By understanding how to use the Network and Sharing Center, you can efficiently find your router’s IP address on a Windows computer. Therefore, recognizing the convenience of this method is essential.

Finding Your Router’s IP Address on Mac

Finding your router’s IP address on a Mac computer involves a few simple steps. Understanding these steps ensures quick access to your router’s settings. Therefore, exploring how to find your router’s IP address on a Mac is essential.

Using System Preferences

The easiest way to find your router’s IP address on a Mac computer is through System Preferences. Follow these steps:

  1. Click on the Apple menu and select System Preferences.
  2. Click on Network.
  3. Select your network connection (Wi-Fi or Ethernet).
  4. Click on the Advanced button.
  5. Go to the TCP/IP tab.

You will see the “Router” entry, which displays your router’s IP address. By understanding how to use System Preferences, you can quickly find your router’s IP address on a Mac computer. Therefore, recognizing the simplicity of this method is crucial.

Using Terminal

Another method to find your router’s IP address on a Mac computer is by using the Terminal. Follow these steps:

  1. Open Terminal from the Utilities folder or search for it in Spotlight.
  2. Type netstat -nr | grep default and press Enter.

The Terminal will display network routing information, showing the IP address next to “default.” This IP address is your router’s IP address. By understanding how to use Terminal, you can efficiently find your router’s IP address on a Mac computer. Therefore, recognizing the effectiveness of this method is essential.

Finding Your Router’s IP Address on Mobile Devices

Knowing how to find your router’s IP address on mobile devices is useful for on-the-go network management. Understanding these steps ensures access from any location. Therefore, exploring how to find your router’s IP address on mobile devices is essential.

Using iOS Devices

To find your router’s IP address on an iOS device, such as an iPhone or iPad, follow these steps:

  1. Open the Settings app.
  2. Tap on Wi-Fi.
  3. Ensure you are connected to your home network.
  4. Tap on the i icon next to your network name.

You will see network details, including the “Router” entry, which displays your router’s IP address. By understanding how to use the Wi-Fi settings on iOS devices, you can quickly find your router’s IP address. Therefore, recognizing the convenience of this method is crucial.

Using Android Devices

To find your router’s IP address on an Android device, follow these steps:

  1. Open the Settings app.
  2. Tap on Wi-Fi or Network & Internet.
  3. Ensure you are connected to your home network.
  4. Tap on the network name or press and hold it, then tap Modify or Advanced.

You will see network details, including the “Gateway” entry, which displays your router’s IP address. By understanding how to use the Wi-Fi settings on Android devices, you can efficiently find your router’s IP address. Therefore, recognizing the simplicity of this method is essential.

Advanced Methods for Finding Your Router’s IP Address

In some cases, advanced methods may be required to find your router’s IP address. Understanding these methods ensures you can access your router’s settings in uncommon situations. Therefore, exploring advanced methods is essential.

Using Network Management Tools

Network management tools can provide detailed information about your network, including your router’s IP address. Tools such as Wireshark, Fing, and Network Analyzer offer comprehensive network analysis and display device details. By running a network scan, these tools can identify your router and its IP address. By understanding how to use network management tools, you can find your router’s IP address in complex network environments. Therefore, recognizing the value of these tools is crucial.

Checking Router Documentation

Another advanced method is to check the documentation that came with your router. Most manufacturers provide detailed manuals that include default IP addresses, which can be useful if default settings are restored. Additionally, manufacturer websites often have support pages with device-specific information, including default IP addresses. By understanding the value of router documentation, you can find your router’s IP address efficiently. Therefore, recognizing the importance of manufacturer resources is essential.

Addressing Common Questions About Router IP Addresses

Understanding common questions about router IP addresses provides clarity and enhances your troubleshooting capability. Knowledge of these answers ensures better preparation and effective use. Therefore, exploring common questions is essential.

Finding Your Router’s IP Address

What Is the Default IP Address of Most Routers?

A common question is what the default IP address of most routers is. For many routers, default IP addresses include 192.168.0.1, 192.168.1.1, and 192.168.1.254. These addresses are used to access the router’s admin interface. However, different manufacturers may use different default IP addresses, so it is important to refer to your router’s documentation. By understanding common default IP addresses, you can quickly access your router’s interface. Therefore, recognizing the common default IP addresses is crucial.

Can the Router IP Address Be Changed?

Another common question is whether the router IP address can be changed. Yes, the internal IP address of your router can be changed through the router’s admin interface. This is often done to improve network security or to resolve IP conflict issues. By understanding how to change your router’s IP address, you can customize and secure your network effectively. Therefore, recognizing the flexibility of IP address configuration is essential.

Addressing Common Misconceptions About Router IP Addresses

Addressing common misconceptions about router IP addresses provides accurate information and dispels unwarranted concerns. Clearing up misunderstandings ensures an informed perspective. Therefore, exploring common misconceptions is important.

Misconception: The Router IP Address Is the Same as the Public IP Address

A common misconception is that the router IP address is the same as the public IP address. In reality, the router IP address is the internal IP address used to access the admin interface. The public IP address is assigned by your ISP and identifies your network on the internet. By understanding the difference between internal and public IP addresses, you can avoid confusion and troubleshoot effectively. Therefore, dispelling this misconception highlights the importance of understanding IP address types.

Finding Your Router’s IP Address

Misconception: The Router IP Address Never Changes

Another misconception is that the router IP address never changes. While the default IP address typically remains the same, users can change the internal IP address through the router’s settings. Additionally, if the router is reset to factory settings, the IP address may revert to the default. By understanding the potential for IP address changes, you can manage your network settings more effectively. Therefore, dispelling this misconception emphasizes the importance of IP address management.

Conclusion: Efficiently Accessing Your Router’s Settings

Efficiently accessing your router’s settings involves understanding how to find the IP address across various devices and operating systems. Proper preparation, including familiarity with advanced methods and addressing common questions, ensures effective network management.

Exploring critical aspects such as Command Prompt, System Preferences, mobile device settings, and network management tools provides comprehensive knowledge and practical approaches. Recognizing the importance of addressing common misconceptions enhances overall confidence and effectiveness in managing your router.

By engaging with these elements, you can efficiently access your router’s settings, optimize performance, and ensure a secure and reliable network. Therefore, whether you are troubleshooting connectivity issues or configuring settings, understanding how to find your router’s IP address offers practical and valuable insights. Embrace the opportunity to improve your network management, knowing you have the knowledge and resources to make informed choices!

WiFi Modem vs Router: Understanding the Key Differences

In today’s digital age, having a reliable internet connection is crucial for both work and leisure. Consequently, understanding the key components that enable this connection—specifically, the modem and the router—is essential. Many people often confuse these two devices, assuming they serve the same purpose. However, modems and routers have distinct roles, each contributing to your home or office network’s functionality. Therefore, this comprehensive guide delves into the differences between WiFi modems and routers, their functionalities, and how they work together to provide seamless internet connectivity. By understanding these aspects, you can optimize your network setup and ensure a reliable connection.

What Is a WiFi Modem?

A WiFi modem is a device that connects your home or office network to your Internet Service Provider (ISP). Understanding its purpose and functionality can help you manage your internet connection more effectively. Therefore, exploring what a WiFi modem is and how it works is essential.

Purpose and Functionality of a WiFi Modem

The primary purpose of a WiFi modem is to modulate and demodulate signals between your ISP and your devices. When you subscribe to an internet service, your ISP provides a connection that delivers data over a telephone line, coaxial cable, or fiber optic line. The modem translates these signals into digital data that your devices can understand. This process is crucial for enabling internet access in your home or office. By understanding the purpose and functionality of a WiFi modem, you can appreciate its role in your network. Therefore, recognizing the significance of signal modulation is crucial.

WiFi Modem vs Router


Types of WiFi Modems

WiFi modems come in various types, depending on the technology used for internet delivery. The common types include DSL modems, cable modems, and fiber optic modems. DSL modems use telephone lines to provide internet access, while cable modems use coaxial cables typically provided by cable TV companies. Fiber optic modems utilize advanced fiber optic technology to deliver high-speed internet. Each type of modem is designed to work with specific ISP technologies, so choosing the correct one for your service is essential. By understanding the different types of WiFi modems, you can select the appropriate modem for your connection. Therefore, recognizing the compatibility with ISP technology is essential.

What Is a Router?

A router is a device that enables multiple devices to connect to a single internet connection, creating a local area network (LAN). Understanding its purpose and functionality can help you manage your network more effectively. Therefore, exploring what a router is and how it works is essential.

Purpose and Functionality of a Router

The primary purpose of a router is to distribute the internet connection from the modem to various devices within your home or office network. It directs data packets between devices and ensures they reach the correct destination. Routers also provide security features such as firewalls and encryption to protect your network. Additionally, most modern routers include WiFi capabilities, allowing wireless devices to connect to the network. By understanding the purpose and functionality of a router, you can appreciate its role in your network. Therefore, recognizing the significance of data packet routing is crucial.

Types of Routers

Routers come in various types, each offering different features and capabilities. Some common types include single-band routers, dual-band routers, and tri-band routers. Single-band routers operate on one frequency band, typically 2.4 GHz, which can become crowded and slow. Dual-band routers use both 2.4 GHz and 5 GHz bands, offering better performance and reduced interference. Tri-band routers add an additional 5 GHz band, providing even more capacity for multiple devices. Choosing the right type of router depends on your network’s size, the number of connected devices, and your performance needs. By understanding the different types of routers, you can select the best one for your network. Therefore, recognizing the importance of frequency bands is essential.

How Modems and Routers Work Together

Although modems and routers have distinct roles, they work together to provide seamless internet connectivity. Understanding their collaboration can help you optimize your network setup. Therefore, exploring how modems and routers work together is essential.

Modem and Router Integration

In many modern homes and offices, the modem and router are integrated into a single device, often referred to as a gateway or modem-router combo. This integration simplifies the network setup by combining the functionalities of both devices into one unit. The modem component connects to the ISP and translates signals, while the router component distributes the internet connection to multiple devices. Integrated devices offer convenience and reduce the number of cables and power outlets needed. By understanding modem and router integration, you can appreciate the benefits of a streamlined network setup. Therefore, recognizing the value of integrated devices is crucial.

Separate Modem and Router Setup

Some users prefer to have separate modem and router devices, each serving its specific function independently. This setup offers greater flexibility and often better performance, as dedicated devices can provide more advanced features and capabilities. The modem connects directly to the ISP and provides an internet connection, while the router receives this connection and distributes it to various devices. Separating these devices allows for easier upgrades and customization of your network. By understanding the benefits of a separate modem and router setup, you can choose the configuration that best suits your needs. Therefore, recognizing the importance of network flexibility is essential.

Benefits of Using a Modem and Router

Using both a modem and a router offers numerous benefits that enhance your internet connectivity and network management. Understanding these advantages can help you make an informed decision about your network setup. Therefore, exploring the benefits of using a modem and router is essential.

Improved Network Performance

One of the primary benefits of using a modem and router is improved network performance. A dedicated router can handle multiple devices and data streams more efficiently than an integrated device. Advanced routers offer features such as Quality of Service (QoS), which prioritizes critical traffic, and beamforming, which enhances WiFi signals to specific devices. These features ensure a stable and fast internet connection for all your devices. By understanding how modems and routers improve network performance, you can optimize your internet experience. Therefore, recognizing the significance of enhanced performance is crucial.

Enhanced Security

Using a modem and router also enhances security within your network. Routers come equipped with security features such as firewalls, encryption, and guest networks, which protect your devices and data from external threats. Regular firmware updates ensure that security protocols remain current and effective. Additionally, separating the modem and router allows for more precise control over network security settings. By understanding the security benefits of using a modem and router, you can ensure a safer internet experience. Therefore, recognizing the importance of network security is essential.

Choosing the Right Modem and Router

Selecting the right modem and router for your needs involves considering several factors, including compatibility, performance, and future-proofing. Understanding these considerations can help you make an informed decision. Therefore, exploring how to choose the right modem and router is essential.

Compatibility with ISP

The first consideration when choosing a modem is ensuring compatibility with your ISP. Different ISPs use various technologies, such as DSL, cable, or fiber optic, requiring specific types of modems. Check with your ISP for a list of compatible modems or look for certifications such as “CableLabs Certified” for cable modems. Similarly, ensure the router you choose is compatible with the modem and supports the necessary speeds and features for your internet plan. By understanding the importance of compatibility, you can avoid connectivity issues and ensure a seamless setup. Therefore, recognizing the significance of ISP compatibility is crucial.

WiFi Modem vs Router

Performance and Features

Selecting a modem and router with the right performance and features is essential for an optimal internet experience. Consider a modem that supports the maximum speeds of your internet plan and offers advanced technologies such as DOCSIS 3.1 for cable modems. For routers, look for features such as dual or tri-band capabilities, MU-MIMO (Multi-User, Multiple-Input, Multiple-Output), and QoS for better performance and management of multiple devices. By understanding the importance of performance and features, you can choose devices that meet your needs and enhance your network. Therefore, recognizing the value of advanced technologies is essential.

Future-Proofing

Future-proofing your modem and router involves selecting devices that can accommodate potential upgrades in your internet service and network demands. Look for modems that support higher speeds and newer technologies, even if your current plan doesn’t utilize them fully. Routers with advanced features and robust performance can handle increasing numbers of devices and more complex network usages, such as gaming, streaming, and smart home integration. By understanding the importance of future-proofing, you can invest in devices that will serve you well for years to come. Therefore, recognizing the value of scalable solutions is crucial.

Addressing Common Questions

Understanding common questions about modems and routers can provide additional clarity and help you make an informed decision. Knowledge of these answers ensures better preparation and effective use. Therefore, exploring common questions is essential.

Can I Use a Router Without a Modem?

A common question is whether you can use a router without a modem. While a router can create a local network and connect devices to each other, it cannot provide internet access without a modem. The modem is necessary to convert the ISP’s signal into usable data for your devices. By understanding the distinct roles of modems and routers, you can avoid connectivity issues and ensure proper network setup. Therefore, recognizing the necessity of a modem for internet access is crucial.

How Often Should I Replace My Modem and Router?

Another common question is how often modems and routers should be replaced. Generally, modems and routers should be replaced every three to five years, or sooner if you experience performance issues or significant technological advancements. Regularly updating your devices ensures you benefit from improved speeds, features, and security protocols. By understanding the importance of timely replacements, you can maintain optimal network performance and security. Therefore, recognizing the value of updating your network equipment is essential.

Addressing Common Misconceptions

Addressing common misconceptions about modems and routers provides accurate information and dispels unwarranted concerns. Clearing up misunderstandings ensures an informed perspective. Therefore, exploring common misconceptions is important.

WiFi Modem vs Router

Misconception: All-in-One Devices Are Inferior

A common misconception is that all-in-one modem-router combo devices are inferior to separate devices. While it’s true that dedicated devices often offer more advanced features and better performance, modern all-in-one devices have improved significantly. They provide convenience and are suitable for many home and small office setups. By understanding the capabilities of all-in-one devices, you can make an informed decision based on your specific needs. Therefore, recognizing the potential of integrated solutions is crucial.

Misconception: Higher Speeds Always Mean Better Performance

Another misconception is that higher internet speeds always result in better performance. While high speeds are important, other factors such as network congestion, router capabilities, and interference also impact performance. Ensuring your modem and router support your internet plan’s speeds and offer features like QoS and beamforming can optimize performance. By understanding the factors influencing network performance, you can avoid overemphasizing speed alone. Therefore, recognizing the importance of comprehensive performance considerations is essential.

Conclusion: Optimizing Your Network Setup

Optimizing your network setup involves understanding the distinct roles of modems and routers, their functionalities, and how they work together. Proper preparation, including selecting compatible devices, considering performance and features, and future-proofing, ensures a reliable and efficient network.

Exploring critical aspects such as modem and router integration, separate setups, and addressing common misconceptions provides comprehensive knowledge and appreciation. Recognizing the importance of addressing common questions enhances overall confidence and effectiveness in using and choosing the right devices.

By engaging with these elements, you can create a robust network setup that meets your needs and provides seamless internet connectivity. Therefore, whether you are setting up a new network or upgrading an existing one, understanding the essential considerations for modems and routers offers practical and valuable insights. Embrace the opportunity to enjoy improved network performance and security, knowing you have the knowledge and resources to make informed choices!

I Reset My Router and Now Can’t Connect to the Internet

Resetting your router can often solve many connectivity issues, but what happens when you can’t reconnect to the internet afterward? It can be frustrating and perplexing. Consequently, understanding the steps to resolve this problem is critical. Therefore, this comprehensive guide explores common causes, detailed troubleshooting steps, user experiences, and preventive measures to ensure seamless internet connectivity after a router reset. By delving into these aspects, you can effectively troubleshoot and restore your internet connection.

Common Causes for Internet Disconnect after a Router Reset

Understanding the common causes for internet disconnects after a router reset can help pinpoint the problem more effectively. Therefore, exploring these causes is essential.

Incorrect Router Configuration

One of the most common reasons for losing internet connectivity after resetting your router is incorrect configuration. When you reset your router, it reverts to its factory settings. This can erase all your previous configurations, including SSID, password, and internet service provider (ISP) settings. Without these configurations, the router can’t establish a connection to the internet. By understanding the impact of incorrect router configuration, you can identify why you might be experiencing connectivity issues. Therefore, recognizing the importance of proper configuration is crucial.

Router Resets

ISP-related Issues

Sometimes, the issue might not lie with your router but with your internet service provider (ISP). Resetting your router could coincidentally occur during an ISP outage or maintenance period, resulting in a loss of internet connectivity. Additionally, ISP settings might need to be reconfigured on your router after a reset. By understanding the potential for ISP-related issues, you can determine if this is the root cause of your connectivity problem. Therefore, recognizing the significance of ISP-related factors is essential.

Troubleshooting Steps to Reconnect to the Internet

Resolving your internet connectivity issues after a router reset involves a series of troubleshooting steps. Exploring these steps can help restore your connection efficiently. Therefore, delving into these steps is essential.

Step 1: Reboot Your Router and Modem

The first step in troubleshooting is to reboot both your router and modem. Unplug both devices from the power source and wait for about 30 seconds before plugging them back in. This simple action can often resolve many connectivity issues. Power on the modem first, wait for all the lights to stabilize, and then power on the router. By understanding the importance of rebooting your devices, you can address temporary glitches and restore connectivity. Therefore, recognizing the value of a power cycle is crucial.

Step 2: Check Your ISP Settings

After rebooting, check your router’s settings to ensure it is correctly configured with your ISP settings. Access your router’s admin interface by entering its IP address into your web browser. Common IP addresses for routers are 192.168.0.1 or 192.168.1.1. Enter your login credentials to access the settings. Look for sections such as “Internet Setup” or “WAN Settings” and ensure they match the information provided by your ISP. By understanding how to verify ISP settings, you can ensure your router is correctly configured. Therefore, recognizing the importance of accurate ISP settings is essential.

Step 3: Update Router Firmware

Outdated router firmware can sometimes cause connectivity issues. Check if a firmware update is available for your router by visiting the manufacturer’s website. Download the latest firmware and follow the instructions to update your router. Updating the firmware can resolve bugs and improve performance. By understanding the necessity of updating firmware, you can enhance your router’s reliability and performance. Therefore, recognizing the value of regular updates is crucial.

Step 4: Reset Router to Default Settings

If you’ve repeatedly encountered issues, consider resetting your router to its default factory settings as a last resort. Locate the reset button on the router, usually a small pinhole, and press it using a paperclip or similar tool. Hold the button for about 10 seconds until the router restarts. After resetting, reconfigure your router with your ISP settings and any custom preferences. By understanding how to perform a factory reset, you can resolve persistent configuration issues and restore default settings. Therefore, recognizing when to reset your router is essential.

Step 5: Contact Your ISP

If all troubleshooting steps fail, contact your ISP for assistance. They can verify if there’s an outage in your area, check your service status, and guide you through any additional configuration steps required. Your ISP may also provide a replacement router if the issue lies with the device. By understanding when to seek professional help, you can ensure your internet issues are resolved effectively. Therefore, recognizing the value of ISP support is crucial.

User Experiences and Solutions

Gaining insights from user experiences can provide practical solutions and help you understand common issues others have faced. Therefore, exploring user experiences is essential.

Positive Outcomes

Many users have successfully resolved their connectivity issues after a router reset by following structured troubleshooting steps. For instance, some found that reconfiguring the router with the ISP’s provided settings restored their internet connection. Others discovered that simply rebooting both the router and modem resolved their issues. By understanding these positive outcomes, you can gain confidence in troubleshooting and solving similar problems. Therefore, recognizing the effectiveness of structured troubleshooting is crucial.

Persisting Issues

However, some users have reported persisting issues even after following standard troubleshooting steps. Factors such as hardware defects, outdated firmware, or complex ISP settings may contribute to ongoing problems. In such cases, consulting with the router manufacturer or seeking professional technical support can provide additional solutions. By understanding the challenges some users face, you can make more informed decisions about seeking help and exploring advanced troubleshooting options. Therefore, recognizing the need for professional assistance is essential.

Preventive Measures for Future Connectivity

Implementing preventive measures can help avoid connectivity issues after resetting your router. Understanding these measures ensures smooth and uninterrupted internet access. Therefore, exploring preventive measures is essential.

Regular Backups

Regularly backing up your router’s configuration settings can save time and effort in case you need to reset the router. Most routers offer an option to export the current settings to a file. Save this file on your computer and use it to restore settings quickly if needed. This practice ensures you have a ready reference for reconfiguring your router correctly. By understanding the importance of regular backups, you can avoid manual reconfiguration and ensure smooth connectivity. Therefore, recognizing the value of configuration backups is crucial.

Firmware Updates

Frequently updating your router’s firmware keeps it running optimally and prevents potential connectivity issues. Make it a habit to check for firmware updates periodically. Some routers offer automatic update options or email notifications when new firmware is available. Keeping your router’s firmware up to date ensures you benefit from the latest performance enhancements and security patches. By understanding the significance of firmware updates, you can maintain your router’s reliability and performance. Therefore, recognizing the necessity of regular updates is essential.

Consult ISP Support

Before resetting your router, consider consulting your ISP’s technical support. They can provide guidance on any specific settings required for your internet connection. Additionally, your ISP can inform you of any ongoing outages or maintenance that may affect connectivity. Proactive communication with your ISP can prevent unnecessary troubleshooting and ensure smooth transitions. By understanding when to seek ISP support, you can preempt potential issues and maintain uninterrupted service. Therefore, recognizing the value of proactive communication is crucial.

Addressing Common Questions About Router Resets

Understanding common questions and concerns about router resets provides clarity and enhances troubleshooting effectiveness. Knowledge of these answers ensures better preparation and informed decisions. Therefore, exploring common questions is essential.

Why Does Resetting the Router Cause Connectivity Issues?

Resetting the router causes connectivity issues primarily because it erases all custom configurations, reverting to factory settings. This includes SSID, passwords, and ISP settings necessary for establishing an internet connection. Without reconfiguring these settings, the router cannot connect to the internet. By understanding the impact of a reset, you can anticipate and resolve configuration needs. Therefore, recognizing the effects of factory reset is crucial.

How Can I Avoid Connectivity Issues After a Router Reset?

To avoid connectivity issues after a router reset, prepare by noting down your current configuration settings, including ISP details, SSID, and passwords. Regularly back up your router settings if supported by your device. Consult your ISP for any specific settings required and follow a structured troubleshooting approach post-reset. By understanding preventive measures and systematic troubleshooting, you can minimize connectivity issues and ensure a smooth reset process. Therefore, recognizing preparation and preventive steps is essential.

Router Resets

Addressing Common Misconceptions About Router Resets

Addressing common misconceptions about router resets provides accurate information and dispels unwarranted concerns. Clearing up misunderstandings ensures an informed perspective. Therefore, exploring common misconceptions is important.

Misconception: Resetting a Router Automatically Fixes All Issues

A common misconception is that resetting a router will automatically fix all connectivity issues. While resetting can resolve some problems by clearing temporary glitches, it often requires reconfiguring settings to restore full functionality. Neglecting to reconfigure settings can result in further connectivity issues. By understanding the actual implications of resetting a router, you can approach troubleshooting more effectively. Therefore, dispelling this misconception highlights the importance of post-reset configuration.

Misconception: All Routers Share the Same Reset Process

Another misconception is that all routers share the same reset process and configuration requirements. In reality, routers differ significantly in terms of interfaces, settings, and firmware updates. It is essential to refer to the user manual or manufacturer’s website for specific instructions related to your router model. By understanding the unique aspects of your router, you can follow accurate steps tailored to its requirements. Therefore, dispelling this myth emphasizes the importance of specific guidance.

Router Resets

Conclusion: Restoring Internet Connectivity After a Router Reset

Restoring internet connectivity after a router reset involves understanding common causes, structured troubleshooting steps, user experiences, and preventive measures. Proper preparation, including firmware updates, configuration backups, and consultation with your ISP, ensures effective resolution of connectivity issues.

Exploring critical aspects such as rebooting devices, checking ISP settings, and updating firmware provides comprehensive knowledge and troubleshooting approaches. Recognizing the importance of addressing common questions and dispelling misconceptions enhances overall confidence and effectiveness in restoring connectivity.

By engaging with these elements, you can successfully troubleshoot and resolve internet connectivity issues, ensuring your router operates optimally. Therefore, whether you are a novice or experienced user, understanding essential considerations for router resets offers practical and valuable insights. Embrace the opportunity to maintain seamless internet connectivity, knowing you have the knowledge and resources to make informed choices!

Red Light on Spectrum Router: Solutions for Connectivity

Internet connectivity issues can be frustrating, particularly when you notice a red light on your Spectrum router. This red light typically indicates a problem that needs to be addressed to restore proper functionality to your network. Consequently, understanding the potential causes and solutions for this issue is crucial for maintaining uninterrupted internet access. Therefore, this comprehensive guide explores the common reasons behind a red light on a Spectrum router, step-by-step troubleshooting methods, and preventive measures to ensure seamless connectivity. By delving into these aspects, you can effectively address issues and enjoy reliable internet performance.

Understanding the Red Light on Spectrum Router

A red light on your Spectrum router signifies a problem within your network or with your router itself. Understanding what this red light represents helps you identify the root cause and address it appropriately. Therefore, exploring the basics of the red light indicator is essential.

Red Light on Spectrum Router

What Does the Red Light Mean?

The red light on a Spectrum router typically indicates a critical issue that prevents the router from functioning correctly. This issue could be related to internet connectivity, hardware malfunction, firmware problems, or service outages. When the router is unable to establish a stable connection to the internet, the red light serves as a warning to alert users of the problem. By understanding what the red light means, you can narrow down potential causes and take appropriate steps to resolve the issue. Therefore, recognizing the significance of the red light indicator is crucial.

Common Causes of the Red Light

Several factors can lead to a red light on your Spectrum router. Common causes include:

  1. Internet Service Outage: A temporary or prolonged outage from your internet service provider (ISP) can disrupt connectivity.
  2. Hardware Malfunction: Physical damage or defects in the router’s internal components can trigger the red light.
  3. Connection Issues: Loose or improperly connected cables, such as Ethernet or coaxial cables, can result in connectivity problems.
  4. Firmware Issues: Outdated or corrupted firmware can affect the router’s performance and connectivity.
  5. Overheating: Excessive heat buildup can cause the router to malfunction, leading to a red light indicator.

By understanding these common causes, you can better diagnose the issue and explore appropriate solutions. Therefore, recognizing potential triggers is essential.

Step-by-Step Troubleshooting for Red Light on Spectrum Router

Troubleshooting a red light on your Spectrum router involves a series of systematic steps to identify and resolve the issue. Understanding these steps helps ensure a thorough and effective troubleshooting process. Therefore, exploring the troubleshooting methods is essential.

Checking for Service Outages

The first step in troubleshooting is to determine if there is a service outage in your area. Contact Spectrum customer support or visit their website to check for reported outages. You can also use the Spectrum app to view outage information. If there is a known outage, the red light on your router may resolve itself once the service is restored. By understanding the importance of checking for service outages, you can save time and avoid unnecessary troubleshooting steps. Therefore, recognizing the need for verification is crucial.

Inspecting Cable Connections

Inspecting cable connections is a crucial step to ensure there are no loose or damaged cables affecting your router’s performance. Start by checking the power cable, ensuring it is securely plugged into both the router and the electrical outlet. Next, examine the coaxial or DSL cable connecting the router to the modem or wall jack, ensuring it is tightly connected. Finally, inspect the Ethernet cables connecting your router to other devices, confirming they are securely plugged in. By understanding the importance of inspecting cable connections, you can address potential connectivity issues effectively. Therefore, recognizing the value of secure connections is crucial.

Restarting the Router

Restarting the router is a simple yet effective troubleshooting step to resolve minor issues and reset the device. To restart the router, unplug the power cable from the router and the electrical outlet. Wait for about 30 seconds to allow the device to fully power down. Plug the power cable back into the router and the electrical outlet, then wait for the router to complete its boot-up process. Check if the red light has turned off and if normal connectivity is restored. By understanding the importance of restarting the router, you can resolve temporary glitches and refresh the connection. Therefore, recognizing the value of a reboot is crucial.

Updating Firmware

Outdated or corrupted firmware can cause performance issues and connectivity problems with your Spectrum router. To update the firmware, log in to the router’s web interface using the default IP address (usually found on the router label or in the manual). Navigate to the firmware update section and follow the instructions to download and install the latest firmware version from the manufacturer’s website. Ensure the router remains connected to the power supply and internet during the update process. By understanding the importance of updating firmware, you can improve the router’s performance and resolve potential issues. Therefore, recognizing the value of updated software is crucial.

Advanced Troubleshooting and Solutions

For persistent issues, advanced troubleshooting methods and solutions may be necessary to resolve the red light on your Spectrum router. Understanding these advanced steps helps address complex problems effectively. Therefore, exploring advanced troubleshooting methods is essential.

Resetting to Factory Settings

Resetting the router to factory settings can resolve persistent issues by restoring the device to its original configuration. To perform a factory reset, locate the reset button on the router (usually a small pinhole labeled “Reset”). Use a paperclip or similar object to press and hold the button for about 10 seconds. Release the button and wait for the router to reboot and restore its default settings. Keep in mind that this will erase any custom configurations, so you will need to reconfigure your network settings afterward. By understanding the importance of a factory reset, you can address deeper issues affecting your router. Therefore, recognizing the value of a fresh start is crucial.

Replacing Faulty Hardware

If the red light persists after basic and advanced troubleshooting steps, faulty hardware components may be to blame. Inspect the router and modem for any visible signs of damage, such as cracks, burns, or loose components. If you suspect hardware issues, consider replacing the faulty device with a new router or modem. Contact Spectrum customer support to discuss replacement options, as they may offer specific recommendations or provide a replacement unit. By understanding the importance of addressing hardware issues, you can ensure the reliability of your network equipment. Therefore, recognizing the need for functional hardware is crucial.

Red Light on Spectrum Router

Contacting Spectrum Support

For unresolved issues after extensive troubleshooting, contacting Spectrum customer support for professional assistance is essential. Spectrum support representatives can remotely diagnose and troubleshoot the problem, offering specific solutions based on your network configuration. They may also provide instructions for further testing or escalate the issue to technical experts. By understanding the importance of seeking professional assistance, you can ensure timely and effective resolution of complex connectivity problems. Therefore, recognizing the value of expert support is crucial.

Preventive Measures for Maintaining Router Health

Implementing preventive measures helps maintain the health and performance of your Spectrum router, reducing the likelihood of encountering a red light issue. Understanding these measures helps ensure long-term reliability. Therefore, exploring preventive strategies is essential.

Regular Maintenance and Cleaning

Regular maintenance and cleaning of your router can prevent dust buildup, overheating, and potential hardware issues. Periodically dust the exterior of the router and its vents to ensure proper airflow. Avoid placing the router in enclosed or cluttered spaces, as this can restrict ventilation and cause overheating. Additionally, inspect the power and cable connections to ensure they remain secure and free from wear. By understanding the importance of regular maintenance and cleaning, you can extend the lifespan of your router and maintain optimal performance. Therefore, recognizing the value of proactive care is crucial.

Monitoring Firmware and Software Updates

Monitoring and applying firmware and software updates are essential for maintaining the router’s security and performance. Regularly check the manufacturer’s website or the router’s web interface for available updates. Apply updates promptly to ensure your router benefits from the latest features, security patches, and performance improvements. Set reminders to periodically review and update your router’s firmware, ensuring it remains up-to-date. By understanding the importance of monitoring updates, you can keep your router functioning optimally and securely. Therefore, recognizing the need for current software is crucial.

Avoiding Overheating

Preventing overheating is vital for maintaining the router’s performance and preventing potential malfunctions. Place the router in a well-ventilated area, away from direct sunlight, heat sources, and other electronic devices that can generate heat. Ensure the router’s vents are unobstructed and clean to allow proper airflow. Consider using a cooling pad or stand to elevate the router and improve ventilation if necessary. By understanding the importance of avoiding overheating, you can protect your router from thermal stress and related issues. Therefore, recognizing the value of a cool environment is crucial.

Addressing Common Questions About Red Light on Spectrum Router

Understanding common questions about the red light on a Spectrum router provides clarity and enhances knowledge. Knowledge of these answers ensures better preparation and practice. Therefore, exploring common questions is essential.

Can a Red Light Indicate Multiple Issues?

Yes, a red light on a Spectrum router can indicate multiple issues. The exact meaning of the red light may vary depending on the router model and configuration. It could signify problems such as internet service outages, hardware malfunctions, firmware issues, or connectivity problems. By systematically troubleshooting and addressing potential causes, you can determine the specific issue and take appropriate steps to resolve it. By understanding the multifaceted nature of the red light indicator, you can accurately diagnose and address connectivity problems. Therefore, recognizing the complexity of potential issues is crucial.

How Long Should I Wait Before Restarting the Router?

Waiting for about 30 seconds to one minute before restarting the router is recommended. This allows the device to fully power down and any residual electrical charge to dissipate. Unplugging and replugging the router ensures a complete reset and can resolve temporary glitches or minor issues affecting connectivity. By understanding the appropriate waiting time before restarting the router, you can ensure a thorough and effective reset. Therefore, recognizing the value of proper timing is crucial.

Addressing Common Misconceptions About Router Red Light

Addressing common misconceptions about the red light on a Spectrum router provides accurate information and dispels unwarranted concerns. Clearing up misunderstandings ensures an informed perspective. Therefore, exploring common misconceptions is important.

Red Light on Spectrum Router

Misconception: A Red Light Always Indicates a Hardware Failure

A common misconception is that a red light on the router always indicates a hardware failure. While hardware issues can cause a red light, it can also result from other factors, such as service outages, connectivity problems, or firmware issues. Systematic troubleshooting can help identify the specific cause and determine whether hardware replacement is necessary. By understanding the various potential causes of a red light, you can approach the diagnosis process with an open mind. Therefore, dispelling this misconception highlights the need for thorough troubleshooting.

Misconception: A Factory Reset Will Always Fix Red Light Issues

Another misconception is that a factory reset will always fix red light issues. While a factory reset can resolve certain stubborn problems by restoring the router to its original settings, it is not a guaranteed solution for all issues. Other factors, such as service outages, cable connections, and hardware malfunctions, may require different approaches. By understanding the limitations of a factory reset, you can explore additional troubleshooting steps and potential solutions. Therefore, dispelling this myth emphasizes the need for comprehensive troubleshooting.

Conclusion: Ensuring Reliable Connectivity by Addressing Red Light Issues

Ensuring reliable connectivity involves understanding the causes, troubleshooting methods, and preventive measures related to the red light on a Spectrum router. Proper preparation, including inspecting cable connections and checking for service outages, ensures a thorough diagnosis.

Exploring critical aspects such as restarting the router, updating firmware, and implementing advanced troubleshooting steps ensures comprehensive knowledge and practice. Recognizing the importance of addressing common questions and dispelling misconceptions enhances overall confidence and effectiveness.

By engaging with these elements, you can effectively address red light issues on your Spectrum router and maintain seamless connectivity for your home or office network. Therefore, whether you are a novice or experienced user, understanding the essential considerations and techniques for troubleshooting Spectrum router issues offers practical and valuable insights. Embrace the opportunity to optimize your network performance, knowing you have the knowledge and resources to address red light issues effectively!

Xfinity Router Setup: Guide for Seamless Connectivity

Setting up an Xfinity router ensures robust internet connectivity for your home or office. A well-configured router provides the foundation for reliable and secure network performance. Consequently, understanding the setup process and key configurations is crucial for optimal results. Therefore, this comprehensive guide explores the initial setup, essential configurations, and troubleshooting tips for your Xfinity router. By delving into these aspects, you can ensure a seamless and efficient network setup that meets all your connectivity needs.

Initial Setup of Your Xfinity Router

The initial setup of your Xfinity router involves several key steps to get your network up and running. Understanding these steps ensures a smooth and error-free setup. Therefore, exploring the initial setup process is essential.

Setup of Your Xfinity Router

Unboxing and Identifying Components

Begin by unboxing your Xfinity router package and identifying all included components. The package typically contains the router unit, a power adapter, an Ethernet cable, and an instruction manual. Carefully inspect each component to ensure nothing is missing or damaged. Familiarize yourself with the router’s ports, including the power, Ethernet, and coaxial cable ports. By understanding the included components and their functions, you can prepare for a smooth setup process. Therefore, recognizing the importance of unboxing and component identification is crucial.

Connecting the Router to Your Modem

Connecting your Xfinity router to the modem is the next step in the setup process. First, ensure that your modem is powered on and connected to the internet via the coaxial cable. Next, connect one end of the Ethernet cable to the modem’s Ethernet port and the other end to the router’s WAN (wide area network) port. Plug the router’s power adapter into an electrical outlet and then into the router’s power port. Once connected, power on the router. By understanding the importance of connecting the router to your modem, you can establish a stable network connection. Therefore, recognizing the value of proper connectivity is essential.

Configuring Your Xfinity Router

Configuring your Xfinity router involves accessing the router’s web interface and setting up key network settings. Understanding these configurations ensures optimal performance and security. Therefore, exploring the configuration process is essential.

Accessing the Router’s Web Interface

Accessing the router’s web interface allows you to customize and manage your network settings. Start by connecting a computer or mobile device to the router using the provided Ethernet cable or Wi-Fi. Open a web browser and enter the default IP address (typically “http://10.0.0.1” or “http://192.168.0.1“) in the address bar. Log in using the default username and password, usually provided in the router’s instruction manual or on a label on the router itself. By understanding the steps to access the web interface, you can begin configuring your network settings. Therefore, recognizing the importance of accessing the interface is crucial.

Setting Up Wi-Fi Networks

Setting up Wi-Fi networks involves configuring your router to broadcast wireless signals. In the router’s web interface, navigate to the Wi-Fi settings section. Create a name (SSID) for your network that is easy to identify and secure. Select the desired frequency band (2.4 GHz, 5 GHz, or both) based on your connectivity needs. Configure a strong password using WPA2 or WPA3 encryption for enhanced security. Save the changes and verify that your devices can detect and connect to the new Wi-Fi network. By understanding the steps to set up Wi-Fi networks, you can ensure secure and reliable wireless connectivity. Therefore, recognizing the value of proper Wi-Fi configuration is essential.

Configuring Security Settings

Configuring security settings is vital for protecting your network from unauthorized access and potential threats. In the router’s web interface, navigate to the security settings section. Enable firewall protection to help block malicious traffic and prevent unauthorized access. Change the default router login credentials to a strong, unique username and password. Enable network encryption using WPA2 or WPA3 to protect your Wi-Fi network. Additionally, consider enabling features such as MAC address filtering to restrict network access to specific devices. By understanding the importance of security settings, you can safeguard your network against potential risks. Therefore, recognizing the significance of robust security is crucial.

Troubleshooting Common Issues

Even with proper setup and configuration, you may encounter common issues with your Xfinity router. Understanding troubleshooting tips helps resolve these issues efficiently. Therefore, exploring troubleshooting strategies is essential.

Addressing Connectivity Problems

Addressing connectivity problems often involves a series of basic troubleshooting steps. First, ensure that all cables are securely connected and that your modem and router are powered on. Restart both devices by unplugging them, waiting for a few seconds, and plugging them back in. Check that your devices are connected to the correct Wi-Fi network or Ethernet port. If the issue persists, log in to the router’s web interface to check for firmware updates and apply them if available. By understanding these basic troubleshooting steps, you can resolve common connectivity problems effectively. Therefore, recognizing the importance of systematic troubleshooting is crucial.

Fixing Slow Internet Speeds

Fixing slow internet speeds may require identifying and addressing various factors affecting your network performance. Start by running a speed test to measure your current internet speed. If the speed is significantly lower than expected, check for interference from other electronic devices or physical obstructions affecting the Wi-Fi signal. Try changing the Wi-Fi channel or frequency band to reduce interference. Additionally, limit the number of devices connected to the network and ensure no background applications are consuming excessive bandwidth. By understanding the steps to fix slow internet speeds, you can optimize your network performance. Therefore, recognizing the value of performance optimization is essential.

Resolving Login Issues

Resolving login issues involves ensuring that you can access the router’s web interface for configuration and management. If you are unable to log in, verify that you are using the correct default IP address and login credentials. Ensure that your device is connected to the router via Ethernet or Wi-Fi. If you have forgotten your login credentials, perform a factory reset on the router by holding the reset button for about 10 seconds until the router restarts. By understanding the steps to resolve login issues, you can regain access to your router settings. Therefore, recognizing the importance of troubleshooting login problems is crucial.

Advanced Configurations and Features

Advanced configurations and features allow you to customize your Xfinity router for enhanced performance and functionality. Understanding these advanced options ensures a tailored network setup. Therefore, exploring advanced configurations is essential.

Setting Up Guest Networks

Setting up guest networks provides a secure way to offer internet access to visitors without compromising your primary network. In the router’s web interface, navigate to the guest network settings section. Enable the guest network option and create a unique network name (SSID) and password. Configure the security settings, choosing WPA2 or WPA3 encryption. Set limitations on bandwidth usage or access times if desired. Save the changes and verify that guests can connect to the new network. By understanding the steps to set up guest networks, you can enhance your network’s security and convenience. Therefore, recognizing the value of guest networks is crucial.

Setup of Your Xfinity Router

Prioritizing Bandwidth with Quality of Service (QoS)

Prioritizing bandwidth with Quality of Service (QoS) ensures that critical applications and devices receive optimal network performance. In the router’s web interface, navigate to the QoS settings section. Enable QoS and configure rules to prioritize specific devices or applications based on their bandwidth requirements. For example, you can prioritize streaming services, online gaming, or video conferencing to reduce latency and buffering. Save the changes and monitor the network performance to ensure the QoS settings are effective. By understanding the importance of QoS, you can enhance the performance of high-priority applications and devices. Therefore, recognizing the significance of bandwidth prioritization is essential.

Utilizing Parental Controls

Utilizing parental controls allows you to manage and restrict internet access for specific devices or users. In the router’s web interface, navigate to the parental controls section. Enable parental controls and create profiles for each user or device you wish to manage. Configure settings such as time limits, content filtering, and access schedules to ensure safe and appropriate internet usage. Save the changes and monitor the activity to ensure the controls are effective. By understanding the steps to utilize parental controls, you can create a safer online environment for your family. Therefore, recognizing the value of managing internet access is crucial.

Maintenance Tips for Your Xfinity Router

Proper maintenance of your Xfinity router ensures optimal performance and longevity. Understanding these maintenance tips helps keep your network running smoothly. Therefore, exploring maintenance strategies is essential.

Regular Firmware Updates

Regular firmware updates are crucial for maintaining your router’s security and performance. Manufacturers release firmware updates to address security vulnerabilities, improve functionality, and fix bugs. Periodically log in to your router’s web interface and check for available firmware updates. If an update is available, follow the instructions to download and install it. By understanding the importance of regular firmware updates, you can ensure your router remains secure and efficient. Therefore, recognizing the value of up-to-date firmware is crucial.

Monitoring Network Usage

Monitoring network usage helps identify potential issues and optimize performance. Use your router’s web interface or a network monitoring tool to track devices connected to your network and their bandwidth usage. Identify any devices or applications consuming excessive bandwidth and address them accordingly. Adjust QoS settings or limit access to ensure balanced network performance. By understanding the importance of monitoring network usage, you can maintain an efficient and secure network. Therefore, recognizing the value of proactive monitoring is crucial.

Performing Routine Maintenance

Performing routine maintenance tasks ensures your router operates at peak performance. Periodically restart your router to clear any temporary issues and refresh the connection. Check and clean the router’s exterior and vents to prevent dust buildup, which can cause overheating. Ensure all cables are securely connected and free from damage. Review and update security settings and configurations as needed to maintain optimal performance. By understanding the significance of routine maintenance, you can extend the lifespan and reliability of your router. Therefore, recognizing the value of regular upkeep is crucial.

Addressing Common Questions About Xfinity Router Setup

Understanding common questions about Xfinity router setup provides clarity and enhances knowledge. Knowledge of these answers ensures better preparation and practice. Therefore, exploring common questions is essential.

What Should I Do if My Router Blinks Red?

A blinking red light on your Xfinity router typically indicates a connectivity issue. First, check that all cables are securely connected and that your modem is functioning properly. Restart both the modem and router by unplugging them, waiting for a few seconds, and plugging them back in. If the issue persists, try resetting the router to factory settings and reconfiguring it. Contact Xfinity customer support for further assistance if the problem continues. By understanding the steps to address a blinking red light, you can resolve connectivity issues effectively. Therefore, recognizing the importance of troubleshooting is crucial.

Setup of Your Xfinity Router

Can I Use My Own Router with Xfinity Internet?

Yes, you can use your own router with Xfinity internet service. Ensure that your router is compatible with Xfinity’s network and meets the necessary specifications. After acquiring your own router, connect it to the Xfinity modem and follow the setup instructions provided by the router manufacturer. You may need to contact Xfinity customer support to activate the new router on their network. By understanding the steps to use your own router, you can customize your network setup to meet your preferences. Therefore, recognizing the value of compatibility is crucial.

Addressing Common Misconceptions About Xfinity Router Setup

Addressing common misconceptions about Xfinity router setup provides accurate information and dispels unwarranted concerns. Clearing up misunderstandings ensures an informed perspective. Therefore, exploring common misconceptions is important.

Misconception: Router Setup is Too Complicated for Beginners

A common misconception is that router setup is too complicated for beginners. While the process may seem daunting, following clear instructions simplifies it significantly. Xfinity provides detailed setup guides and customer support to assist users through the setup process. Many modern routers also feature user-friendly web interfaces and mobile apps for easy configuration. By understanding the straightforward nature of router setup, beginners can approach the process confidently and successfully. Therefore, dispelling this misconception highlights the accessibility of router setup.

Misconception: Factory Resetting the Router is Always Necessary

Another misconception is that factory resetting the router is always necessary to resolve issues. While a factory reset can resolve certain persistent problems, it should be used as a last resort. Many issues can be addressed through basic troubleshooting steps, such as restarting the router, checking connections, and updating firmware. By understanding that factory resetting is not always necessary, you can save time and effort by addressing issues more efficiently. Therefore, dispelling this myth emphasizes the effectiveness of simpler solutions.

Conclusion: Achieving Seamless Connectivity with Proper Xfinity Router Setup

Achieving seamless connectivity with your Xfinity router involves understanding the initial setup, configuring key settings, and practicing proper maintenance. Proper preparation, including connecting the router and accessing the web interface, ensures a smooth setup process.

Exploring critical aspects such as Wi-Fi network setup, security configurations, troubleshooting, and advanced features ensures comprehensive knowledge and practice. Recognizing the importance of addressing common questions and dispelling misconceptions enhances overall confidence and efficiency.

By engaging with these elements, you can implement a reliable and secure network setup that meets all your connectivity needs. Therefore, whether you are a beginner or an experienced user, understanding the essential considerations and techniques for Xfinity router setup offers practical and valuable insights. Embrace the opportunity to optimize your network performance, knowing you have the knowledge and resources to achieve seamless connectivity!

How to Reset Your Router Password: A Comprehensive Guide

Resetting a router password can be necessary for various reasons, such as forgotten credentials or security updates. Routers allow access to network settings, and maintaining secure, updated passwords is crucial. Consequently, understanding the steps to reset your router password ensures continued security and functionality. Therefore, this guide explores the reasons for resetting router passwords, the step-by-step resetting process, and additional tips for enhancing network security. By examining these aspects, you can effectively manage and secure your network.

Reasons for Resetting Your Router Password

Understanding why you might need to reset your router password helps you address and prevent potential issues. Identifying these reasons aids in maintaining network security. Therefore, exploring these reasons for resetting your router password is crucial.

Forgotten Password

A commonly cited reason for resetting a router password is a forgotten password. The router’s administrative password grants access to essential network settings. Without it, making necessary adjustments or managing configurations becomes challenging. Resetting the router enables the restoration of factory default settings, allowing you to regain access and set a new password. By understanding the importance of remembering passwords, you can avoid this hassle. Therefore, recognizing the critical nature of password management is essential.

Enhancing Network Security

Another significant reason to reset your router password is to enhance network security. Over time, shared passwords or poorly chosen credentials can compromise your network’s integrity. Regularly updating the router password ensures that only authorized users gain access, minimizing risks associated with unauthorized access. Using strong, unique passwords further enhances security. By understanding the need to enhance security, you can maintain a safer network environment. Therefore, recognizing the value of regular updates is crucial.

Resetting Your Router Password

Preparing for a Password Reset

Before proceeding with a password reset, proper preparation ensures a smooth and effective process. Understanding the necessary steps helps avoid potential issues and ensures a successful reset. Therefore, exploring how to prepare for a password reset is crucial.

Backing Up Configurations

Backing up your router’s configurations is an essential step before resetting the password. This backup saves time and effort when restoring your preferred settings post-reset. To back up settings, log in to the router’s web interface using your current credentials. Navigate to the settings or administration section and look for the option to back up configurations. Save the configuration file to your computer or secure storage device. This backup ensures all custom settings, such as port forwarding, Wi-Fi credentials, and parental controls, remain intact. By understanding the importance of backing up configurations, you can safeguard your settings. Therefore, recognizing the value of preparation is crucial.

Identifying the Router’s Default Settings

Before resetting, it’s vital to identify the router’s default settings. Most routers come with a default username and password, usually found on the device’s label or in the user manual. Common default usernames include “admin,” with default passwords like “password” or “1234.” Knowing these defaults will help you regain access to the router once it’s reset. Additionally, record your Internet Service Provider (ISP) settings, such as the PPPoE username and password, which may be needed to restore internet connectivity. By understanding the router’s default settings, you can prepare for a seamless reset. Therefore, recognizing the importance of gathering this information is essential.

Resetting Your Router Password

Performing a Password Reset

Resetting the router password involves specific steps to restore factory settings and set a new password. Understanding these steps ensures an effective reset. Therefore, exploring how to perform a password reset is crucial.

Soft Resetting the Router

A soft reset, or reboot, is the simpler option that doesn’t erase custom settings. To perform a soft reset, locate the power button on the router. Press and hold the power button until the router powers off. Alternatively, unplug the power adapter from the electrical outlet. Wait for about 10 seconds to ensure the router’s internal components fully power down. Press the power button again or plug the adapter back in to restart the router. After restarting, log in to the router’s web interface and update your password through the settings menu. By understanding the soft resetting process, you can quickly resolve minor issues. Therefore, recognizing the simplicity of this method is crucial.

Hard Resetting the Router

A hard reset restores the router to factory default settings, erasing all custom configurations. To perform a hard reset, locate the reset button on the router. The reset button is typically small and recessed, found on the back or bottom of the device. You may need a paperclip or similar small object to press it. Ensure the router is powered on before proceeding. Press and hold the reset button for at least 10 seconds until the router’s lights flash, indicating the reset process has started. The router will automatically reboot, restoring default settings. Log in using the default credentials and set a new password. By understanding how to execute a hard reset, you can resolve significant issues effectively. Therefore, recognizing the thoroughness of this method is essential.

Setting a New Router Password

After resetting the router, setting a new password ensures continued security and functionality. Understanding how to set a strong password helps protect your network. Therefore, exploring how to set a new router password is crucial.

Creating a Strong Password

A strong password is essential for securing your router and network. Utilize a combination of uppercase and lowercase letters, numbers, and special characters. Avoid using easily guessable information like birthdays or simple sequences such as “1234.” Consider using a password manager to generate and store complex passwords. Regularly update your router password to maintain security. By understanding the importance of creating a strong password, you can protect your network from unauthorized access. Therefore, recognizing the value of robust passwords is crucial.

Updating Wi-Fi Credentials

In addition to setting a new router password, updating your Wi-Fi credentials is equally important. Log in to the router’s web interface and navigate to the wireless settings section. Enter a new SSID (network name) and password for your Wi-Fi network. Ensure the Wi-Fi password is strong and unique, similar to your router’s administrative password. By understanding the importance of updating Wi-Fi credentials, you can ensure a secure and accessible network for authorized users. Therefore, recognizing the need for comprehensive updates is essential.

Enhancing Network Security Beyond Passwords

While resetting your router password is crucial, further steps can enhance overall network security. Understanding these additional measures ensures a safer and more secure network environment. Therefore, exploring how to enhance network security beyond passwords is essential.

Resetting Your Router Password

Configuring Firewall Settings

A robust firewall configuration provides an additional layer of protection for your network. Access your router’s web interface and navigate to the security or firewall settings section. Enable the firewall and configure it to block untrusted or suspicious traffic. Additionally, enable features such as Stateful Packet Inspection (SPI) and intrusion detection to monitor and protect against potential threats. By understanding how to configure firewall settings, you can enhance your network’s security posture. Therefore, recognizing the importance of a well-configured firewall is crucial.

Updating Router Firmware

Regularly updating your router’s firmware is vital for maintaining security and performance. Firmware updates often include security patches, bug fixes, and performance enhancements. Log in to your router’s web interface and check for available firmware updates in the administration or settings section. Follow the manufacturer’s instructions to download and install updates. By understanding the necessity of updating firmware, you can ensure your router operates optimally and securely. Therefore, recognizing the value of keeping firmware current is essential.

Addressing Common Questions About Router Password Resets

Understanding common questions about router password resets provides clarity and enhances your knowledge. Knowledge of these answers ensures better preparation and execution. Therefore, exploring common questions is essential.

How Often Should I Update My Router Password?

Updating your router password regularly is important for maintaining security. Aim to update administrative and Wi-Fi passwords at least every six months. More frequent updates may be necessary if you suspect unauthorized access or notice changes in network performance. Additionally, update passwords following significant changes, such as moving to a new location or adding new devices. By understanding the recommended frequency for updates, you can maintain network security. Therefore, recognizing the importance of periodic updates is crucial.

What Should I Do If I Still Can’t Access My Router?

If you still can’t access your router after resetting the password, ensure you’re using the correct default credentials. Double-check the router’s label or user manual for the default username and password. Ensure you’re entering the correct IP address to access the web interface, commonly 192.168.0.1 or 192.168.1.1. If problems persist, contact your router manufacturer’s support for further assistance. By understanding the appropriate steps to take, you can resolve access issues effectively. Therefore, recognizing the importance of accurate information is crucial.

Addressing Common Misconceptions About Router Password Resets

Addressing common misconceptions about router password resets provides accurate information and dispels unwarranted concerns. Clearing up misunderstandings ensures informed and effective usage. Therefore, exploring common misconceptions is important.

Misconception: Resetting the Router Is Harmful

A common misconception is that resetting your router is harmful or indicative of a severe problem. In reality, resets are standard troubleshooting steps that can resolve various connectivity issues and restore functionality. While frequent hard resets are not recommended, occasional soft resets can be beneficial. By understanding the routine nature of resets, you can use them confidently. Therefore, dispelling this misconception highlights the utility of resets.

Other Router Password Misconceptions

Another misconception is that complex passwords are unnecessary for routers. However, simple passwords can easily be guessed or breached, compromising network security. Strong, unique passwords are essential for protecting administrative access and Wi-Fi networks. By understanding the necessity of complex passwords, you can enhance your network’s security posture. Therefore, recognizing the importance of password strength is crucial.

Conclusion: Effectively Resetting and Securing Your Router Password

Resetting your router password involves understanding essential steps, recognizing when a reset is necessary, and implementing additional security measures. Proper preparation, including backing up configurations and identifying default settings, sets the foundation for a successful reset.

Exploring critical techniques such as soft resets, hard resets, and setting strong passwords ensures a comprehensive approach. Recognizing the importance of enhancing security beyond passwords, addressing common questions, and dispelling misconceptions enhances your overall network management and security.

By engaging with these elements, you can ensure your router operates optimally and securely, providing reliable and stable internet connectivity. Therefore, whether you are dealing with forgotten passwords or enhancing security, understanding the essential considerations and strategies for resetting your router password offers practical and rewarding solutions. Embrace the benefits of effective router management, knowing you have the knowledge and resources to maintain a secure network environment!

How to Reset Your Netgear Router: A Comprehensive Guide

Netgear routers are well-known for their reliability and high performance, providing users with seamless internet connectivity. However, like any technological device, routers might occasionally encounter issues that necessitate a reset. Consequently, understanding the steps to reset your Netgear router can help restore functionality and performance. Therefore, this guide explores the reasons for resetting, step-by-step instructions, and troubleshooting common issues post-reset. By delving into these aspects, you can ensure your Netgear router operates optimally.

Reasons for Resetting Your Netgear Router

Understanding why you might need to reset your Netgear router is essential for recognizing the symptoms of underlying issues. Identifying these reasons helps you decide when a reset is necessary. Therefore, exploring the reasons for resetting your router is crucial.

Connectivity Problems

One of the primary reasons for resetting a Netgear router is experiencing connectivity problems. These issues can manifest as inconsistent or dropped connections, slow internet speeds, or difficulty connecting devices to the network. Connectivity issues might be due to configuration errors, corrupted firmware, or network conflicts. Restarting the router can sometimes resolve these problems temporarily, but a reset can provide a more lasting solution by restoring default settings. By understanding how a reset addresses connectivity problems, you can ensure stable and reliable internet access. Therefore, recognizing the importance of resolving connectivity issues is crucial.

Resetting Your Netgear Router

Forgotten Password

Another common reason to reset a Netgear router is forgetting the administrative password. The administrative password is required to access the router’s settings, and without it, you cannot make necessary adjustments or configurations. Resetting the router restores the default username and password, allowing you to regain access. Once access is restored, you can set a new password and reconfigure the settings as needed. By understanding how a reset can help recover access, you can manage your router’s configurations effectively. Therefore, recognizing the need for password recovery is essential.

Preparing for a Reset

Before performing a reset on your Netgear router, proper preparation ensures a smooth and successful process. Understanding the necessary steps helps you avoid potential issues and retain essential configurations. Therefore, exploring how to prepare for a reset is crucial.

Backing Up Configurations

Backing up your router’s configurations is an essential step before resetting. This backup saves time and effort when restoring your preferred settings after the reset. To back up your settings, log in to the router’s web interface using your current username and password. Navigate to the settings or administration section and look for the backup option. Save the configuration file to your computer or a secure storage device. This backup ensures all custom settings, such as port forwarding, Wi-Fi credentials, and parental controls, are retained. By understanding the importance of backing up configurations, you can safeguard your settings. Therefore, recognizing the value of preparation is crucial.

Identifying the Reset Method

Netgear routers offer two primary reset methods: a soft reset and a hard reset. A soft reset, or reboot, involves cycling the router’s power to resolve minor issues without affecting configurations. Conversely, a hard reset returns the router to factory default settings, erasing all custom settings. Determine which method is appropriate for your situation. If the issue is minor, a soft reset might suffice. However, if you need to recover access or resolve significant problems, a hard reset is required. By understanding the differences between reset methods, you can choose the appropriate one. Therefore, recognizing the appropriate actions is essential.

Performing a Soft Reset

A soft reset is a simpler process that resolves minor issues without losing custom settings. Understanding the steps for a soft reset ensures a quick resolution. Therefore, exploring how to perform a soft reset is essential.

Power Cycling the Router

Power cycling, or rebooting, the router is a straightforward process. Begin by locating the power button on the router’s back or side. Press and hold the power button until the router turns off. Alternatively, you can unplug the power adapter from the electrical outlet. Wait for about 10 seconds to ensure the router’s internal components fully power down. After waiting, press the power button again or plug the adapter back in. Allow the router a few minutes to restart and re-establish the network connection. By understanding the power cycling process, you can resolve minor connectivity issues quickly. Therefore, recognizing the simplicity of this method is crucial.

Logging Back into the Router

Once the router has rebooted, log back into the router’s web interface to ensure it is functioning correctly. Open a web browser and enter the router’s IP address, usually found on the device’s label or in the user manual. The most common IP addresses are 192.168.0.1 or 192.168.1.1. Enter the username and password to access the settings. Verify that all configurations, such as wireless settings and connected devices, are intact. If everything appears normal, the soft reset has resolved the issue. By understanding how to log back into the router, you can confirm successful resolution. Therefore, recognizing the importance of post-reset verification is essential.

Performing a Hard Reset

A hard reset is necessary for more severe issues or when you need to restore factory settings. Understanding the steps for a hard reset ensures thorough resolution. Therefore, exploring how to perform a hard reset is crucial.

Locating the Reset Button

To perform a hard reset, first locate the reset button on your Netgear router. The reset button is usually small and recessed, located on the back or bottom of the device. You may need a paperclip, pin, or a similar small object to press it. Ensure the router is powered on before proceeding. By understanding where to find the reset button, you can prepare for the reset process. Therefore, recognizing the importance of identification is crucial.

Executing the Hard Reset

After locating the reset button, use the paperclip or pin to press and hold the button for at least 10 seconds. You may see the router’s lights flash, indicating the reset process has started. Continue holding the button until the lights stabilize, usually after about 30 seconds. The router will reboot automatically, and the factory default settings will be restored. This reset clears all custom configurations, returning the router to its original state. By understanding how to execute a hard reset, you can resolve significant issues effectively. Therefore, recognizing the thoroughness of this method is essential.

Reconfiguring Your Router After a Reset

Reconfiguring your router after a reset is necessary to restore custom settings and ensure optimal performance. Understanding how to reconfigure ensures a seamless transition. Therefore, exploring post-reset reconfigurations is crucial.

Restoring Saved Configurations

If you backed up your configurations before the reset, restoring them simplifies the reconfiguration process. Log in to the router’s web interface using the default username and password. Navigate to the settings or administration section and look for the restore or import configuration option. Upload the saved configuration file and apply it. This restoration reinstates your custom settings, such as Wi-Fi credentials and security configurations. By understanding how to restore saved configurations, you can save time and effort. Therefore, recognizing the importance of backups is crucial.

Recreating Custom Settings

If you did not back up configurations, you will need to recreate custom settings manually. Log in to the router’s web interface using the default credentials. Navigate through each section, re-entering your preferred settings, such as SSID, password, security mode, and port forwarding. Ensure all devices reconnect using the updated Wi-Fi credentials. Additionally, update the router’s firmware to the latest version for optimal performance and security. By understanding how to recreate custom settings, you can restore your network to its desired state. Therefore, recognizing the importance of thorough reconfiguration is essential.

Troubleshooting Common Issues Post-Reset

Occasionally, you might encounter issues after resetting the router. Understanding common problems and their solutions helps ensure effective troubleshooting. Therefore, exploring post-reset troubleshooting is crucial.

Router Not Connecting to the Internet

A common post-reset issue is the router not connecting to the internet. Begin by checking the physical connections, ensuring the modem is connected to the router’s WAN port, and the router is connected to your devices. Restart both the modem and router by unplugging them for 30 seconds and then plugging them back in. Access the router’s web interface and verify that the internet settings match your ISP’s requirements. If necessary, contact your ISP for assistance. By understanding how to troubleshoot connectivity issues, you can restore internet access. Therefore, recognizing the importance of accurate configurations is crucial.

Resetting Your Netgear Router

Forgotten Default Credentials

If you cannot access the router’s web interface, you might be using incorrect default credentials. Common default usernames and passwords for Netgear routers are “admin” and “password,” respectively. Check the device’s label or user manual for the specific credentials. If you still cannot log in, ensure you are using the correct IP address, such as 192.168.0.1 or 192.168.1.1. By understanding how to find and use default credentials, you can regain access to your router settings. Therefore, recognizing the importance of accurate information is essential.

Addressing Common Questions About Netgear Router Resets

Understanding common questions about Netgear router resets provides clarity and enhances your knowledge. Knowledge of these answers ensures better preparation and execution. Therefore, exploring common questions is essential.

How Often Should I Reset My Netgear Router?

The frequency of resetting your router depends on your usage and performance needs. Occasional resets can help maintain optimal performance, especially if you experience connectivity issues or sluggish speeds. Regular soft resets (about once a month) can prevent minor glitches. A hard reset should only be performed when necessary to resolve significant issues or recover access. By understanding the appropriate frequency, you can maintain a stable network. Therefore, recognizing the importance of balanced maintenance is crucial.

Will Resetting the Router Improve Performance?

Resetting the router can improve performance by resolving configuration errors, clearing cache, and addressing software glitches. However, it is not a cure-all solution. Consistent issues may require updating firmware, optimizing settings, or upgrading hardware. Regular maintenance, including monitoring device connections and network load, also contributes to sustained performance. By understanding the potential benefits and limitations, you can use resets effectively. Therefore, recognizing the importance of comprehensive maintenance is essential.

Addressing Common Misconceptions About Router Resets

Addressing common misconceptions about router resets provides accurate information and dispels unwarranted concerns. Clearing up misunderstandings ensures informed and effective usage. Therefore, exploring common misconceptions is important.

Resetting Your Netgear Router

Misconception: Resets Are Harmful

A common misconception is that resetting your router is harmful or indicative of a serious problem. In reality, resets are a standard troubleshooting step that can resolve various connectivity issues and restore functionality. While frequent hard resets are not recommended, occasional soft resets can be beneficial. By understanding the routine nature of resets, you can use them confidently. Therefore, dispelling this misconception highlights the utility of resets.

Misconception: Hard Resets Are Always Necessary

Another misconception is that a hard reset is always necessary to resolve issues. In fact, many problems can be resolved with a soft reset or by adjusting specific settings. Hard resets should be a last resort for more severe issues or when recovering access. By understanding the appropriate use of hard resets, you can avoid unnecessary data loss and maintain stable configurations. Therefore, dispelling this myth emphasizes the value of measured actions.

Conclusion: Effectively Resetting Your Netgear Router

Resetting your Netgear router involves understanding essential steps, recognizing when a reset is necessary, and troubleshooting post-reset issues. Proper preparation, including backing up configurations and choosing the appropriate reset method, sets the foundation for a successful process.

Exploring critical techniques such as soft resets, hard resets, and reconfigurations ensures a comprehensive approach. Recognizing the importance of addressing common questions and misconceptions enhances your overall knowledge and confidence in maintaining your router’s performance.

By engaging with these aspects, you can ensure your Netgear router operates optimally, providing reliable and stable internet connectivity. Therefore, whether you are dealing with connectivity issues or recovering access, understanding the essential considerations and strategies for resetting your Netgear router offers practical and rewarding solutions. Embrace the benefits of effective router management, knowing you have the knowledge and resources to maintain a seamless network experience!

Understanding USB B: Features, Uses, and Evolution

Universal Serial Bus (USB) technology has revolutionized data transfer and peripheral connectivity. Among the various types of USB connectors, USB B stands out as a widely used connector in both consumer and professional settings. Consequently, understanding the features, uses, and evolution of USB B can help you make informed choices about its applications. Therefore, this comprehensive guide delves into the specifics of USB B, exploring its design, functionality, and relevance in today’s tech landscape. By exploring these aspects, you can appreciate the versatility and importance of USB B connectors.

USB B

Features of USB B

USB B connectors come with distinct features that differentiate them from other types of USB connectors. Understanding these features provides a clear idea of their design and functionality. Therefore, exploring the features of USB B is essential.

Design and Structure

The USB B connector is characterized by its square shape with beveled corners on the female port, which helps prevent incorrect insertion. This design ensures a secure and reliable connection between devices. The male connector, usually found on cables, fits into the female port on devices like printers, scanners, and external hard drives. The robust construction of USB B connectors minimizes wear and tear, making them ideal for frequent connections and disconnections. By understanding the design and structure of USB B connectors, you can appreciate their durability and reliability. Therefore, recognizing the design elements is crucial.

Data Transfer Rates

USB B connectors support various data transfer rates depending on their version. USB 1.1 offers a maximum speed of 12 Mbps, while USB 2.0 increases this to 480 Mbps. More recent USB 3.0 and 3.1 versions can achieve speeds up to 5 Gbps and 10 Gbps, respectively. These higher speeds are particularly beneficial for data-intensive applications, such as transferring large files or streaming high-definition video. By understanding the data transfer rates of USB B connectors, you can choose the appropriate version for your needs. Therefore, recognizing the significance of data transfer rates is essential.

Uses of USB B

USB B connectors serve various functions, making them versatile and valuable in different contexts. Understanding these uses highlights their practicality and relevance. Therefore, exploring the uses of USB B is essential.

Connecting Peripherals

One of the primary uses of USB B connectors is connecting peripherals to computers and other devices. Common peripherals that utilize USB B connections include printers, scanners, and external storage devices. These connections facilitate the transfer of data, enabling efficient communication between devices. The robust nature of USB B connectors ensures reliable connections, making them a go-to choice for many peripheral devices. By understanding the role of USB B in connecting peripherals, you can appreciate its importance in everyday technology use. Therefore, recognizing this common application is crucial.

Power Delivery

USB B connectors also play a role in power delivery, supplying power to connected devices. This feature is particularly useful for devices that require power to operate, such as external hard drives and some older printers. USB 2.0 provides up to 500 mA of current, while USB 3.0 and later versions can deliver up to 900 mA. This increased power delivery capability supports a wider range of devices and functions, enhancing the versatility of USB B connectors. By understanding the power delivery aspect of USB B, you can appreciate its utility in powering devices. Therefore, recognizing this functionality is essential.

Evolution of USB B

The USB B connector has undergone significant changes since its inception, evolving to meet the demands of modern technology. Understanding this evolution provides insight into its current capabilities and future potential. Therefore, exploring the evolution of USB B is crucial.

USB 1.1 and 2.0

The USB B connector made its debut with the advent of USB 1.1 and gained widespread adoption with USB 2.0. USB 1.1, introduced in 1996, provided a basic data transfer rate of 12 Mbps, suitable for early peripherals like keyboards and mice. USB 2.0, released in 2000, significantly improved data transfer rates to 480 Mbps, accommodating more data-intensive applications. This version also introduced the concept of backward compatibility, ensuring that newer USB B connectors could still work with older devices. By understanding the early stages of USB B, you can appreciate its foundational role in modern USB technology. Therefore, recognizing this initial evolution is crucial.

USB 3.0 and Beyond

The introduction of USB 3.0 in 2008 marked a significant leap in the capabilities of USB B connectors. USB 3.0 introduced a new design, often referred to as USB 3.0 B, featuring additional pins for increased data transfer rates of up to 5 Gbps. USB 3.1 and 3.2 followed, further enhancing speeds to 10 Gbps and 20 Gbps, respectively. These advancements allowed USB B connectors to support more demanding applications, such as high-speed data backup and video streaming. By understanding the advancements in USB 3.0 and beyond, you can see the continuous improvement in USB B technology. Therefore, recognizing this ongoing evolution is essential.

Comparison with Other USB Connectors

Understanding how USB B compares with other USB connectors provides a comprehensive view of its advantages and limitations. This comparison helps clarify where USB B fits in the broader landscape of USB technology. Therefore, exploring the comparison with other USB connectors is essential.

USB A Connectors

USB A connectors are the most commonly recognized type, featuring a flat, rectangular design. These connectors are typically used for connecting devices like keyboards, mice, and flash drives to computers. While USB A connectors are versatile and widely used, USB B connectors are specifically designed for devices requiring a more robust connection, such as printers and external hard drives. By understanding the differences between USB A and USB B connectors, you can appreciate the unique advantages of USB B for certain applications. Therefore, recognizing this comparison is crucial.

USB C Connectors

USB C connectors represent the latest advancement in USB technology, featuring a small, reversible design that supports high data transfer rates and power delivery capabilities. USB C is rapidly becoming the standard for modern devices, including smartphones, laptops, and tablets. However, USB B connectors remain relevant for legacy devices and applications that require their specific design. By understanding the strengths and limitations of USB C compared to USB B, you can make informed decisions about which connector type suits your needs. Therefore, recognizing this comparison is essential.

Practical Tips for Using USB B Connectors

Using USB B connectors effectively ensures reliable connections and optimal performance. Understanding practical tips for their use can enhance your experience and prevent common issues. Therefore, exploring practical tips for using USB B connectors is crucial.

Ensure Proper Insertion

Proper insertion of USB B connectors is essential for maintaining a secure and reliable connection. The square design with beveled corners helps guide the connector into the correct position, but it’s important to align it carefully before insertion. Forcing the connector can damage the pins or port, leading to connection issues. By understanding the importance of proper insertion, you can prevent damage and ensure consistent performance. Therefore, recognizing this tip is crucial.

Check Compatibility

Before using a USB B connector, ensure that your devices are compatible. While USB B connectors are generally standardized, differences in versions (e.g., USB 2.0 vs. USB 3.0) can affect performance and functionality. Check your device’s specifications to determine the appropriate version of USB B needed. This step helps avoid compatibility issues and ensures optimal data transfer rates and power delivery. By understanding the importance of checking compatibility, you can achieve better results with your USB B connections. Therefore, recognizing this tip is essential.

Regular Maintenance

Regular maintenance of USB B connectors can prolong their lifespan and ensure reliable connections. Periodically inspect the connectors and ports for signs of wear, debris, or damage. Clean the connectors with a dry, soft cloth and use compressed air to remove dust and debris from the ports. Avoid using liquids or abrasive materials that could damage the connectors or ports. By understanding the importance of regular maintenance, you can keep your USB B connections in optimal condition. Therefore, recognizing this tip is crucial.

USB B

Addressing Common Questions About USB B Connectors

Understanding common questions about USB B connectors provides clarity and addresses potential concerns. Knowledge of these answers ensures better preparation and effective use. Therefore, exploring common questions is essential.

Can USB B Connectors Be Used with USB C Devices?

While USB B and USB C connectors are not inherently compatible due to their different designs, adapters and cables are available to bridge this gap. USB C to USB B cables allow for direct connections between devices with USB B ports and those with USB C ports. These adapters maintain the functionality and performance of the connected devices, ensuring seamless data transfer and power delivery. By understanding the availability of adapters, you can connect USB B devices to modern USB C devices easily. Therefore, recognizing this compatibility solution is crucial.

Are USB B Connectors Obsolete with the Rise of USB C?

Despite the growing popularity of USB C connectors, USB B connectors are far from obsolete. Many legacy devices and specialized equipment still rely on USB B connections for their robust design and reliable performance. Additionally, USB B connectors continue to be used in specific applications, such as professional audio and video equipment. By understanding the ongoing relevance of USB B connectors, you can appreciate their continued importance in various contexts. Therefore, recognizing their enduring utility is essential.

Addressing Common Misconceptions About USB B Connectors

Addressing common misconceptions about USB B connectors provides accurate information and dispels unwarranted concerns. Clearing up misunderstandings ensures informed and effective use. Therefore, exploring common misconceptions is important.

Misconception: USB B Connectors Are Only for Printers

A common misconception is that USB B connectors are exclusively used for printers. While they are indeed commonly found on printers, USB B connectors are also used for various other devices, including external hard drives, audio interfaces, and professional video equipment. By understanding the broader applications of USB B connectors, you can appreciate their versatility and relevance beyond just printers. Therefore, dispelling this misconception highlights the wide range of uses for USB B.

USB B

Misconception: USB B Connectors Are Outdated

Another misconception is that USB B connectors are outdated and no longer useful in modern technology. In reality, USB B connectors have evolved with advancements in USB technology, supporting higher data transfer rates and power delivery capabilities with versions like USB 3.0 and 3.1. Additionally, their robust design makes them suitable for specialized applications that require reliable connections. By understanding the ongoing development and utility of USB B connectors, you can recognize their relevance in today’s tech landscape. Therefore, dispelling this myth emphasizes the continued importance of USB B.

Conclusion: Appreciating the Value of USB B Connectors

USB B connectors are an integral part of the USB ecosystem, offering robust and reliable connections for a variety of devices. Proper preparation, including understanding their features, uses, and evolution, sets the foundation for effective use.

Exploring their design, structure, and data transfer rates helps you choose the right USB B connector for your needs. Recognizing their applications in connecting peripherals and power delivery highlights their versatility. Addressing common questions and misconceptions provides clarity and confidence in using USB B connectors effectively.

By engaging with these aspects, you can appreciate the value of USB B connectors in enhancing connectivity and data transfer. Therefore, whether you are using legacy devices or modern equipment, understanding the importance and utility of USB B connectors offers practical and beneficial solutions. Embrace the advantages of USB B connectors, knowing you have the knowledge and resources to make the most of their capabilities!

« Older posts